Ads 468x60px

Showing posts with label Guest Designer. Show all posts

Thursday, October 30, 2014

Halloween Pillow with Guest Designer Aimee Maddern

Guest Designer Aimee Maddern is with us today to share how she made her bat pillow using the 1 piece bat moon circle frame Silhouette cut!
  6

I was feeling the need to release some creativity and came upon the idea to make some Halloween home décor. I came across the bat moon design and thought of making a vinyl decal. But I then decided I wanted a pillow for my front porch. So I decided to make the bat moon a stencil using vinyl. I used a pillowcase that I purchased from Ikea for $4} and measures 20x20 inches.

First I opened the design in the Silhouette Studio Program. I made the design about 11.75 inches big. The silhouette can cut up to 12 inches wide, and the vinyl comes 12 inches x 6 ft. So I am limited on size for this project since the design is square.
  Screen Shot 2014-10-15 at 4.44.48 PM
I first cut the design out on cardstock so I could see what the negative pieces were. Now that I know what those pieces are I changed the setting on the machine it’s self to load media, and feed the machine my vinyl. I made sure I adjusted my setting in the program and also on my blade.

After cutting the vinyl I weeded out the actual design of the bat moon leaving a square piece of vinyl to adhere to my pillowcase.

1

I stuck the negative piece of vinyl to the pillowcase making sure it stuck as well as vinyl can to material. At first I planned using a dye in a spray bottle to dye the fabric. I then came up with the idea to use spray paint, which I had on hand. {Later I found out I should have just used an acrylic fabric paint}
  2

I used painter’s tape and wax paper to cover the pillowcase to catch any over spray. I also placed the whole project on the grass so incase there was over spray, the lawn would be mowed removing any of the over spray.
3

 I also sprayed the stencil with a color mist {I now regret} giving it a shimmer.
  4

I then let the pillow dry for a few hours in the sun, but I could have used a heat gun to speed up the process

  5

Be sure to stop back in Monday to see more Home Decor projects from Aimee!


Thursday, May 22, 2014

The Little Things with Tammy Malone

Sometimes the littlest things take up the most room in our heart - Winnie the Pooh

The joyous occasion of welcoming a child in to this world can quickly turn to sorrow, as it did for our pastor and his wife. They had anticipated the arrival of another great grandchild only to find themselves 8 days later standing at a graveside with no words to bring comfort to their grandson and his family.

While life does not always play fair, we can try to bring comfort to those that are hurting. Our church decided to give them a rose bush in memory of their great granddaughter so I was chosen to create a special card to go with the gift. 

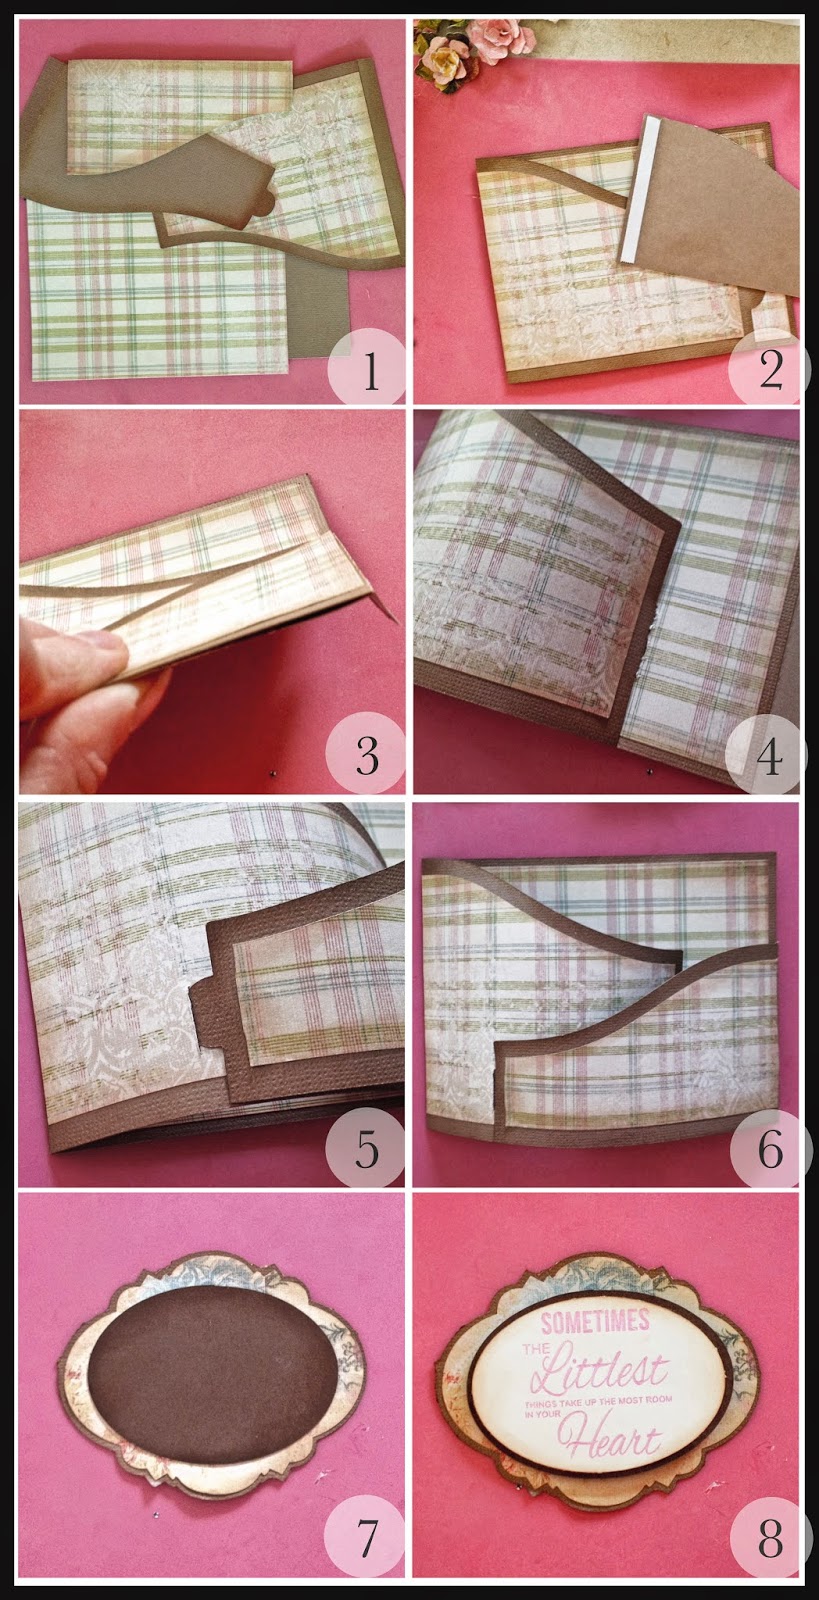
 I chose the Sloped Bendy Card and Box since it would be something they could display on a coffee table or nightstand.

  1. Cut out all of the pieces for the Sloped Bendy Card along with an inset for the patterned paper. Adhere the patterned paper to the card pieces.

  2. Add adhesive tape to to both flap edges.

  3. Align fold with the bottom of the card base and adhere to the card.

  4. Fold in the large flap (left) and attach the tab in the pre-cut slot on the card base.

  5. Fold in the small flap (right) and attach the tab in the pre-cut slot located on the front of the large flap.

  6. This is how your Bendy card should look when assembled.

  7. Cut out a label from the 5 Label Set along with an inset for both the label and oval. Assemble all of the pieces.

  8. Use a Sketch Pen or a Print and Cut for the quote on the label. Attach to the oval mat and adhere to the card base.

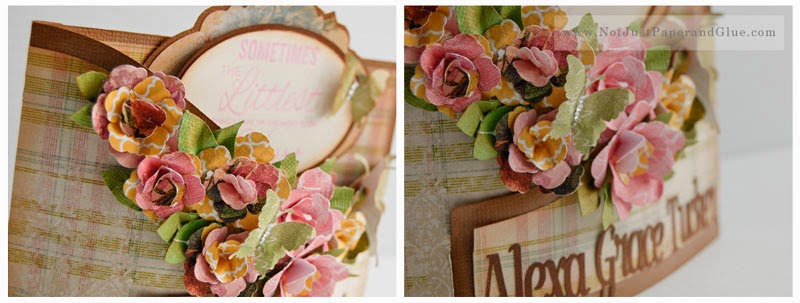
For the finishing touches I cut out various sized flowers from different patterned papers along with a couple of butterflies. After adding the name to the bottom of the smaller flap, I attached the flowers along the top edge of the card. I added some hand-cut leaves along with the two butterflies.


 The left-over flowers and butterfly were used to accent the Card Box and a lightweight magnet was added to the box lid to keep it closed during the presentation.

Rarely do you ever hear me bragging on my own work, but I have to say that this is one of my most favorite cards that I have made in spite of the circumstances surrounding its creation.

Products Used:
Samantha Walker: Bendy Card Box Basic in the Silhouette Online Store Samantha Walker: Bendy Card and Envelope Sloped in the Silhouette Online Store 

Samantha Walker: Butterfly in the Silhouette Online StoreSamantha Walker: Flower Spiral Gardenia in the Silhouette Online Store


Tuesday, April 15, 2014

Easter Banner with Guest Designer Arin!

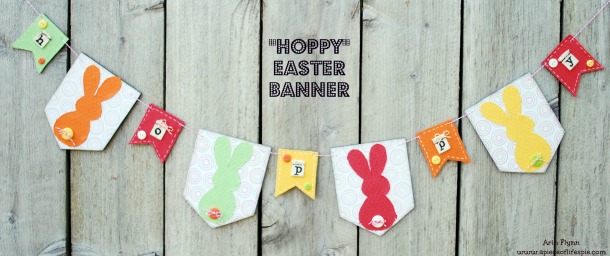
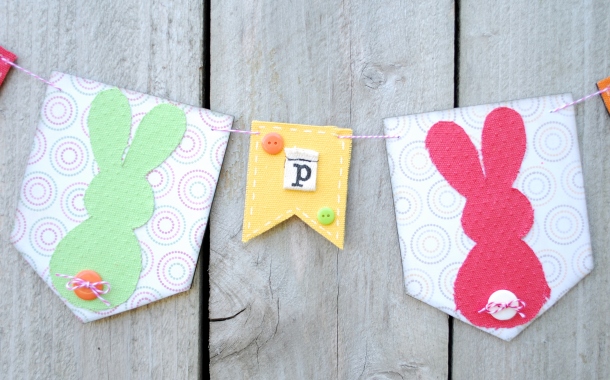
Hello it is Arin Flynn here and am I excited to share my first project as a 2014 Samantha Walker Creative Team Guest Designer. I decided that I wanted to show how simple you can make a cute and bright spring banner just using one cut, some laser cut wooden pennants, linen, and a few other embellishments. This little guy was turned out just in time to greet Mr. Cottontail!
Hoppy Easter Banner Project 1 

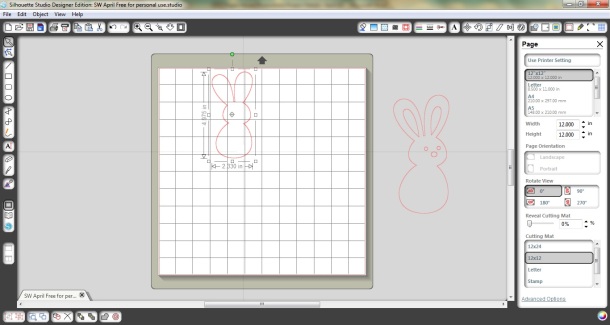
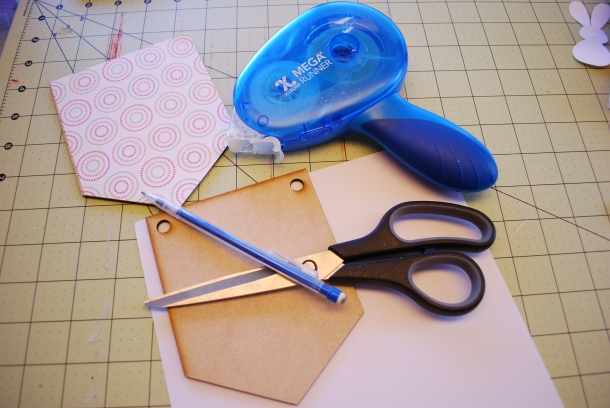
 Let's "hop" right into how I did this. (A full supply list will be included at the end of this post). Heading over to the Silhouette Store, I found this cute Samantha Walker Bunny cut file. Once downloaded into my Silhouette software, I ungrouped the shape and moved the detailed layer off the page just keeping the silhouette of the bunny. I measured my wooden pennants and set the dimensions of my bunny.

Samatha Walker Easter Banner 1

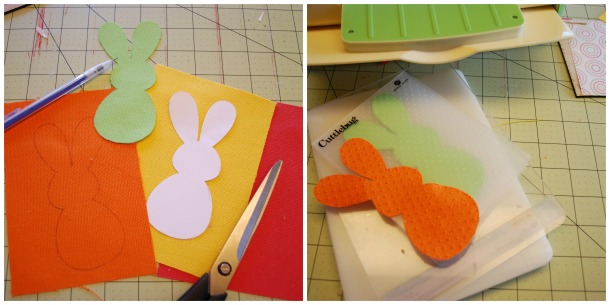
Using a sturdy white cardstock, I cut ONE, yest I said it, ONLY ONE cut. This will be the template to trace onto the linen fabric. Can it get any easier than that?
Samantha Walker Easter Banner 2 

 Once all the bunnies I wanted to add some character to each little guy and ran it through my Cuttlebug Embosser using Swiss Dot. It really gave it great shape and texture. Then I ran each bunny through my Xyon 5 inch Creative Station (any adhesive of choice will work) and set aside.
DSC_7757

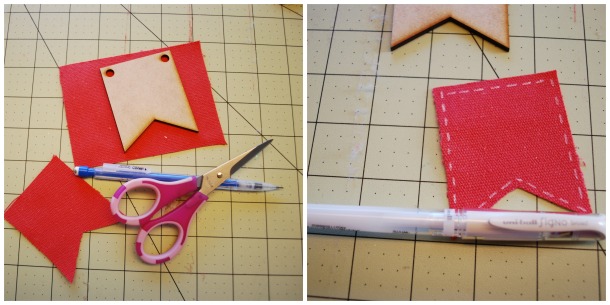
Using the smaller wooden pennants as a template, I traced, cut and added faux stitching to the linen fabric.
Samantha Walker Easter Banner 3

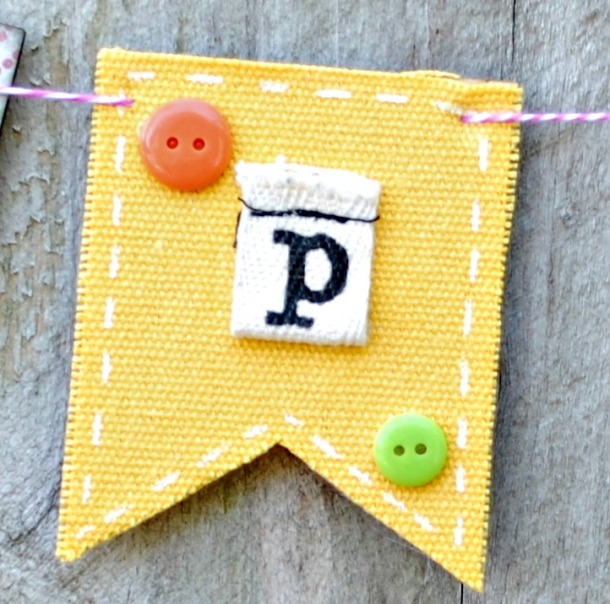
I ran the linen pennants through my Xyron 5 inch Creative Station (any adhesive of choice will work) and placed them onto the wooden pennants. Using hot glue I added some buttons and some fabric letters I had on hand.

Samantha Walker Easter Banner 5

Using some scrapbook paper I had on hand, I traced the larger of the wooden pennants, cut and set onto the base using my tape gun (any adhesive of choice will work) and inked the edges.

DSC_7745 

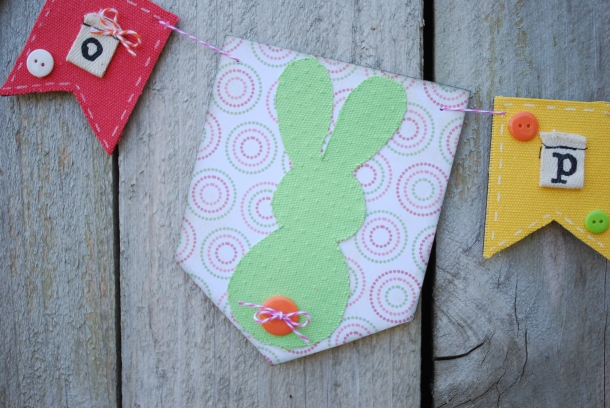
 Once all the bases and smaller pennants were done, I added the bunnies, the button tails with bows made of baker's twine and hot glued them to the bottoms of each bunny. I then used a large gauge needle and ran baker's twine through the tops of each pennants stringing them together and using the pre-punched holes at the guide.

DSC_7756 

 This project was not only super simple and easy to do, but there is something therapeutic about just simply tracing and cutting and with this bunny cut from Samantha Walker, it could not have been any easier. 

Supply List:
Bunny Cut form Samantha Walker
White Cardstock (Recollections)
Laser Cut Wooden Pennants (Pick Your Plum)
Linen Fabric Sheets (DCWV)
Cuttlebug Embosser and Swiss Dot Embossing Folder
Baker's Twine (Hemptique)
Scrapbook Paper (Recollections)
Fabric Letters
Buttons
Stamp Ink (Close to My Heart/Slate)
Xyron Mega Runner
Xyron 5 inch Creative Station
White Gel Pen (Uniball)
Hot glue
Scissors
Pencil

Monday, March 17, 2014

Clover Leaf Gift Bag with Tammy Malone


I feel like one "Lucky" gal to be sharing this tutorial on the Samantha Walker blog today!


Speaking of being "Lucky", I wanted to make a gift bag for friend and the Clover Bag Topper was just the right accent that I needed to make this gift a little extra special. 
Clover Leaf Gift Bag; Skill Level: Intermediate

To begin you will need:

You will first want to make an offset image of the Clover Bag Topper file. 
To do this, watch the instructions in this video. 

)

How to assemble your Clover Bag Topper

Clover Leaf Gift Bag; Skill Level: Intermediate


1. Cut the Offset topper from solid cardstock and the original from patterned paper. Using the clover from the patterned paper as a template, freehand cut a clover from the Double Sided Adhesive sheet. You can also create an offset of the clover and use your machine to cut the image.

2. Cut apart the patterned paper topper on the fold line. Add the clover that you cut from the adhesive sheet to the back side of the patterned clover so that the adhesive is exposed through the front of the image.

3. Sprinkle glitter over the exposed adhesive making sure the entire surface is covered. Brush off the excess.

4.Apply adhesive to the back sides of each piece of the patterned paper toppers. Align over the solid colored topper making sure to provide an even margin on all sides.


Their are many ways to attach the topper:

  • Staple it to your bag
  • Punch holes in the top and add a ribbon handle
  • Use brads
  • Cut a slit along the top fold line just wide enough to allow the handles to slip through (this was the method I used for my project)

Use the extra clover and cut out one or two more (like I did) to embellish the bag.
Have a happy St. Patrick's Day!


Thursday, September 19, 2013

Introducing Guest Designer Kerri Smith!


Good Morning!  
Today we would like to introduce you to our 
September Guest Designer, Kerri Smith!

* * * * * 
Hey Crafty Friends-

I am THRILLED to be guest designer this month for Samantha Walker. Let me introduce myself to all the new friends that may be visiting the blog today. My name is Kerri Smith. My little blog is Craft Time and Cupcakes. I am wife to my retired Air Force husband and mommy to two beautiful princesses, ages 4 and 5. I am a Southern California girl living the Vegas life and I love it! I have always been a creative person. I love every type of craft imaginable. I am a scrapbooker, baker, party planner, and I'm beginning to work more with fabric too. I would say my crafting style is a little bit country, a little bit cutesy, and a lot of fun. I believe projects should be quick, simple, and stunning.  I was so happy working on my project for today.......so let's get to it!

 I'm sure that many of you with a Silhouette love to shop Samantha's cutting files as much as I do. For today's project I decided to do something that sticks with the theme of my blog.......A cupcake box! 

I used the Cupcake Scalloped Box cutting file. I cut the pieces from craft cardstock and a blue and red floral cardstock.


I folded all of the perforated lines then glued the tab of the craft cardstock piece to the floral cardstock to merge the top and bottom of the box together. I then glued all the remaining tabs to complete the box.


Once it was all together I jazzed things up a bit by inking up the edges using Tim Holtz Distress Ink in Festive Berries.


I then placed the circle insert inside the box and added my yummy cupcake.


The final touch to my project was a red gingham ribbon tied around the box to hold it all together.


I couldn't be happier with how this project turned out. The file was so easy to cut and put together. I can see making these boxes for every holiday, teachers gifts, birthday parties. They will put a smile on any one's face when they receive this special little gift.

I want to say a special thank you to Samantha Walker Designs for letting me guest design this month. For more inspiration please follow my blog at http://www.crafttimeandcupcakes.com/. You can also follow me on Pinterest and Facebook.

Have a great crafty day!

Kerri


Friday, July 19, 2013

Guest Designer Sarah Petrie from Australia


A few weeks ago I heard from an old friend of mine whom I have never met in person, but know quite well through the power of the internet. Her name is Sarah Petrie. It was so fun to hear from her, and she surprised me by sharing pictures of this amazing quilt with me. I was in awe at what she had done with my fabrics from my Serenata Collection for Riley Blake. I asked her if I could share it with you. I was thrilled that she said yes!

How Sarah and I met...
Long ago...about 9 years ago, I met a group of ladies through the Memory Maker's Magazine chat board--Sarah was one of them. It wasn't an official forum like you see today...and this was well before facebook. It was pretty rudimentary. You would type in a sentence, then someone else may type something in and there was only one thread--it was a pretty awkward way to chat; and yet a group of us were starting to form a friendship. We had all entered the Memory Maker's Masters contest and out chats started on that subject. But soon we broke away from the chat board, and started our own group--"the queens of the crop." Beyond scrappy talk, we chatted about life in general, congratulated births of babies, celebrated engagements, cheered on each other triumphs, became listening ears when things were rough, and it all started through our common interest in crafting, but came to be so much more.
 Some of us even went to a camp Memory Makers together. 

Since then, I've met a few more of the ladies from that group in person--which is pretty amazing considering that we were from all over! (we're from New Zealand, Iowa, Virginia, California, Colorado, Washington, and Australia.) Suz Drgon was one of the ladies I met from the group, she's a spunky lady who loves to travel, and I got to meet her on one such trip when she was passing through Washington when I lived there. Well, it turns out that Sarah Petrie is visiting the United States from Australia, and she is going to get the chance to visit Suz, as her travel plans bring her within a mile of Suz's home. 

She made this incredibly lovely quilt for Suz. 
I have to say, Suz is pretty darn lucky to be the recipient of such a gorgeous quilt!!! 
AND...
She's lucky she gets to meet Sarah and her family...
can I just say I'm slightly envious? 
I just thought I'd share this story as I know many of you have also made great friendships through crafting and internet communities. It is a pretty small world out there, and it's such a blessing to be a part of such a great community! 

Happy Crafting!
Samantha

Thursday, July 18, 2013

Introducing Guest Designer Raven Baca

Today we would like to introduce you to our July Guest Designer, Raven Baca!


I am so grateful to be guest designing for Samantha Walker today!! 
Thank you Samantha for this great opportunity!
SO this post is all about my favorite little guy! I haven't made an actual scrapbook page in a while but I was getting the itch. So I pulled out a few faves from Samantha Walker and got to work. This scalloped-ish circle is from the 12 piece tag set and cut out of the I Am Me Designer Series Paper 130138. Love this pretty paper.
I knew I wanted "washi" on this fun project too. So I went to the fun Washi Tape Wordstrips from Samantha Walker and framed it with Basic Gray Stampin' Up paper so that the words would pop.
The final project...
Isn't he adorable?!?!? YUP I pretty much agree with you! lol. And yes the title says "Our bookwork" and there are no pictures of books. lol my husband was so kind to point that out for me. But that's just our nickname for him I didnt feel like I needed book pictures. But uh maybe I was wrong lol. AH! ;)

Here's a list of what was used:
Washi Tape Wordstrips
Baker's Twine (125573)
Epic Day This and That Designer Washi Tape (#131269)
Rhinestone Basic Jewels (119246)
Subtles Designer Buttons (130030)
Basic Gray 8-1/2X11 Card Stock (121044)
Pool Party  8-1/2X11 Card Stock (122924)
Calypso Coral 8-1/2X11 Card Stock (122925)
I Am Me Designer Series Paper (130138)

Thank you all so much for stopping by and I hope you are all having a great day! Today I am flying out of town to the Stampin' Up! Annual convention so I'll be checking in soon!!!


You can find more of Raven's work through her blog:


Tuesday, June 25, 2013

Guest Designer Monica Edwards


Monica Edwards is with us today sharing a couple boxes she created!

***

Hi everyone I am super excited to share some projects I made for Samantha Walker's blog.  I used the Handle Tuck Box and Purses files.  I decorated it using Echo Park stickers.  Here I tried to get an top view of the box.  These are super handy for little gift boxes for Valentines, birthdays you name it!!


 Front view of the boxes


 This is the Samantha Walker purse cut file.  I decorated the front with a ric rac flower I made.  I attached the flower to the buckle on the purse for added weight.  Just too cute isn't it and these are just a few I mean few of the many amazing files Samantha Walker has available!


Hope everyone enjoyed my projects and always thanks for stopping by!

You can see more of Monica's work by visiting her blog!
Simply Monica

Get Amazon Prime Membership! Enjoy Free 2-day Shipping on Prime products, plus access to Free digital content like videos, books, and more!

Thursday, April 25, 2013

Introducing Guest Designer Arin Flynn!

Good morning!  
Today we would like to introduce you to Guest Designer, Arin Flynn!  


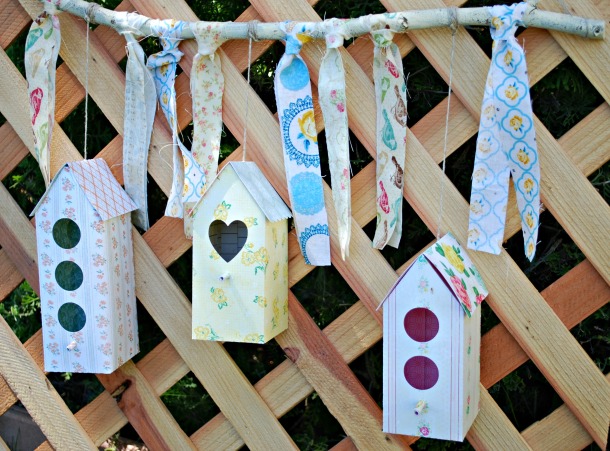
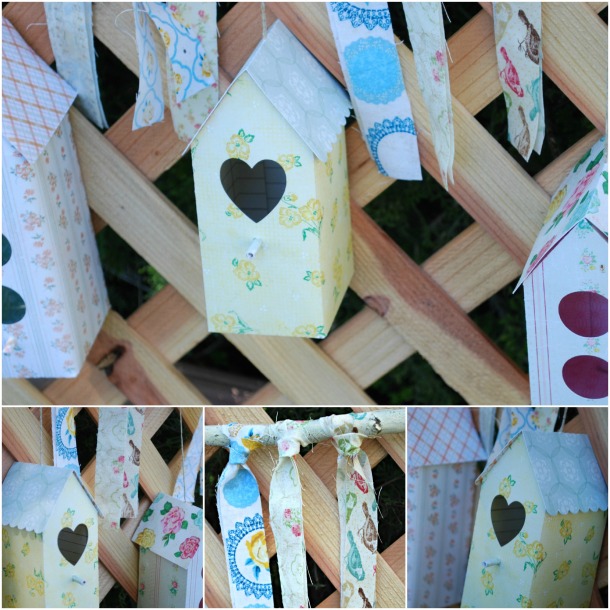
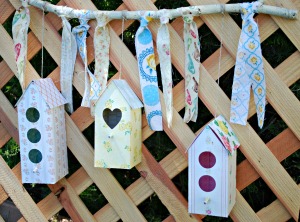
Hello and a happy Thursday to you! My name is Arin from A Piece of Life's Pie and I am thrilled and honored that I have been invited to be a guest designer for Samantha Walker! Ever since I have been working with my Silhouette Cameo, I unknowingly gravitate towards Samantha Walker cuts and paper, so having the honor to actually be here today makes me want to break out in my happy dance! What I am going to share with you is two 3D projects that I just had to sink my creative teeth in when I saw them. The first project is a fun and whimsy vintage inspired bird house home decor. This project was so fun and easy to make and it sure adds a touch of spring to any room or outside patio it is displayed in DSC_6271 PicMonkey Collage Supplies:
  • Samantha Walker Silhouette File: 3 Story Bird House
  • Samantha Walker Silhouette File: 2 Story Bird House
  • Samantha Walker Silhouette File: Box Love Bird Mailbox
  • Crate Paper - Little Bo Peep
  • Hemptique - Hemp Cord
  • Small wooden Branch (18-24 inches)
  • Craft paint - Buttermilk
  • Drill
  • Paper punch
  • Glue
  • Bone Folder
  • Tapastry Needle
  • Fabric
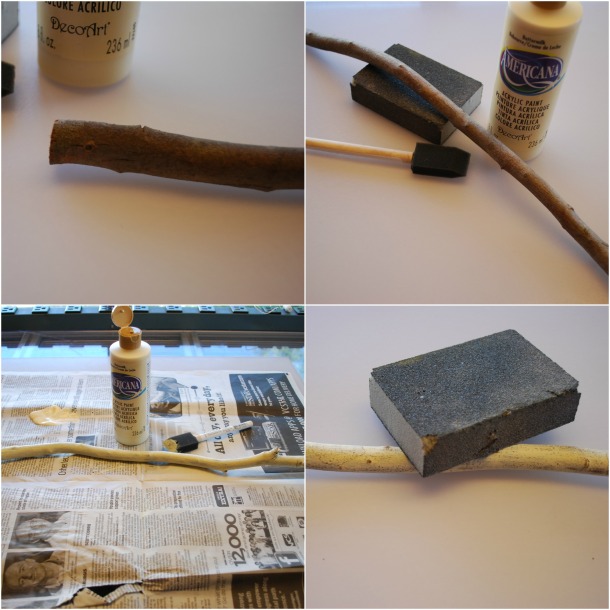
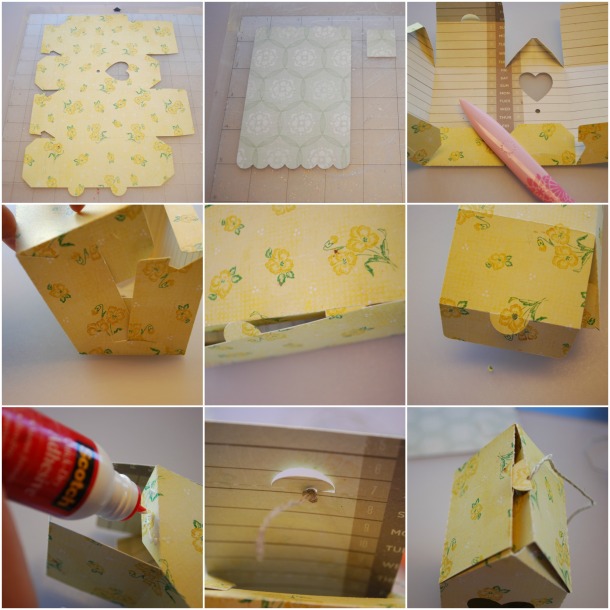
Step 1: Prep Branch Drill holes at each end of branch and paint. Once dried, sand to distress. sw1 Step 2: Cut and assemble bird houses - There are three different bird houses used in this project. Keep all bird houses at "stock size". The steps below apply to all three bird houses, therefore only the three story bird house will be shown.
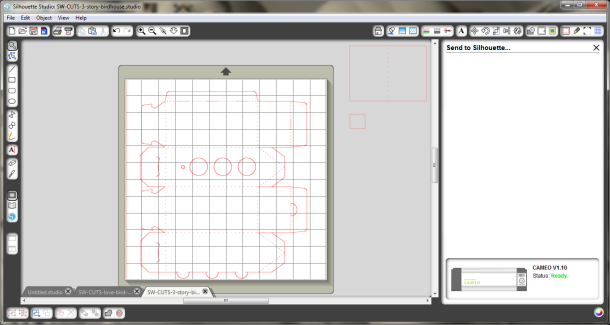
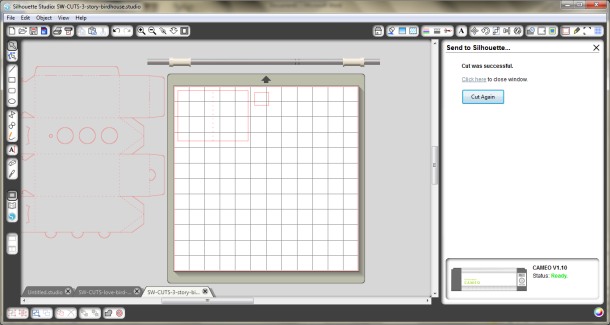
Leave size as is and "ungroup". Move perch and roof off page. Group house and cut house on a 12x12 sheet of designer paper.
Three story bird house
Move house off page and move roof and perch back on mat and cut.
Three story bird house 2
( Please note, when cutting the Love Bird Mailbox, be sure to delete mail slot before regrouping image)
sw4
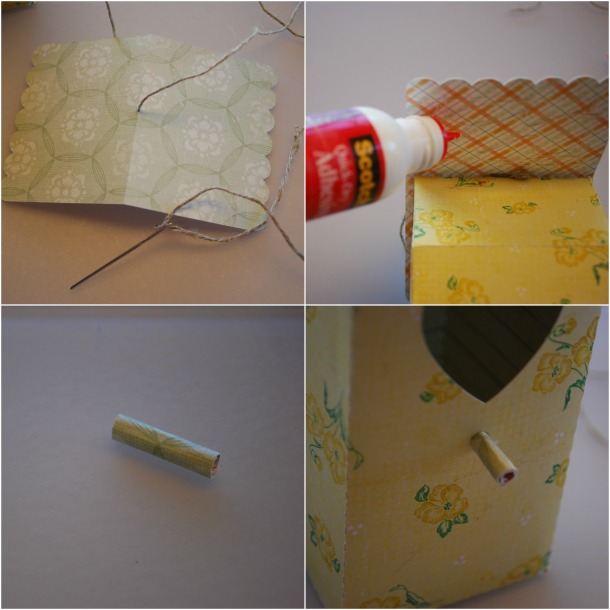
When making the perch, be sure you first add a little glue to the paper before you roll it. Also be sure to be aware of the hole size it needs to fit in.
PicMonkey Collage
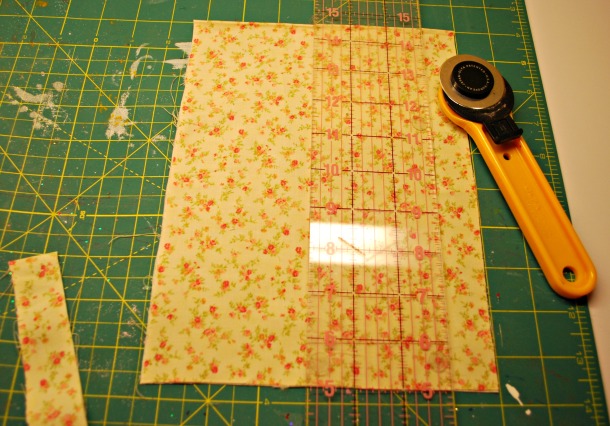
Step 3: Prep Fabric: Using a variety of fabric, cut 8 strips at 1 inch wide and 10 inches long.
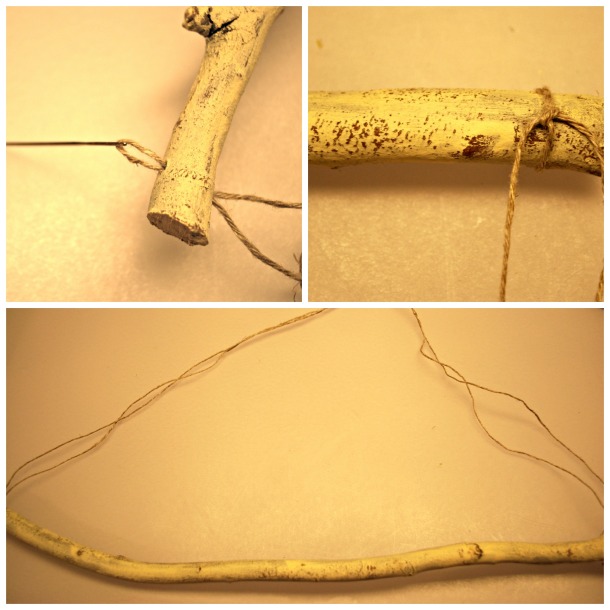
DSC_6246 Step 4: Assemble bird houses to branch: First attach 24 inches of hemp cord to the branch by threading the needle through the hole and then warping the cord around one end of the branch. Do this on both ends. Bring together at the top, make sure level and tie off. Trim any excess. sw7
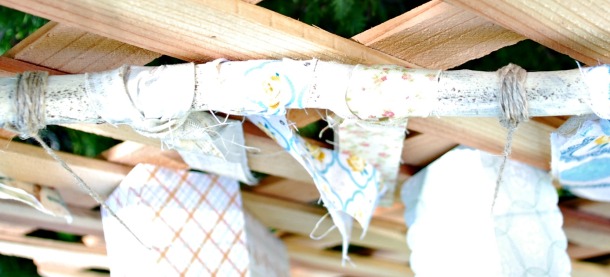
Attach the bird houses to the branch evenly spaced by wrapping and securing them to the branch.DSC_6274
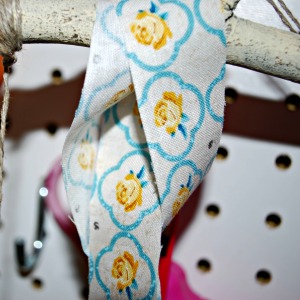
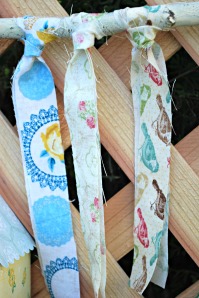
Attach the fabric to the branch using a slip knot, looping around the branch.
DSC_6248 DSC_6273 DSC_6271

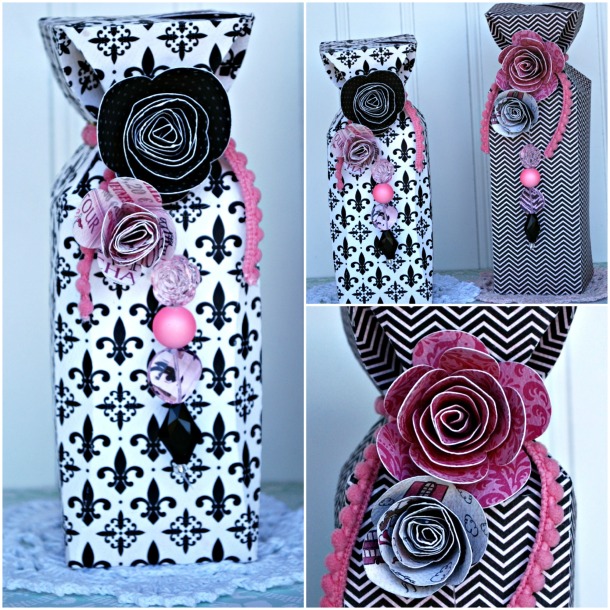
For the next project, I had so much fun making these 3D bottles that I had to make a video to show you all how to construct the them! The Samantha Walker flower cuts really finish the project! These bottles are such a great idea for adding some "Ooh lala" effect to a little gift or treat. swpic Supplies List:
  • Samantha Walker Silhouette File: 3D Curved Bottle Box
  • Samantha Walker Silhouette File 3D Bottle Box
  • Samantha Walker Silhouette File: (Video cut) 3D Short Bottle Box
  • Samantha Walker Silhouette File: Flower (Cut twice, once at stock image and once at 2.5 inches)
  • Samantha Walker Silhouette File: Flower Spiral Peony Bud (Cut twice, once at stock image and once at 2.5 inches)
  • Samantha Walker "Paris Girl" - Carta Bella Designer Paper
  • Bone Folder
  • Quick Dry Adhesive
  • Hot Glue
  • Beads
  • Fishing Line
  • Twine
  • Close To My Heart Ribbon
A quick run down of final assembly of bottles: The flower cuts are rolled and set with hot glue. Once the bottles are assembled, tie decorative ribbon around the neck to cover the twine that is securing the bottle neck. Sting decorative beads of choice onto fishing line or like material and attach to the decorative ribbon and attach the flowers using hot glue. 


 It has been a pleasure to be able to share these two projects and you can find another fun Samantha Walker project over at my blog today! I hope that they inspire you and snag yourself some Samantha Walker 3D cuts and see what you can come up with!


A big "Thank You" to Arin for sharing her projects with us today!  
Be sure to stop by Arin's blog to see more of her fabulous creations! 


Related Posts Plugin for WordPress, Blogger...