Ads 468x60px

Showing posts with label Layout. Show all posts

Saturday, October 18, 2014

Happy Halloween Layout with Christine

Hi Samantha Walker Fans!  Christine joining you today to share a tip on using the negative space on some of Samantha's more detailed cuts. 

For this layout I used Samantha's new Halloween 3 Ways (#67410) cut file but instead of using the title cut out I used the negative space of it and used various colors behind it.  With the spider webs this could quickly get complicated - but today I am going to show you how I did it without any fancy tapes or tools!

1. In this first picture you can see that I have a couple letters still to fill in.  
2.  I took my title that I had cut out and used it as a "stencil" as to where to put my negative web pieces.
3. It easily fits right back on and you can see the first "e" already filled in.
4.  Use a glue pen and your stencil as a guide - after adding glue just stick your pieces in and there you have it!

Isn't that fun? An easy way to add back in the detail to negative space without having to worry about lining everything up right!

Hope you are having a fun weekend and find some time to get some fall crafting in too!


Saturday, September 06, 2014

Lemonade Stand Layout with Christine!

Hi Samantha Walker fans!  Christine joining you for a fun weekend post!  One of my favorite things about the Summer Lovin' line from Samantha and Carta Bella is that it included some moments that get left out of a lot of summer lines, but lots of us experience.  I knew I wanted to make use of the lemonade stand stuff to document my kiddos and their stands from the last two years!  I figure now that summer is wrapping up I better get some of these memories committed to layouts!


I went for an 8 1/2 X 11 base this time and layered papers onto a green cardstock background.  I left a  little of that to peek out underneath the colorful vertical stripes. I lined up my pictures (one from each year) vertically on some more green cardstock.


I fussy cut out a giant chevron from patterned paper and added that as a focal point in the base.  I really like how it plays off of the colorful vertical stripes!  


Coordinating stickers and wood pieces make up a few clusters around the layout but otherwise I kept it clean and simple.  I can't believe these summer days are already wrapped up and we're on to the next season of Back to School and Fall!


Thanks for joining us today and have a great weekend!

Saturday, June 28, 2014

Sunny Shaker Box Layout with Cathy

Hi Samantha Walker fans!  Cathy here to share a layout with you featuring an adorable baby girl, Samantha Walker's Carta Bella Collection Summer Lovin' and a couple of Samantha's Silhouette files.  I used the Sunny Word Logo Set #10879 and Scalloped Circle Border Set #9359 to create this bright and sunny layout. I did another shaker box layout for the Creative Team blog hop this month with a square shaker box, you can find that tutorial here.  You can make a shaker out almost any shape, just by adding layers of card stock in the basic shape of your cut.


I cut the Sunny first out of the white background paper...don't remove the mat yet, and offset your title, switch the blade out for a Silhouette Sketch pen and send it through again.  I backed my negative cut title with the super cute flamingo paper from the Summer Lovin' Collection.


Next, I cut my sun and border out of yellow card stock.  Ungroup the sun and you will be able to remove the swirl.  The sun without the swirl will be the back of your shaker box.  


Again, don't remove your mat, but you can delete the bottom sun and border from your screen.  Now, do an internal offset of the sun and then change the line to a dash. Switch your blade out again for a Silhouette Sketch pen (make sure to remove the original sun so that you just have the dotted line) and send it back through!


Next, cut a few circles out of yellow card stock.  These build the depth for your shaker box so that you can add sequins and such.


After they are cut, glue them all together to for a stacked circle.


 Somehow I deleted a photo step here, sorry! Just glue this ring to the solid sun, fill with sequins and add the swirly cut sun that you lined with clear plastic so that your sequins stay put.


I love this adorable photo of Kate at the beach with the Sunny title and shaker box....it highlights her personality so well. She brings sunshine wherever she goes.


Click on the pictures below to go right to these files on the Silhouette Store.


Thanks for joining us today at Samantha Walker, we can't wait to see what you create!


Saturday, May 03, 2014

Creating your own Frozen Party Decor by Christine Meyer

Happy National Scrapbooking Day!  Christine joining you today with a crrrrrazy suggestion! Let's go back to winter for a little bit today!  I hear the collective sighs....but if you have a child in love with the movie "Frozen" you are probably still seeing winter type things around right???  My sweet daughter wanted a "Frozen" birthday party last month.  Newsflash...there is not "Frozen" party decor to be had yet.  If it exists, I could not find it.  So I had to get creative.  And in came Samantha Walker with her gorgeous winter files to the rescue.

Now, we're talking about a 7 year old here.  So I wasn't going to go overboard with decorations.  But I definitely wanted a banner and snowflakes.  I got my Silhouette cranking and cut full size snowflakes on 12 X 12 cardstock and then also some reduced size ones.  
I like to create a backdrop for her parties that we can take pretty pictures up against.  I started with an aqua blue colored fabric (could be a cheap tablecloth too - I just happened to have some shimmery material on hand.  I draped twinkle lights behind it.  I then taped the snowflakes at varying lengths to the the ceiling making use of some bakers twine. 

 Next came the banner.  I used Samantha's Par-tay Thyme Font to cut out her name.  The L in Lucy just has to be in a script font right!?!  
I simply attached those to some metallic cardstock (yay for shimmer) and punched a cute border along the bottom. A hole punched in each top corner allowed me to string it up and space it out easily.

This all took me about an hour and the personal touch I was looking for.  Beyond creating those special decorations I added some of my Christmas winter decor in coordinating colors and of course Olaf!  Finding him was a pleasant surprise and a perfect decoration addition since I had little else.  I was really pleased with how it came together and satisfied that I was able to make it work for her even without a party store's help!

Doesn't it look just beautiful!?!  I should mention that I created a couple of tissue paper pom poms (you can see them in the upper corners) those were also very easy - think back to your elementary art class days and making flowers!

I came up with games to go along with several of the songs and the girls loved it!  
Here's what we did:
Do You Wanna Build a Snowman?: For this I gave them toothpicks, big marshmallows and little marshmallows and told them to build snowmen while the song was playing.
Fixer Upper: They used toilet paper rolls and fixed up one of their friends as a lovely snowman.
Let it Go: This one was the most fun...I gave them big marshmallows and they had to stand behind a line and throw them at my hubby's head trying to knock a cup of it (yes he's that good of a sport).
In Summer: We did the traditional "hot potato" game but used a chunk of ice instead of passing something else.

Now of course I had to document the party and share that with you today also!  It is National Scrapbooking Day after all! 

I used Samantha's Par-tay Thyme Font for my title but other than that I stuck to using her Keepin' Cozy line from Echo Park.  The colors in it just worked perfectly!  I did lots of fussy cutting and then topped it off with stickers!  

Now, let's get back to spring!

Samantha Walker Supplies Used:


Tuesday, January 07, 2014

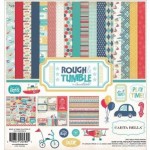
Rough and Tumble Layout by Diana Fisher


Hello! Diana Fisher here with you today sharing a layout using the Rough and Tumble collection from Carta Bella by Samantha Walker. 

At first glance, this collection does seem a little young for an older boy, but I really love the neutral tones and navy in the collection. Throw in the argyle pattern, and Rough and Tumble is perfect for documenting my 7-year-old son.


I didn't take any step-by-step pictures (mostly because I could not hold my camera and a hole punch at the same time), but I do have a tip for you when you work with this collection.

You can see below the strip of yellow "tickets" layered under the photo. Here are some tips on getting that ticket look from a border strip sheet of 12x12 paper.


That border strip is from the paper called Explore Together. If you cut the strips horizontally, use one of the strips that has the pre-notched ticket pattern in the paper. Once you have it separated from the rest of the paper, take your little hole punch (hand held will work much better than a 3-hole punch) and line it up so that you are punching each side of the notches. 

Do that all the way down the border on each side. You can see in the image above that it really looks like a line of tickets rather than a straight-edge border strip.


Supplies: Rough and Tumble (Pattern paper: Daring Dots, All Smiles, Explore Together; Chipboard; Stickers)


Sunday, September 22, 2013

Using pattern stamps on layouts with Maya

Hello Samantha Walker fans! 

This is Maya and today I am sharing with you few ideas how to use pattern stamps on your layouts.


My son Eli came back from his first day at school with big paper star that he absolutely loved. I wanted to use stars on the layout and found them in the JustRite Pattern Basics stamp set by Samantha.


I used the stars and the tickets stamps.

I stamped rows of stars on a scrap of silver paper and cut them apart. They will be the background for the picture.

The tickets stamp is one big stamp with three rows of tickets. I wanted only the top row so I stamped the tickets pattern twice on a piece of red cardstock and cut off the top row of tickets. I than stamped them again on the back side of the paper strip. 

I colored some of the stars with metallic blue marker. "Remember" tag is cut out of "Giddy Up"  patterned paper, mounted on a piece of dark blue paper and cut out again.

I wrapped the ticket strip around small pencil and used it as a base for the title.

This stamp sets coordinates perfectly with the "Giddy Up" boy collection that I used to make this layout. Thank you for stopping by and I hope I inspired you to take out those pretty stamps out of their packages and just use them!

Thursday, July 18, 2013

Introducing Guest Designer Raven Baca

Today we would like to introduce you to our July Guest Designer, Raven Baca!


I am so grateful to be guest designing for Samantha Walker today!! 
Thank you Samantha for this great opportunity!
SO this post is all about my favorite little guy! I haven't made an actual scrapbook page in a while but I was getting the itch. So I pulled out a few faves from Samantha Walker and got to work. This scalloped-ish circle is from the 12 piece tag set and cut out of the I Am Me Designer Series Paper 130138. Love this pretty paper.
I knew I wanted "washi" on this fun project too. So I went to the fun Washi Tape Wordstrips from Samantha Walker and framed it with Basic Gray Stampin' Up paper so that the words would pop.
The final project...
Isn't he adorable?!?!? YUP I pretty much agree with you! lol. And yes the title says "Our bookwork" and there are no pictures of books. lol my husband was so kind to point that out for me. But that's just our nickname for him I didnt feel like I needed book pictures. But uh maybe I was wrong lol. AH! ;)

Here's a list of what was used:
Washi Tape Wordstrips
Baker's Twine (125573)
Epic Day This and That Designer Washi Tape (#131269)
Rhinestone Basic Jewels (119246)
Subtles Designer Buttons (130030)
Basic Gray 8-1/2X11 Card Stock (121044)
Pool Party  8-1/2X11 Card Stock (122924)
Calypso Coral 8-1/2X11 Card Stock (122925)
I Am Me Designer Series Paper (130138)

Thank you all so much for stopping by and I hope you are all having a great day! Today I am flying out of town to the Stampin' Up! Annual convention so I'll be checking in soon!!!


You can find more of Raven's work through her blog:


Sunday, June 23, 2013

School is Over! by Chrissy Guido


Finally....summer has begun! My little one has completed PreK4 and is headed to Kindergarten. I created this digital layout using Samantha's AtoZ Mega Collection. I love elements and images in this kit! Perfect to celebrate any school themed project.

What I really enjoy about this collection is that it's perfect for the "not so little kid" school projects. Here is another digital layout that I did for one of my other daughter's school milestones.


By just changing elements you can create a more mature look for your layout. Before we know it...school will be back in session! Enjoy your summer!

Additional products used by Design by Dani (alphabet),Echo Park (This&That Charming), Lori Whitlock (You can do Anything and apple) and many masks and frames by Anna Aspnes

Sunday, June 02, 2013

Quick and simple page with Picasa Collage by Maya

Hi, Samantha Walker fans! This is Maya here today, sharing quick and simple page using Picasa Collage tool.

Picasa is what I use to organize my digital pictures and to do simple image enhancements. One of my favorite Picasa features is collage. It is great for putting 2 small pictures on 4x6 canvas, making quick 8x10 collages (handy when you get that email about free 8x10 print at Walgreens) and even pre-planning image placements for future layouts.

For this layout I knew I want to use three small pictures in a row. I selected the pictures in Picasa, cropped them to 3x4 and clicked on Collage button. I chose Picture Pile mode and that allowed me to drag my pictures anywhere I want. I changed the color of the background to white and placed my pictures side by side in one row. At first I worked with 4x6 format (as seen in the screenshot) but later changed to 5x7. The only thing what was left is to save the picture and print.


An hour later I picked it up from Walgreens. 


I had the perfect papers to use - Samantha Walker Cool Summer collection from Carta Bella. With bright summer papers and great selection of cardstock and chipboard stickers the layout came together in no time.


Ice cream is a favorite summer (and not only summer) treat in our house. I know I am going to use every last piece from this collection.
 
 Thanks for stopping by!

Related Posts Plugin for WordPress, Blogger...