Ads 468x60px

Showing posts with label box. Show all posts

Tuesday, July 22, 2014

New Silhouette Promotion and a Silhouette Studio Tutorial!

It's that time again!  
Today we are introducing a new Sihouette Promotion!
This month's promotion features...
 a CAMEO bundle which includes:
1 Silhouette CAMEO
1 copy of Silhouette Studio Designer Edition
1 teal CAMEO dust cover
for
$269.99

and 

a Portrait bundle which includes:
1 Silhouette Portrait
1 copy of Silhouette Studio Designer Edition
1 grey Portrait dust cover
for
$149.99

as well as 

40%* off Silhouette Studio 
Designer Edition Software!

To get these deals, simply click HERE and enter promo code SAMANTHA!

Creative Team Member Allie created this fabulous 
First Aid Box and is providing a detailed Silhouette Studio tutorial too! 


Hey there, it's Allie from My Card Party and I have 
fun tutorial that will help you customize your projects!


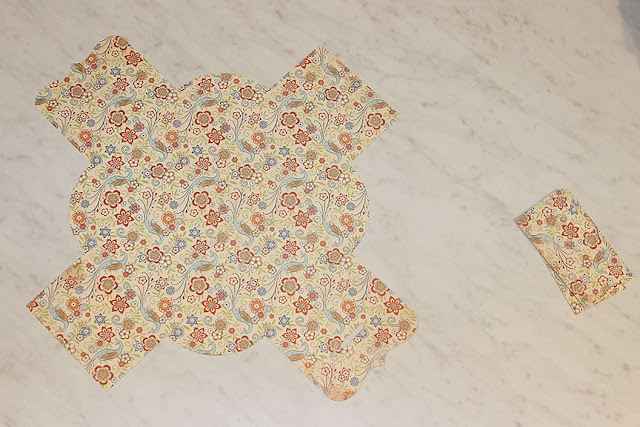
I'm using shapes #62208 (Circle Basket with Small Bow) to create a little first aid basket for my medicine cabinet. I have a full sized first aid kit in the kitchen, but I hate dragging it out for a simple cut. I thought I'd just make a tiny basket to hold the ouchie essentials.

Let's get started. I'll walk you through all the steps using some of the Designer Edition tools. With these great features, you can really style your projects to suit your needs.

You'll need some red cardstock - a scrap will do, and white cardstock - I used a sheet of 8.5x11". 


I'm using the basket with a bow, but I will not be needing the bow. 
I also don't need the basket to be very big, so I've reduced everything to 75%.


To add a cross, start by drawing a rectangle. Align it with the middle of the basket by selecting the basket and the rectangle and using the ALIGN feature.


Copy the rectangle and rotate it by 90 degrees. ALIGN.


Group the two rectangles and WELD.


To get it aligned I added a rectangle for reference and then made sure it was centered nicely.
Delete the rectangle when you are done aligning.


OFFSET the cross and create an outline.


Change lines to dotted to create a stitched effect.


Make an extra copy of the stitched cross. 
Note: Change the lines back to regular cutting lines.
I've changed it to red so you can see it, this will be cut from red cardstock.


Using the OFFSET tool, make an INSET LAYER of the strap. 
I've colored it red just so you can see it. This will also be cut from red cardstock.


Ungroup the outer strap and the holes.


Pull away the outer strap and delete. Now you have a smaller strap with holes, to match the first one you cut out.


Assemble basket. The red cross will go inside. You only need to put a little bit of adhesive in between the stitched shape and the opening.

This little project is super affordable and easy. Now it's your turn, go on and customize one of these fun baskets for any occasion!


I filled it with two sizes of bandages, some antibiotic ointment and some lifesavers.
Something sweet makes an ouchie all better!


Here's my basket in action, at home in our medicine cabinet.

Thanks for joining me today.

Remember, these deals end July 31st!
Click HERE and enter promo code SAMANTHA!

Sunday, December 22, 2013

Quick and Easy Gift Box with Linda


Hi everyone! Linda here from www.paperboutiquewithlinda.com.  Are you looking for a last minute holiday gift?  Be sure to check out Samantha’s box with round handle.  It only took me minutes to make!
The fun thing about this box is that you do not need glue or adhesive to assemble it.  I used adhesive on the panels and snowflake, but if you want a really quick box, you can leave off the panels and added decoration. You can purchase her box file (ID# 50520) and her snowflake file (ID # 38926) from the Silhouette On-line Store.
This adorable box would be great for any occasion and also makes a fun party favor. I filled mine with Dove Chocolates...yum! For assembly details, please watch the following video!
Thanks for visiting and have a wonderful holiday season!
Linda
Here are some supplies that you can use to make today's project, and ideas for filling favor boxes:


Get Amazon Prime Membership! Enjoy Free 2-day Shipping on Prime products, plus access to Free digital content like videos, books, and more!

Sunday, July 28, 2013

Quick and Easy Paper Wine Tote Tutorial with Linda


Hi everyone! Linda here from Paper Boutique with Linda. I love Samantha Walker’s Cool Summer Collection and just had to use it to design an adorable wine tote. You do not need a cutting machine to make this quick and easy project.


This tote will hold all sizes of wine bottles, but I also designed it to hold a bottle of sparkling cider. Soda or juice cans also fit. You could also use this as a gift tote and add a pair of cute sunglasses, a bottle of sparking water and sunscreen. It is so versatile.


Samantha Walker’s papers work perfectly for this project. Isn’t the tag adorable? I used her
Cool Summer collection in the video and it is mega adorable!


Have a great week and thanks for visiting!

Linda

* * * * * * * 
Craftsy

Thursday, July 18, 2013

Silhouette Tutorial--Triangle Surprise box! (includes copy and paste directions)

Patterned paper from my Traditions collection for Carta Bella

Patterned paper from my Giddy Up! collection for Carta Bella

This week in the Silhouette digital download store, you will soon find a few different versions of this triangle surprise box cutting file. This design can be cut with the Silhouette Portrait or Cameo machine. If you cut with the Cameo, it is already sized on a 12X12 mat. 
(These are maximum sizes...they can always be sized down.)
Cameo cut rectangular box approximate finished size will be 3 X 3 X 3 3/4
Cameo cut square cube box approximate finished size will be 3 X 3 X 3

For cutting this shape on the Portrait machine, you will need to size it down to fit within the 8.5 X 11 cutting area. 
Portrait cut rectangular box approximate finished size will be 2 X 2 X 2 1/2
Portrait cut square cube box approximate finished size will be 2 X 2 X 2
 Open the file in your Silhouette Studio software. Select the cut lines. Go to Object, select ungroup one time (selecting more than once will start to ungroup cutting lines and other components.) This will release the cutting lines into groups of parts. Select the small pieces of the project and move them off the cutting area into the grey area leaving the main box piece in the cutting area. Now cut that out being sure to select the correct paper settings for your chosen paper or card stock.
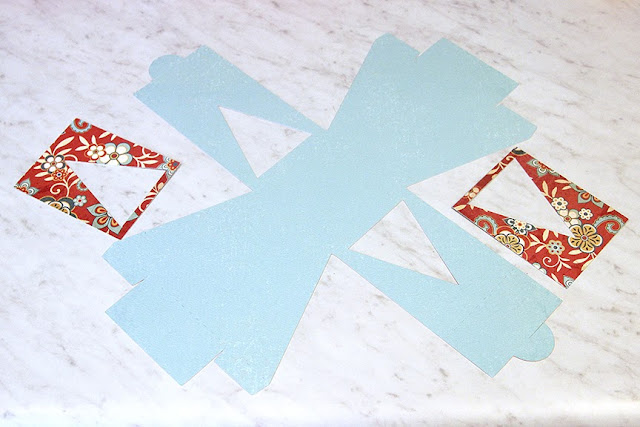
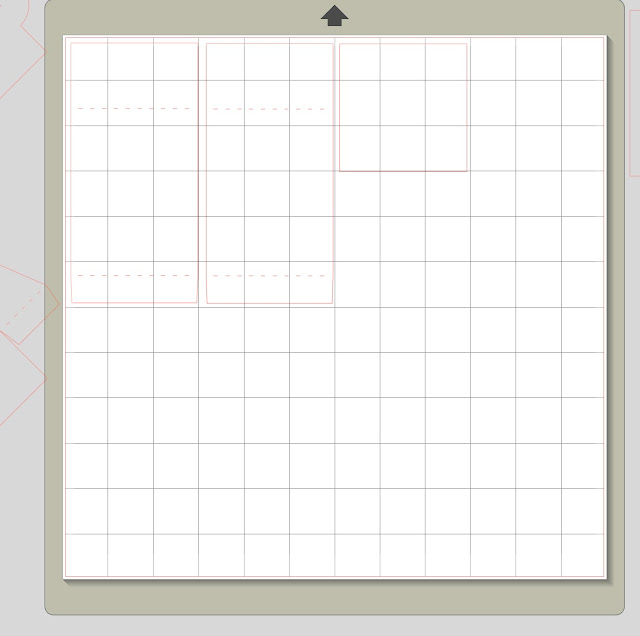
Now select the rectangle with the triangle in the middle and move it to the cutting mat area on your screen. You will need to cut two, so use one of the copy and paste methods explained below:

Here are three methods for cut and paste in the Silhouette Studio software (choose one method):

Select the object you want to copy then use the keyboard commands ctrl c, then ctrl v.

Select the object you want to copy then go to "edit" in the top bar and select Copy and then Paste from the drop down menu.

Or select the object you want to copy, while it is selected, hold down the "alt or option" key on the keyboard while dragging your selection with the mouse.

All of the above methods will get you the same result of duplicating the selected object. 
Now that you have these pieces cut, find the main box piece and the optional 
contrasting triangle window pieces.
  Glue them down over the triangle areas of the main box piece.
 Now move the triangle into the live cutting area. You will need to cut two. So you will want to copy and paste a second triangle into the cutting area using one of the methods mentioned above. 
I chose to cut mine out of acetate to create a fun clear window.
Glue the acetate triangles onto the inside of the main box piece. 
Proceed to cut the optional interior rectangular sides--you will need to cut two if you choose to use this part of the box. You will also cut the square piece that fits into the bottom interior of the box.

Please note, this part does not have to be used. You can just use the outer triangular sides to fold in if you want. However, if you put a treat in the box like jelly beans, they will spill out when you pull down the triangular sides. This can be a fun presentation if this is what you are after. To fill a box without sides, close one triangular side, then lay the box down on that side. Fill the box, then close the other triangular side. Now you can turn the box upright and tie it with a ribbon until the recipient gets surprised with the contents spilling out.
 If you chose to use the rectangular interior sides, glue them at the fold line, 
so the tab edge is glued to the bottom of the interior of the box.
Notice how the folded edge of the interior rectangular sides, 
lines up with the fold line at the bottom of the box.
This is where they should be glued.
 Fold the triangular exterior sides.
Glue the triangular exterior sides.
 Glue the square piece onto the bottom of the interior of the box. 
To close the box...
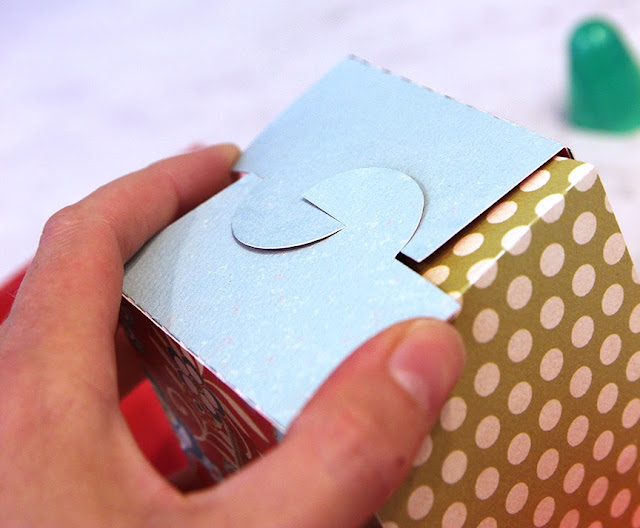
Pull up the triangular window sides, and attach the half moon tabs. 
Then pull up the interior rectangular sides (if you used them.) 
Lastly pull up the exterior triangular sides.
And there you have it...
a very unusual box for any occasion! 

Happy Crafting!
Samantha


Monday, July 15, 2013

Silhouette tutorial "Expandable box" for Portrait and Cameo users

Here's a fun box that is the perfect size for little gifts. This makes a great presentation for any occasion.

I have two versions of the expandable box, each with a few different styles. One is a square box and is formatted for Cameo users--though Portrait owners can size it down and get a slightly smaller version of the box. The second version of the box is rectangular and is formatted with Silhouette Portrait users in mind--though it can be sized up and be used by Cameo owners. The instructions here apply to all of the expanding boxes. Look for new styles on this expanding box in my Silhouette store.

Just click on the images below to be taken to the cut file:


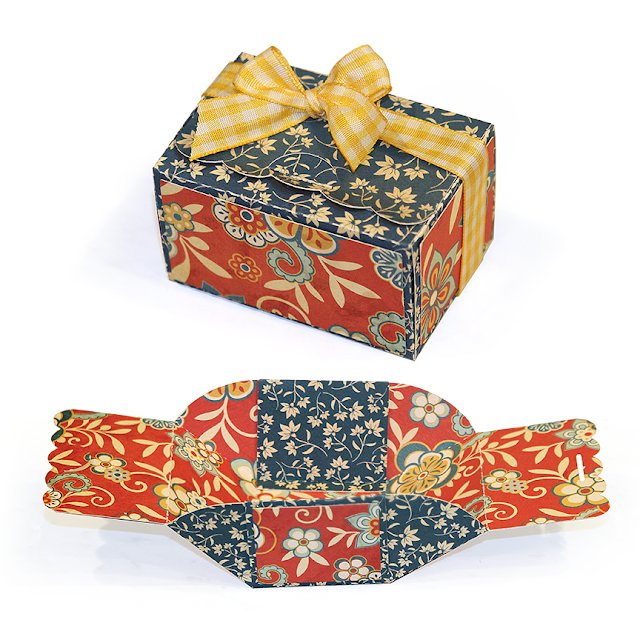
 Cut the file out. I recommend double sided cardstock with contrasting colors. 
 Fold all dotted lines toward the center except for the long 1/4 inch tabs which will fold outward.
 Glue on the contrasting sides (this is optional of course.)
 Fold the box so that the curved tabs fold under the sides. 
Glue the 1/4 inch tab down in the the box to hold.
 Note that the box will now act as if it is hinged and can expand, and contract. (cool, huh!)
Now close the box using by inserting  half moon tab into the slot. 
Optional: Tie a ribbon around the box for decoration.

Happy Crafting!
Samantha


Get Amazon Prime Membership! Enjoy Free 2-day Shipping on Prime products, plus access to Free digital content like videos, books, and more!
Related Posts Plugin for WordPress, Blogger...