Ads 468x60px

Showing posts with label Gift. Show all posts

Thursday, July 18, 2013

Silhouette Tutorial--Triangle Surprise box! (includes copy and paste directions)

Patterned paper from my Traditions collection for Carta Bella

Patterned paper from my Giddy Up! collection for Carta Bella

This week in the Silhouette digital download store, you will soon find a few different versions of this triangle surprise box cutting file. This design can be cut with the Silhouette Portrait or Cameo machine. If you cut with the Cameo, it is already sized on a 12X12 mat. 
(These are maximum sizes...they can always be sized down.)
Cameo cut rectangular box approximate finished size will be 3 X 3 X 3 3/4
Cameo cut square cube box approximate finished size will be 3 X 3 X 3

For cutting this shape on the Portrait machine, you will need to size it down to fit within the 8.5 X 11 cutting area. 
Portrait cut rectangular box approximate finished size will be 2 X 2 X 2 1/2
Portrait cut square cube box approximate finished size will be 2 X 2 X 2
 Open the file in your Silhouette Studio software. Select the cut lines. Go to Object, select ungroup one time (selecting more than once will start to ungroup cutting lines and other components.) This will release the cutting lines into groups of parts. Select the small pieces of the project and move them off the cutting area into the grey area leaving the main box piece in the cutting area. Now cut that out being sure to select the correct paper settings for your chosen paper or card stock.
Now select the rectangle with the triangle in the middle and move it to the cutting mat area on your screen. You will need to cut two, so use one of the copy and paste methods explained below:

Here are three methods for cut and paste in the Silhouette Studio software (choose one method):

Select the object you want to copy then use the keyboard commands ctrl c, then ctrl v.

Select the object you want to copy then go to "edit" in the top bar and select Copy and then Paste from the drop down menu.

Or select the object you want to copy, while it is selected, hold down the "alt or option" key on the keyboard while dragging your selection with the mouse.

All of the above methods will get you the same result of duplicating the selected object. 
Now that you have these pieces cut, find the main box piece and the optional 
contrasting triangle window pieces.
  Glue them down over the triangle areas of the main box piece.
 Now move the triangle into the live cutting area. You will need to cut two. So you will want to copy and paste a second triangle into the cutting area using one of the methods mentioned above. 
I chose to cut mine out of acetate to create a fun clear window.
Glue the acetate triangles onto the inside of the main box piece. 
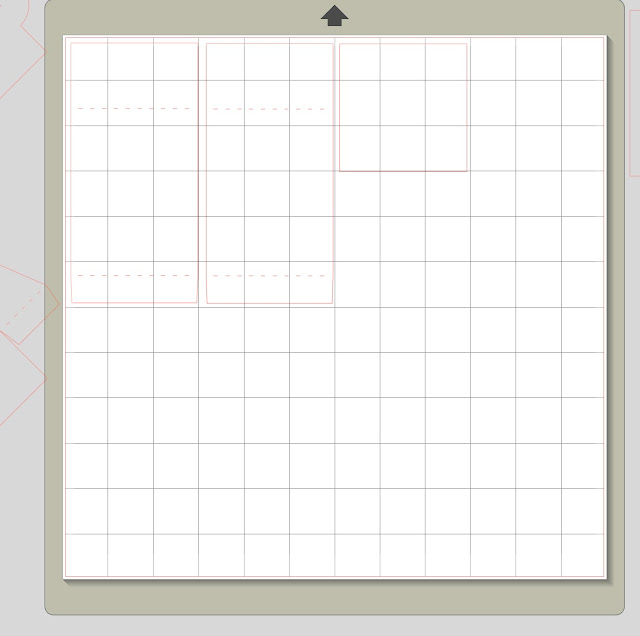
Proceed to cut the optional interior rectangular sides--you will need to cut two if you choose to use this part of the box. You will also cut the square piece that fits into the bottom interior of the box.

Please note, this part does not have to be used. You can just use the outer triangular sides to fold in if you want. However, if you put a treat in the box like jelly beans, they will spill out when you pull down the triangular sides. This can be a fun presentation if this is what you are after. To fill a box without sides, close one triangular side, then lay the box down on that side. Fill the box, then close the other triangular side. Now you can turn the box upright and tie it with a ribbon until the recipient gets surprised with the contents spilling out.
 If you chose to use the rectangular interior sides, glue them at the fold line, 
so the tab edge is glued to the bottom of the interior of the box.
Notice how the folded edge of the interior rectangular sides, 
lines up with the fold line at the bottom of the box.
This is where they should be glued.
 Fold the triangular exterior sides.
Glue the triangular exterior sides.
 Glue the square piece onto the bottom of the interior of the box. 
To close the box...
Pull up the triangular window sides, and attach the half moon tabs. 
Then pull up the interior rectangular sides (if you used them.) 
Lastly pull up the exterior triangular sides.
And there you have it...
a very unusual box for any occasion! 

Happy Crafting!
Samantha


Monday, July 15, 2013

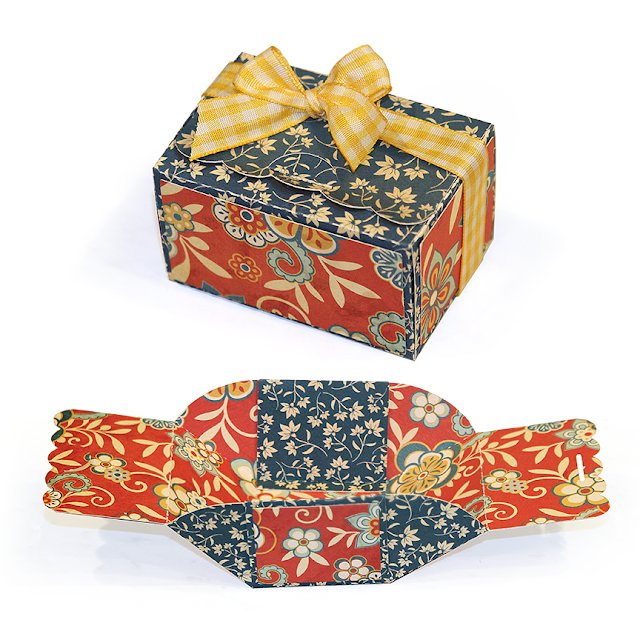
Silhouette tutorial "Expandable box" for Portrait and Cameo users

Here's a fun box that is the perfect size for little gifts. This makes a great presentation for any occasion.

I have two versions of the expandable box, each with a few different styles. One is a square box and is formatted for Cameo users--though Portrait owners can size it down and get a slightly smaller version of the box. The second version of the box is rectangular and is formatted with Silhouette Portrait users in mind--though it can be sized up and be used by Cameo owners. The instructions here apply to all of the expanding boxes. Look for new styles on this expanding box in my Silhouette store.

Just click on the images below to be taken to the cut file:


 Cut the file out. I recommend double sided cardstock with contrasting colors. 
 Fold all dotted lines toward the center except for the long 1/4 inch tabs which will fold outward.
 Glue on the contrasting sides (this is optional of course.)
 Fold the box so that the curved tabs fold under the sides. 
Glue the 1/4 inch tab down in the the box to hold.
 Note that the box will now act as if it is hinged and can expand, and contract. (cool, huh!)
Now close the box using by inserting  half moon tab into the slot. 
Optional: Tie a ribbon around the box for decoration.

Happy Crafting!
Samantha


Get Amazon Prime Membership! Enjoy Free 2-day Shipping on Prime products, plus access to Free digital content like videos, books, and more!

Sunday, July 14, 2013

Silhouette Tutorial Tote bags for the Cameo and Portrait!

I'm so excited about this week's Silhouette digital cutting files! 

I've got little tote bags going up in the Silhouette store this week. 

These would make perfect little gift bags, or bags for little treats...or party favor bags...
or fun organizational decor...it's up to you how to use the bags,
as there are just so many ways you could use them!

Best thing about this file...I kept both Cameo and Portrait users in mind when designing it.


Bag Scalloped Tote (studio format)


 Bag Simple Tote (studio format)


Pinked edge tote (studio format)

spiderweb tote (studio format)

 When you open the file, it is formatted for a 12 X 12 cutting area...
however, if you are a smaller format cutting machine owner, I grouped everything in such a way 
that you can easily resize the grouping just a tad to maximize the space on an 8.5 x 11. 
First cut the file out. I recommend using double sided card stock...then you only have to cut once and then you can use the opposite side of the paper for the contrasting elements like the straps and base.
 Fold the base.
 Glue the tabs, then adhere them together at the sides to form the base.
 Find the large rectangular piece--this will become the bag.
 Roll the piece up to make the paper flexible.
 Go ahead...roll it even tighter. This will make it more flexible when shaping it into the base. 
 Now glue the edge. (This is approximately 1/4 inch area on the edge.)

Flex the base a bit to make it shape with the bag portion. 

Glue around the bottom of the bag.
 Put the bag into the base. 

Roll the corners of the bag pressing one finger behind and shaping from the front with your thumb and forefinger. Play with the cardstock a bit to shape it how you would like.
 While the glue is still wet, glue the back of each of the straps and tuck them into the base. Weave the buckles with the strap at the top and fold over. (if you use tape, you may want to glue the straps before glueing the bag to the base...I just happened to do this a little backwards.)
 Add all the straps the same way.
 Curl the handles. 

Thread the handle through the buckle.

 Glue them into the buckles at the top on the inside of the bag.


You may need a dot of glue here and there to make the handles lay the way you want.

Squeeze the bag to shape it how you want. 
(this is why there aren't fold lines--so you can create your bag's unique look.)
Voila!
You have your tote!

Thanks for stopping by.
Samantha

Related Posts Plugin for WordPress, Blogger...