Yes! Whooo Hooo! We are tackling cutting detailed designs with your Silhouette today!!!


What?
Don't go now...
STAY...
I'll try to make this painless for you!
Promise!
Step 1 is for newbies to detailed designs:
Stop holding your breath...you can do this!
For all you detailed veterans and self proclaimed gurus on cutting detailed designs...I'd love for you to chime in on how you are able to achieve smooth cuts when going detailed...so feel free to comment with your tips and tricks!
Alright, I know there are some of you out there who have bought detailed designs but have yet to cut them due to fear. I'm going to set you up with a surefire way to achieve success!
Okay...if you've stopped holding your breath...you made it past step one.
Onto step 2...equipment check!
if your blade is old...or even somewhat old...set it aside. You will want to use a fresh blade for detailed cuts. This is the number one reason why people aren't successful with detailed cuts. I know that the blade you have in your machine is probably still good for other projects, so just set it aside, and mark it somehow. We'll use this new blade for this detailed cut. You can always put the old blade back in the machine for other projects. I set my old blade aside tonight...it's been cutting non stop for a few days...but will use it again for simple cuts. I like getting as much use out of something like the next person.
Step 3...mat check.
Check your mat make sure it is sticky enough that your design won't slide around. If it has been slipping, even a little on your last designs, then it's time for a new mat--but keep the old mat...it's still good for more simple cuts. (tip: use tape on the edges of your paper when cutting with an older mat...still works well on basic designs.)
Step 4...paper choice.
Detailed designs usually cut best on a regular card stock. You may be able to cut a design on paper, but you will have to slow down the cutting speed (see below.) If the paper starts tearing, you may have to choose another medium. That is just the nature of detailed designs. If you choose to cut thicker than normal card-stock, you will definitely need to do select the double cut setting (see below.)
Step 5...it's all in the settings!
Open your file in your Silhouette Studio software. Select cut, then change your settings as outlined below.
A. Speed: The first thing you will want to change is the speed...slow it down to 2 or 3. This is the most important setting for getting your detail to cut correctly. Slowing the speed helps the blade turn corners nicely and not bunch up the card stock. If your card stock is bunching up, slow your speed down.
B. Depth: if you are cutting a paper or cardstock you have cut before, use the depth settings that has worked in the past for you. In addition, if you are cutting a thicker card stock, I recommend using the double-cut setting just to be sure that the design cuts all the way through. If you are unsure what settings are good for your paper, use the settings Silhouette recommends for your paper type, then choose test cut...which will cut a small area so you can see if the settings will work for your paper. If it's good to go...move on and click that cut button.

You may ask why select double-cut when you could just set the blade deeper. That may be an okay choice for simple cuts...but for detailed cuts...it's best not to try to "push the paper" too much as it will have to make lots of turns during the cut and might "chunk up" the corners. When you see your paper pushing up at the corners and not cutting all the way through, it means the blade is too deep. When you select double cut, it may not cut through on the first pass...which is fine, but in most situations, it will cut completely through on the next pass.
I am using Carta Bella Premium textured card stock. I like that it doesn't clog up my blade. The fibers are dense and work fantastic for detailed cuts. The settings that I use on detailed cuts are: speed 2, blade depth 4, and double cut.
****Please Note: In most cases, you should be fine after step four...but steps 5 and 6 will save you if things didn't go perfectly with that round.****
Step 6 Check your cuts before you unload!
I cannot stress this step enough. When your design finishes up, do not automatically press the unload button on your machine. Carefully lift a few edges of your design to see if you cut all the way through. Even if your test cut did fine, detailed designs can be a little trickier to achieve complete cuts. If your design is still attached in spots, leave the mat in the machine, and press cut again! You should be fine after this round. Then make a note to yourself that you probably should have gone one setting more on the blade depth. Even though you had to wait for it to cut all over again...it sure beats trying to battle freeing the design with an x-acto knife.
This should peel easily from the cutting mat. You want nice smooth edges like this, if they aren't, your settings need to be adjusted.
Step 7...Did I mention X-acto knife?
Okay...usually this is totally unnecessary after all the above precautions...But if by chance there are 2 or 3 areas that are still attached where they should be cut through, you'll notice when you remove your design from the mat. Don't panic. Just get the X-acto knife out and carefully cut the areas that are still attached. You can put the design back on the mat to do this step.
Okay, now that your design is cut out, and quite nicely I might add...it's time to assemble it!
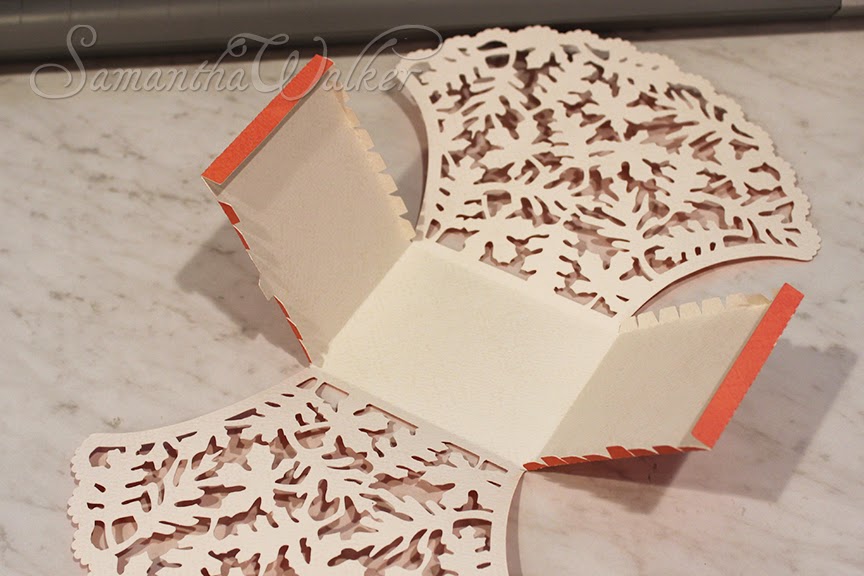
For this basket, you will want to fold the sides first.
Then glue down the reinforcing edge.
Then curve the sides to "train" them into shape before glueing.
Put a dot of glue on each tab...a quick drying paper glue is what I suggest. This will get tacky fast and dry with a strong hold without warping the paper. FYI...Tombow Mono adhesive is latex based...so if you are allergic, choose another paper glue.
Clip or hold the tabs around the curve until set.
To clip the sides, insert the clip into the spaces that are between the leaves and pinch a tab and the basket side with the clip. There are only a few spaces on the sides that will fit a clip, so you can also pinch the front with the side as shown with the front middle clip in the picture above. It will warp the basket only for the time that it is pinched, then you can reshape it after the glue is set. You can also use your fingers.
Keep on gluing and clipping the sides to the front.
Now find the strips of paper for the basket handle. Please not the strip comes in three pieces. You can cut the basket smaller and just cut a single 3/4 X 12 inch strip of paper for the handle. However, I wanted to cut the basket at maximum size to show off the detail. If you have a silhouette portrait, you can resize this, to fit on an 8.5 X11 you will need to scale the design to 75%. You will want to cut the handle separately if working on a portrait so that you can maximize the design. The handle strip should measure approximately 3/4 X11 in that case.
Glue the handle pieces together.
Then glue the handle to the basket. You can hold this or clip it until set.
Bend the handle as shown above. (I've since added score lines here, I usually realize a couple of minor changes when I assemble a project for the first time...this is one of the changes that I made, so your design will have score lines for the fold here.)
Now pat yourself on the back! You did it! You cut a very detailed design and made a beautiful basket!
This basket will make a perfect table centerpiece!
-Samantha Walker