Ads 468x60px

Showing posts with label joscelyne cutchens. Show all posts

Friday, January 04, 2013

Paris Girl Thank You Notes by Joscie

Hello Friends, Joscie here to share a quick and easy thank you card.

  • I cut a piece of 8.5 x 11 black cardstock in half the long way.
  • I scored and folded in half to create a 5.5 x 5.5 card base.
  • I cut two strips from a sheet of 6 x 6 Carta Bella Paris Girl Paper.
  • I took a long piece of silver twine, folded in half and then tied a bow in the middle.
  • I stapled one side to the left side of the paper strip and then added adhesive to the back of the paper strip.
  • I adhered the paper to the bottom of the card and then used the tiny attacher to attach the right side of the twine to the card base/strip.
  • I added adhesive and tucked the second strip above and behind the first.
  • I added a short strip of silver striped washi tape to the top right side of the card.
  • I layered the thank you sticker over the strips and washi.
  • I used a scissors to trim off all the right edges flush with the card base.


If you don't have a silver or white pen to write inside a dark card base, you can always add a white block of cardstock inside for the note.
Thank You! I hope you're inspired to make some pretty Thank You notes!
Love Love,

Friday, November 02, 2012

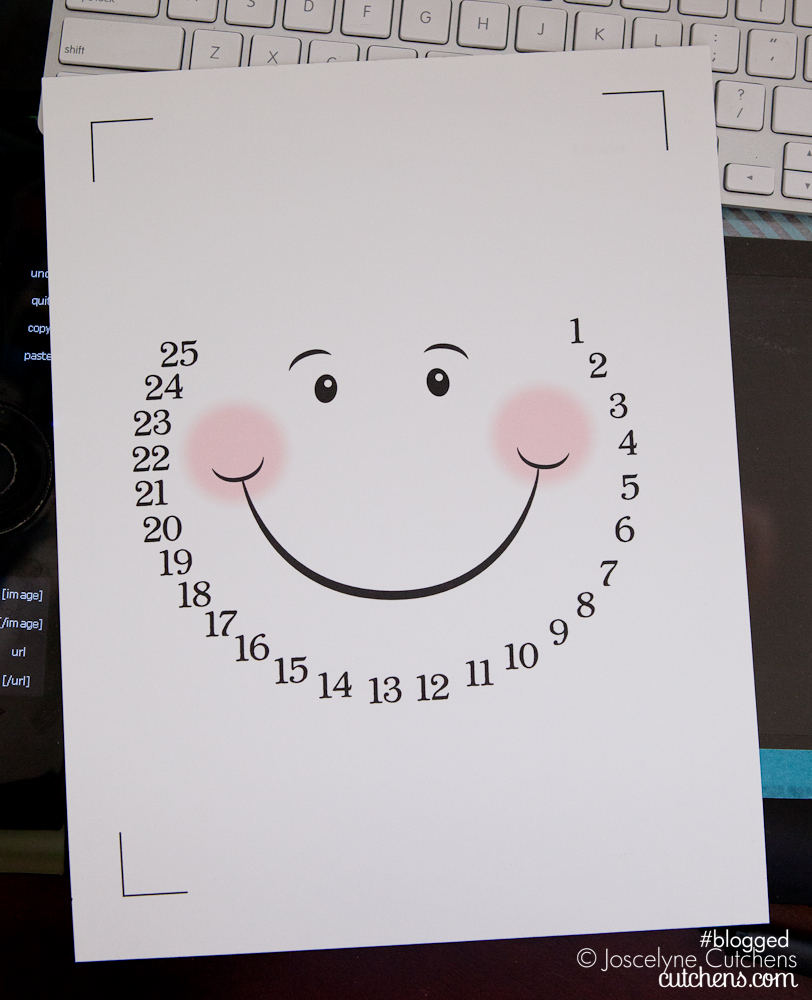
Snowman Advent Print and Cut Tutorial by Joscelyne Cutchens

Hello Friends, Joscie here to share with you a new print and cut design from Samantha Walker!  This super cute snowman advent calendar is perfect for helping kids count down the days until Christmas! I am working on an original silhouette and a standard printer, so my size limit is 8.5 x 11 paper. Feel free to click any of these images for a larger view. 
Snowman Advent from Silhouette
Here's how I made it:
  • I opened the file in my silhouette software and ungrouped all the elements.
  • I set the paper size to 8.5 x 11 and turned on the print registration marks setting.
  • I selected all elements and resized together until the snowman face and cut lines fit inside the print/cut area.
  • I printed the snowman face on my printer on white cardstock.
  • I placed the printed sheet on the carrier mat and loaded into the silhouette.
  • Press cut, voila, snowman face. :)
  • Select items that you want to be the same color and place in the cutting area


  • I used foam adhesive to pop some layers.


  • I used an orange mini brad to connect the carrot nose/pointer.


I also added some crystal effects to the holly leaves and berries to add a little shine. Voila! Snowman :)


I hope you will give the print and cut a try!
Love Love and Blog you Later,
Joscie, rhymes with bossy :)

*******
Be sure to check out the Silhouette Store for more Advent Calendars:


Friday, September 07, 2012

Creating Trendy Chevrons in PhotoShop by Joscelyne Cutchens

Hello friends, it's Joscie here to share an easy fun tip to create trendy chevrons in your digital layouts.
I used Adobe Photoshop on my Mac but also included some tips for PC. If you have any questions, please feel free to leave them in the comments and I'll do my best to answer for you.


I then used the text tool to add a caption to the top picture. Here's my finished layout:
Thanks for stopping by!
Love Love and Blog you Later,

Friday, July 20, 2012

Digital Tutorial by Joscelyne Cutchens

Hello Friends, this is Joscelyne Cutchens checking in again with another Digital Tutorial. I use Photoshop CS5 on a mac, but you should be able to use the same directions with PSE or a PC.  
Here is the layout I will be sharing with you:
Fonts: dirty headline, Futura Light.
click for each point of the banner, double click to close the selection.

pc: Ctrl-Shift-n

pc: Ctrl- d


pc: Alt-Click-Drag


pc: alt-click-drag

Tips for the title work

  • Dirty Headline is a paint stamp looking font sample the text color from a patterned paper to get a perfectly coordinated colored title.
  • adjust the opacity of the font layer (I used 80%).
  • Stack the letters. Type a syllable, return, syllable, return until the whole word is typed out.
  • Perfect sized title for the space: select the whole word and adjust font size until the longest syllable takes up almost the whole width of your text area. Now adjust spacing between the lines until the letters just touch.( I used font size 145 pt, spacing 113 pt)
  • You can also make your title multicolored by selecting certain portions of the title and adjusting the color as I did in my Sea Life Park layout.

I hope this gives you ideas for new digital layouts! If you have any questions, please leave them in the comments and I'll do my best to get you an answer.
Thanks for stopping by!
Love Love,
Joscie, rhymes with bossy :)


Related Posts Plugin for WordPress, Blogger...