Ads 468x60px

Showing posts with label Christmas. Show all posts

Tuesday, November 25, 2014

Nativity Gift Set with Cathy

Hi everyone!  Cathy here with you today sharing a nativity gift set created with Samantha's files.  This project came together quickly and makes the perfect last minute hostess gift.  You know you always need some little gifts stashed away for last minute plans and such!

I used SRM vinyl for the bucket.  It is Oracal 631 and it cuts like a dream.  


I set my machine for a speed of 8, thickness of 9 and my blade at 2.  I got the little bucket at Target and scaled the SVG file down to the settings below.  It's a detailed cut but the vinyl cut beautifully and was easy to weed!
Apply your design, add candy and a bit of ribbon.


I also created a card to match using Samantha's Nativity Card.  I added a piece of red patterned paper from Samantha's Echo Park Keepin' Cozy 6x6 paper pad.
I love the textured black paper against the red.  Striking!


Click on the photos below to go directly to these files on the Silhouette Store.


Thanks for joining us today at Samantha Walker!


Friday, November 07, 2014

Sweet Shaker with Guest Designer Tonya!

Good Morning, Guest Designer Tonya here today to share with you a great shaker card using a Samantha Walker's Silhouette file!  I have been bitten by the Christmas bug and have been making Christmas cards for weeks and weeks already.  


Here is the file I am using:


When the file is opened, it is fit for a 12 x 12 sheet.  
My plan was to use the file as a printed background for a shaker card.  So I modified it.  

The first thing I did was ungroup the pieces.  I used the file color option in the software and colored the candy swirls red, since I was using a white card base.  Once colored I moved the swirls to fit on the 'wrapper'.
The swirls were not lined up the way I wanted.  To correct that, I highlighted the swirls and rotated them until they lined up with the red meeting the wrapper ends.  

I wanted the outline of the wrapper to be a charcoal tone.  To do this, I clicked the line color option and chose the correct level of gray tone.
 Since peppermint candy wrappers are clear, I chose a lighter gray so that they appeared to be slightly transparent on the background.  

Next I drew a rectangle and sized it to 4.25 x 5.5 inches.  This represented the base of my A2 size card.  

The cardstock I used was 8 1/2 x 11 inches.  To make things easier (visually), I changed the page settings to fit.   Also, to represent printing, I positioned the page in portrait. 
Next I moved the rectangle I drew to fit the bottom left corner of the page. 


 The peppermint candies were sized and replicated to fit my pattern.  
I intentionally left a bit of space between the candies in the upper center for a sentiment to be stamped.  

When using a cut file for a print design, it is very important to be sure you have the print lines selected.  
The option to do this is under the line style icon.  Since I did not want the rectangle to print as I only used it as a reference, I did not select those lines.  


When I had everything where I wanted it, I sent it to the printer.  I used my paper trimmer to cut the cardstock to 4.25 x 11 inches, then scored at 5.5 inches to created my card base. 


For the front of the shaker, I just used my reference rectangle and created a few offsets for the layers.  
I glued the two pieces together and added two layers of foam tape to create my shaker front. 

I used Doodlebug Designs Sequins to fill the shaker.  

(inside of card)

I added clear Wink of Stella to the white frame.  


Supplies:
Papertrey Ink Cardstock
Papertrey Ink Cube
Foam Tape
Dooblebug Sequins
Wink of Stella Brush Pen
Printer


Sunday, December 29, 2013

Silhouette Tutorial: Cube Surprise Box by Aimee

Aimee here to sharing how to make Samantha’s cube surprise box!
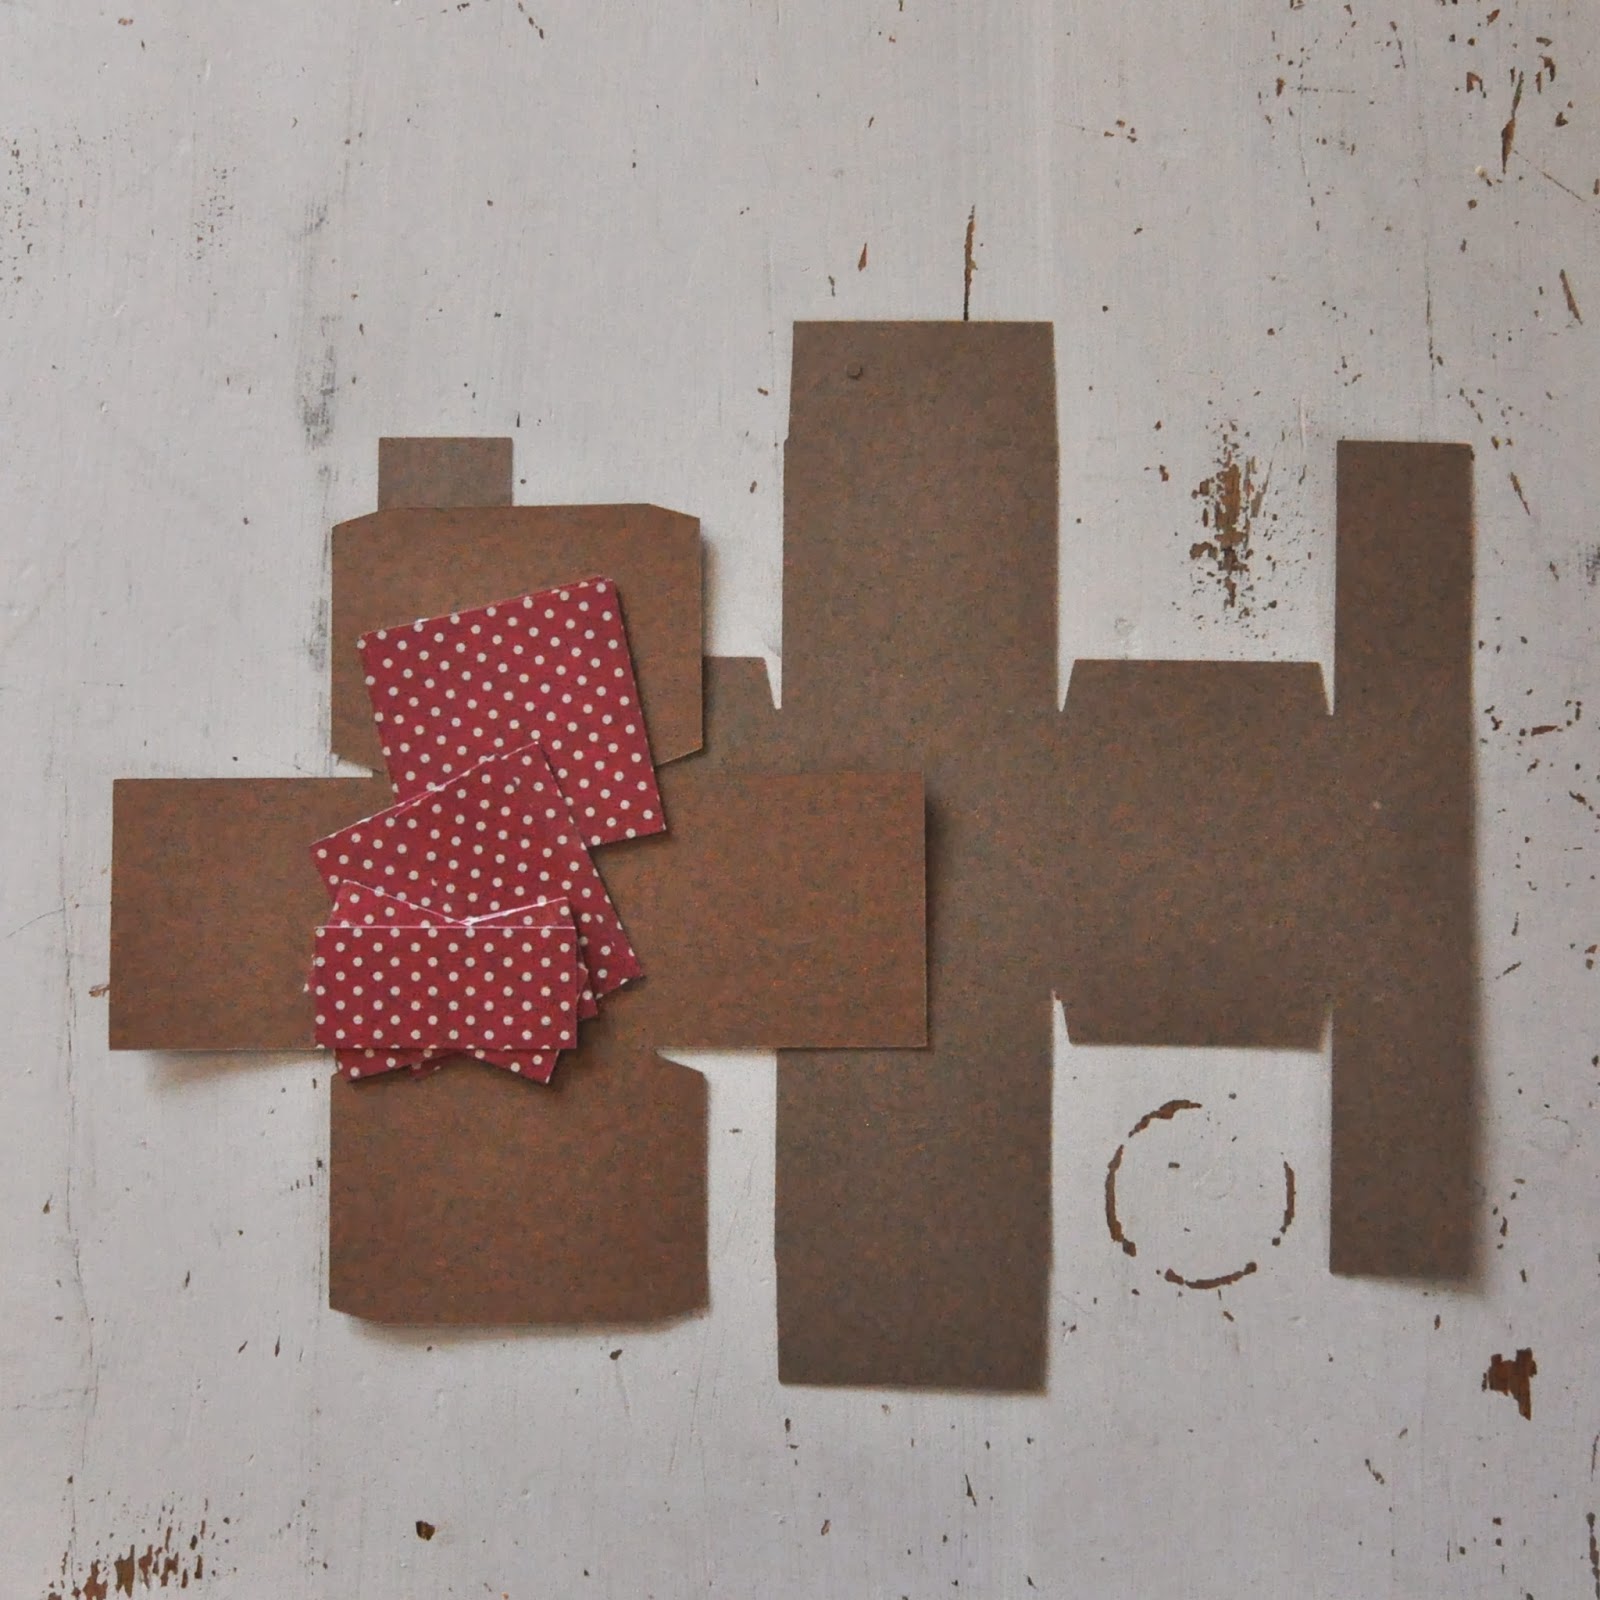
I opened the file in the silhouette program, and ungrouped the images, copying and pasting them to new pages. 


I cut the box and cube from two pieces from Kraft cardstock. I cut the polka dot squares from Samantha’s Giddy Up Line. {I cut 2 extra squares}

I started folding all the perforated lines on the 2 box pieces.


I glued all the tabs to the inside of the cube and box, except the 2 top ones on the box, they will get folded in the cube once the cube has been placed inside the box.


I placed the cube inside the box, glued it down folding the 2 tabs over into the box and adhering. 

I then glued all the polka dot paper to all sides of the cube {that's where the 2 extra squares come in} and outside panels of the box.

I hope you enjoyed this little box as much as I do! Thanks for stopping by the blog today, to see how I made it!

Thursday, December 05, 2013

Silhouette: How'd you do that? Putz-Style Glitter Houses

Thanks for popping in today!
If you've been reading the blog this week, you've already learned how to assemble a few of these glitter houses using your Silhouette cutting machine with my house files from the Silhouette store:

Today, I have a cute little red one to show you. 
Here are the steps I took to finish my house:
1. Ungroup your file. Select your house piece and put in the live cutting area.
2. Cut the house piece in your desired color, I chose red for this house.
3. Cut the windows, roof in another color.
4. Cut the base in white (or green for a spring variation.)

I assembled it using American Crafts glitter card stock. It is as thick as thin chipboard and requires setting your silhouette machine blade depth to 9 or 10. It also requires use of a fairly new blade. Some glitter papers aren't quite as thick. You may find one that you like better. Just know that not all glitter paper needs the blade to be set that deep. Also be sure your mat is still sticky and that your paper is secured.

You can also use a thick non-glitter cardstock and add glitter to your house with glue. I recommend putting the glitter on the house before it is assembled.

5. Gather your cut pieces, and glue the window frames around each window, and glue the door onto the front. You can use a hot glue gun, or a paper glue that works with glitter.
6. Crease all the fold lines.
7. Put glue on the tabs, and glue to the side walls of the house. You will be able to hold the tabs to the sides through the rectangle on the bottom of the house.
8. Glue the side wall tab, and close the house sides.

Notice how my house has the unsightly barcode showing from the back of the card stock? I included a wall backing piece just in case you run into this and want to cover it up. You could also put patterned paper here and "wallpaper" the interior of your house if you desire. This piece is not necessary for everyone, so some will find that it ends up being an extra piece.
9. Glue the optional wall backing piece to the back wall with a glue stick or other smooth paper glue.
 10. Glue the roof on starting at the center, then do one side, then the other. I used a hot glue gun so I wouldn't have to wait for drying. If you have a very thick card stock the glue gun works great. This is not a great option for thinner card stock as your glue lines will end up chunky. Just say "no" to chunky.
11. Notice that there is a little overhang on the roof. Make sure you center this.
 12. Now glue each side of the roof into place.
 13. Glue the house to the base…make sure to leave more room in the "front yard" and only about 1/2 inch in the "backyard".
14. Add one or two bottle brush trees to the front yard.
15. Add a wreath to the door if desired. I have both versions below:
Happy Crafting!


Wednesday, December 04, 2013

Silhouette Tutorial: How to make the Castle Glitter House from my Putz-Style House Series

Yesterday I showed you how to make the little pink glitter house with your cutting machine. Today, I'll show you how to make a castle style glitter house. The technique is about the same, though the shape is different. I hope to offer you a whole village by the end of the week. ;) 

This design will be available as a .studio or SVG file format in the Silhouette Online store


1. Ungroup your file. Select your house piece and put in the live cutting area.
2.  Cut the main castle piece in your desired color, I chose a happy yellow.
3. Cut the windows, roof, and chimney in another color. I chose white.
4. Cut the base in white.

I used glitter cardstock (it's like a light chipboard) by American Crafts. It is very thick. If you use this medium, use a newish blade, set the depth to 9 or 10 and select double cut. You will need to adjust your machine according to your material.

You can also use a thick non-glitter cardstock and add glitter to your house with glue. If you do this, I recommend putting the glitter on the house before it is assembled.

5. Gather your cut pieces, and glue the window frames around each window, and glue the door onto the front. You can use a hot glue gun, or a paper glue that works with glitter.
6. Glue the bows to the wreaths, then attach the wreaths to the house.
7. Fold the house piece as shown above. 
8. Glue the side wall tab, and close the house sides.
9. Put glue on the bottom tabs, and glue to the side walls to the bottom of the house. You will be able to hold the tabs to the sides through the rectangle on the bottom of the house, or use wonder clips until it is dry.
10. Fold the roof piece with the glitter side up and the tabs folding upward. 
11. Put glue on the back side of the roof tabs, and carefully insert into the house top, move it around until the tabs run parallel just underneath the castle top edge.
12. Hold the tabs of the roof against the inside of the house until glue is set, or use clips.
13. You may also apply extra glitter to the interior of the castle top as I did with my castle below. To do this, just put glue on the back side of the "castle" roof edge, and dip into glitter.
14. Glue the house to the base with a hot glue gun, so that the majority of the base is in front of the house and only 1/2 of an inch remains at the back of the house. 
15. Glue a couple bottle brush trees to the base with hot glue. 


Tuesday, December 03, 2013

Tri-fold Holiday Scene Card by Diana Fisher


Hi! Diana Fisher here with you today to share a tutorial on how to best use the tri-fold scenery cards available from Samantha Walker in the Silhouette store. You can find the file for this card here.

To get set up to cut your pieces, you'll want to select the file and 
then ungroup all of the pieces. 

Once they are ungrouped, you can reposition them into the areas of the cutting mat where you will be assigning them colors.

My top area is white card stock — the base for the card. Bottom left is green and bottom right is grey.


I started a second file and moved the snowman, the warm wishes, the carrot nose and the scarf into their own quadrants. This makes it easier for me to just use 6x6 papers set up into fours. 


After all of your pieces are cut, you can start to assemble the card. I adhered the green trees to the white card stock base. 

Since this is a wintery scene, I have to share one of my favorite things to use this time of year: embossing paste. Using a stencil, you smooth it through the dots using a sponge or brush to make a textured, soft-looking snowfall effect. I've used gesso, too, but the embossing paste looks the most like snow. It dries pretty fast and has a texture to it once dried. 


Once the layer with the trees is finished, I assembled the snowman layer. He also gets a brush of embossing paste for some more snow fall.


Once the basic pieces from the card are assembled, you can put some finishing touches on the card. I added enamel dots for ornaments to the trees and some more for the snowman's buttons.


For this cad, you'll want to write on the areas covered by the other layers, so you won't see your writing through the trees. 


Thanks for stopping by here today to see my holiday scene tri-fold card. These are some of the most rewarding cards you can make, and they are worth every step it takes to make them. Check out Samantha Walker's silhouette files for more cute card ideas.

* * * * * * *

Get Amazon Prime Membership! Enjoy Free 2-day Shipping on Prime products, plus access to Free digital content like videos, books, and more!
Related Posts Plugin for WordPress, Blogger...