Ads 468x60px

Showing posts with label Cool Summer. Show all posts

Tuesday, April 01, 2014

Easter Card Tutorial by Christine

Happy April Fool's Day!  Christine joining you today with a 
post full of tips and ideas and that is no joke! 

From the first time I saw Samantha's Bubbles of Love Valentine Card #54121, I loved it. One of my favorite things about these cuts is that often times you can modify them to make them work for other seasons. Today I am going to show you how I modified it slightly to turn it into an Easter card!


The original card has circles but I thought those circles could easily be stretched to look like Easter eggs!  So I did just that!
I have some tall 8 inch envelopes so I stretched mine to be really tall.  It would work just as well shorter!
After cutting I used pieces from the Cool Summer line from Carta Bella to back certain eggs.  I used mostly solid or monochromatic patterns to do the eggs and then cut apart pieces from the chevorn patterned paper to decorate the big eggs.


I filled in most of the rest of eggs with glitter.  This helped me to remember why I don't love glitter ;).
I decided to cover up the heart and put my title in that spot.  Initially I cut my title just in yellow using Samantha's "Happy Easter Phrase Title" #39476.  But with just the yellow it didn't stand out enough.  So I decided to create a shadow to use on it.

To do that I clicked on the title and then clicked on the Offset button.  I then chose "offset" and lowered the offset button to a distance I was happy with.  

I then ungrouped them and cut the shadow in white.  Once I glued those together I popped the title up with foam adhesive and it was perfect!

Hope you have a great day and don't get fooled by too many people!

Sunday, February 23, 2014

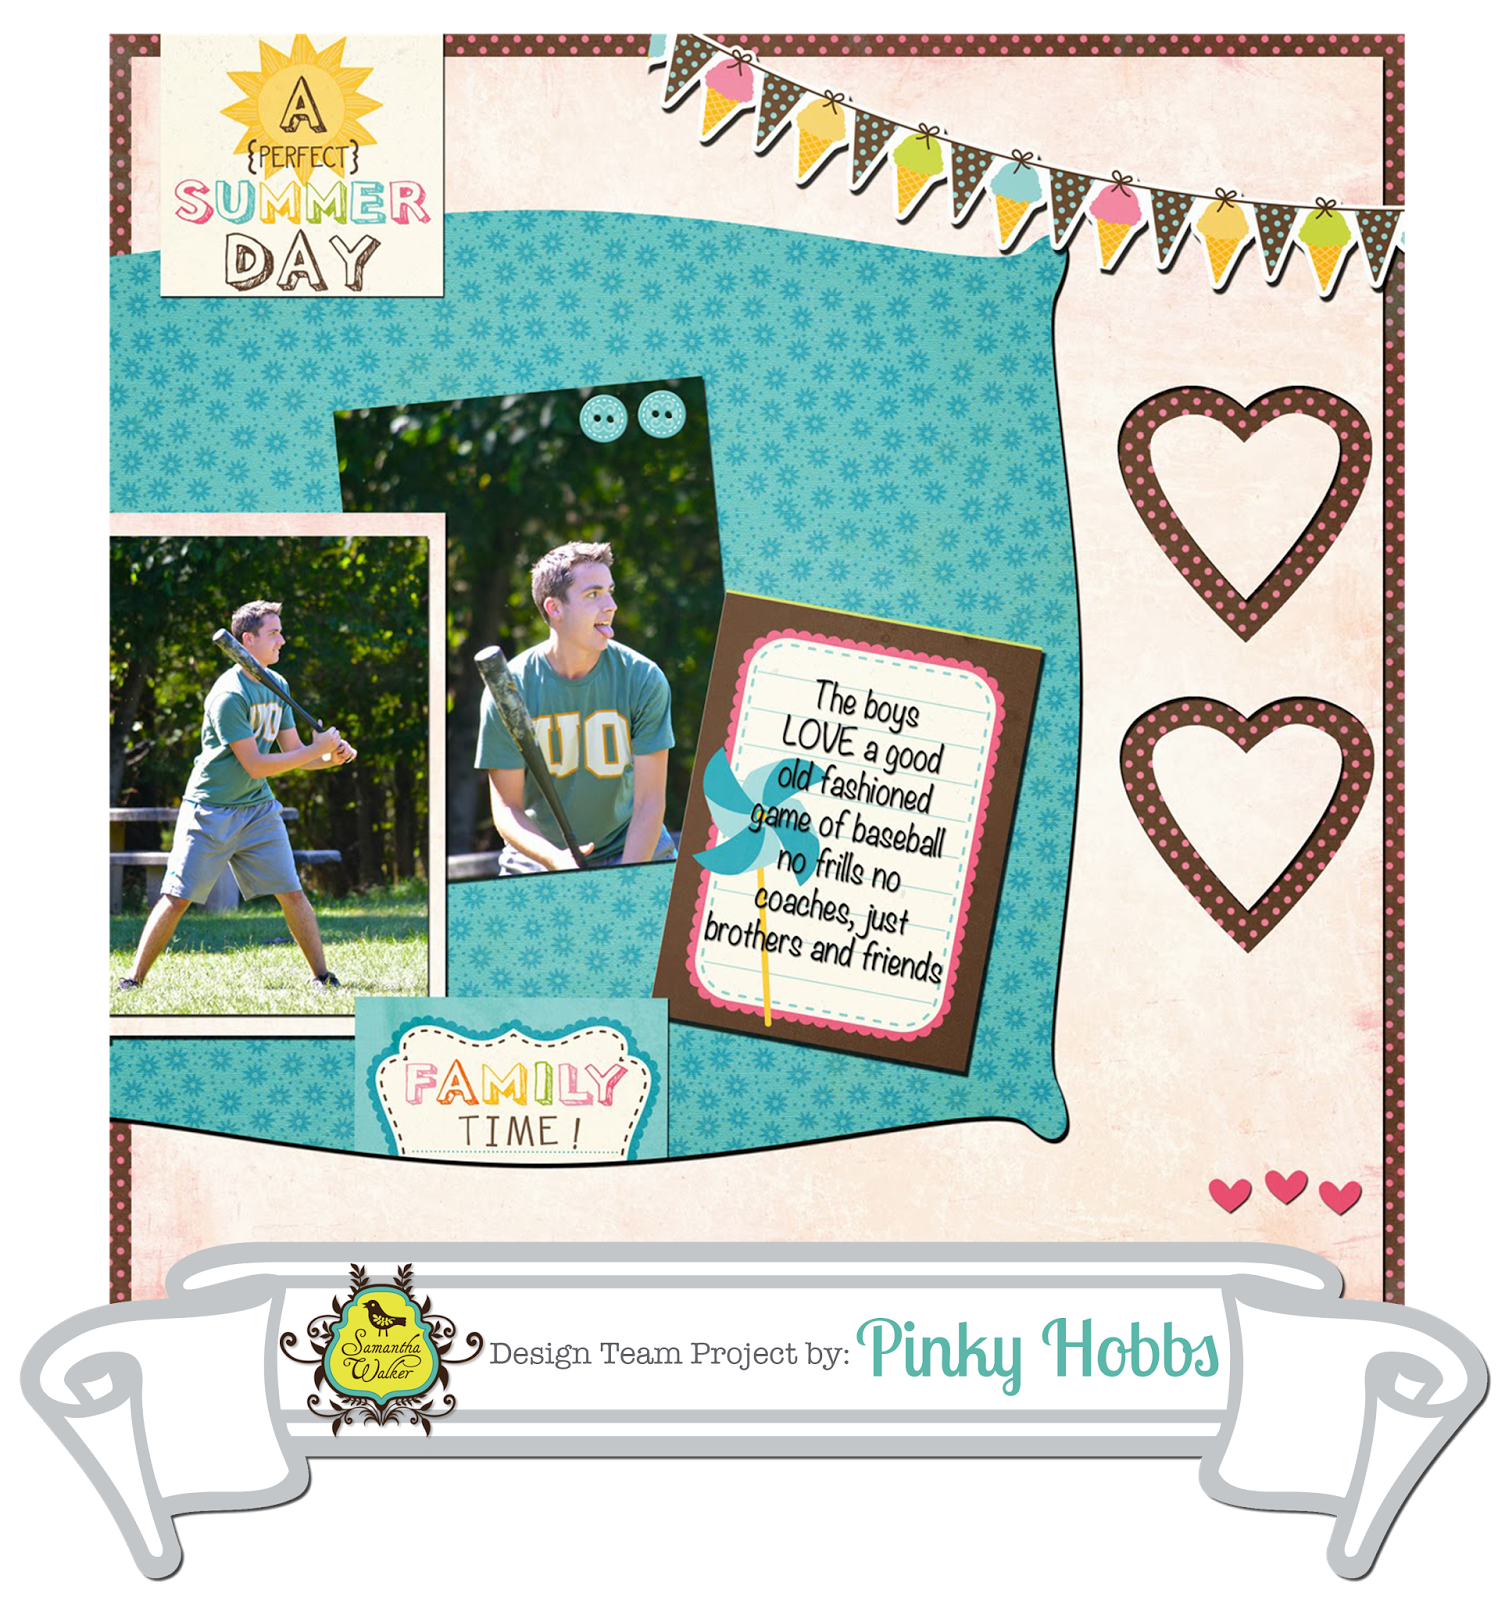
Punching Digital Paper with Pinky!

"Punching Digital Paper!": Using Custom Shape Tools In Digital Scrapbooking

Hey there SW friends,
it's Pinky today and I am so happy to be here!
You know I love to craft with paper, sew with fabric and many
other crafty things but I also love to do digital scrapbooking.

Sometimes it's nice to play with my computer and
just make pretty things but it can also be overwhelming. 
So today I wanted to share how I create "Paper punches" 
using my custom shape tools which are endless for Photoshop.

I am going to share an example by using the Rosie Collection
 but you can see the same results in the layout above using the 

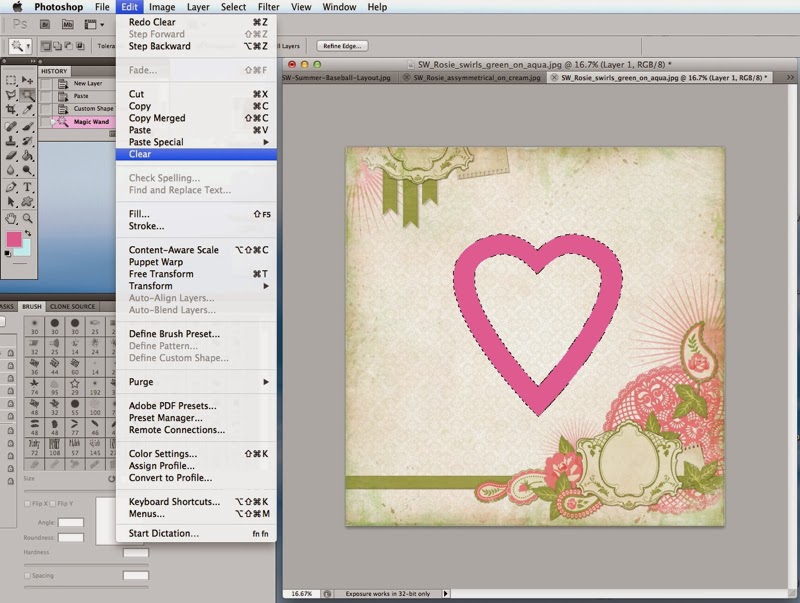
1. Open your base layer and page.
 2. Create a new layer.
 3. Paste new paper onto layer one.
 4. In sidebar find "Custom Shape Tool".
 5. Choose which shape you want.
(All Photoshop programs come with a few to try).
 6. Place Custom Shape Tool design where you want on the top layer.
Size to desired size.
 7. Using "Magic Wand" select shape.
 8. Clear OR Delete shape.
This will leave the patterned paper showing through behind.
9. For more dimension- change style of layer 2- to have a
"drop shadow".
 This creates a paper punched look.
You can also create a beveled look if you change your layer style to
beveled instead of drop shadow.
 Easy and adorable effect! You can apply this with stamps too.
Get ready to DIGI scrap this summer photos. I know I am especially 
in this cold weather, maybe if I scrap it- it will come!

Until next time- Keep on creating!


Saturday, August 24, 2013

Dress Card Tutorial with Maya

Hello Samantha Walker fans!

Today I am going to share a tutorial how to make this adorable dress card. Perfect for little girls that you may know (and not so little girls as well!). 


Download the 'may all your dreams...come true' card from Silhouette Online Store. That's how the cut file looks like after opening it in Silhouette Studio.


I decided to use papers from Samantha's 6x6 paper pads. First I cut the dress shapes from pink paper from "Giddy Up" girl paper pad. I love that the paper is double sided! I am using both sides of the paper for the dress.


More dress parts from the same pink paper.


Now the belt, the underskirt and the sentiment using the blue paper from "Cool Summer" 6x6 paper pad. 


Yellow wave using the yellow paper from "Cool Summer" 6x6 paper pad. I rotated the shape to make sure it will fit the 6x6 paper taking advantage of the fact that it is actually 6x6.5.

T
The last step - white card base.


Everything is cut out and ready to go.


Let's put the dress together - my favorite part!


I wanted to give it a little 3d effect so I added small pieces of foam tape between the skirt layers.


I mounted everything on yellow card piece of paper from "Cool Summer" paper pad and added few jewels.


That was really fun! I am sure I am not the only one who loved playing with paper dolls. That comes really close. Check Samantha's online store for more dresses. How cute is this "Party dress"? Or maybe the "Princess Dress"? They will look adorable on a card or layout or even home decor project.

Thank you for visiting today!
If you have  dresses on the brain after Maya's cute tutorial...
I know where you can pick up some fun retro-hip dresses at great prices...and one of my favorite places to shop for unique trendy clothes...if you haven't been there yet...you are missing out!

Sunday, July 28, 2013

Quick and Easy Paper Wine Tote Tutorial with Linda


Hi everyone! Linda here from Paper Boutique with Linda. I love Samantha Walker’s Cool Summer Collection and just had to use it to design an adorable wine tote. You do not need a cutting machine to make this quick and easy project.


This tote will hold all sizes of wine bottles, but I also designed it to hold a bottle of sparkling cider. Soda or juice cans also fit. You could also use this as a gift tote and add a pair of cute sunglasses, a bottle of sparking water and sunscreen. It is so versatile.


Samantha Walker’s papers work perfectly for this project. Isn’t the tag adorable? I used her
Cool Summer collection in the video and it is mega adorable!


Have a great week and thanks for visiting!

Linda

* * * * * * * 
Craftsy

Saturday, July 27, 2013

Thank You Card by Daniela Dobson

Hello, Daniela here with a Thank you card.


Samantha Walker products used:

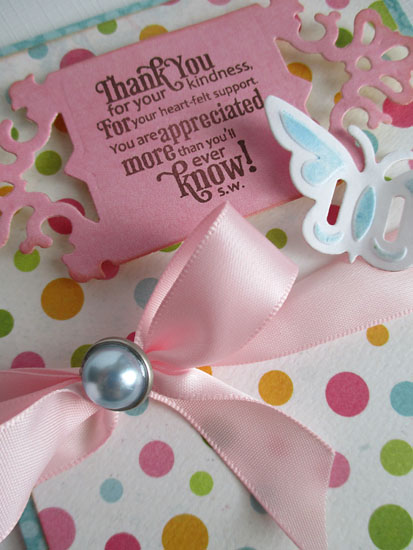
1. Make card base from Cool Summer paper collection. Cut a smaller piece from polka dot paper and adhere to the front. 
2. Die cut ornate square from pink 6x6 paper pack and stamp a sentiment from For All You Do Vintage Labels Three stamp set. Adhere to the top of the card using 3D foam squares.

3. Die cut and emboss butterfly from Butterfly Corners dies in white cardstock. While the cardstock is still attached, color the exposed/embossed parts with chalk.


4. Adhere butterfly to the card with 3D foam square. Tie ribbon into a bow and add a brad.


Thank you for stopping by today and let me know if you have any questions.


Saturday, June 22, 2013

Quick and Easy 3x4 and 4x6 Journaling Cards with Linda

Hi everyone! Linda here from Paperboutiquewithlinda.com. I  enjoy making quick and easy scrapbook pages using 3x4 and 4x6 journaling cards and photos and could not wait to share them with you.

I made the journaling cards and put this page together in just a little over ten minutes by using Samantha Walker’s new Cool Summer Collection.


Samantha’s Cool Summer collection is perfect for making adorable and easy, and I do mean easy, journaling cards. Be sure to watch the video to see how really fun they are to make and for more ideas. I love her Cool Summer collection and you will too!


For more adorable 3 x 4 journaling cards designed by Claudia Harvey, click here.

Have a great week and thanks for visiting!

 Linda

Sunday, June 09, 2013

Summer Fun: Quick and Easy Card Set by Claudia Harvey

Hi everyone! Claudia here. I am so excited to share my latest project using Samantha's Cool Summer kit with you! I just can't get enough of it.

Remember the journaling cards I created for my boys a couple of weeks ago? Well, today I created this [hybrid] card set for them. It was part of their "end of the school year" goody bag.
I thought it would be fun to have them mail these to their school buddies some time during the summer. We expect to have a super busy summer, so this is a little something we can do to help them keep in touch with friends. I don't know about you (or your kiddies), but we get excited every time we receive a card or a letter in the mail; especially my boys. I think their friends will enjoy getting some mail too, don't you think?

Here is a look at all the cards I created.
I didn't have a stamp to go with the paper, so I created the sentiment in Photoshop; lined it up along the bottom of the 11" x 8.5" file I created, and added the little ice cream. The ice cream is from Samantha's A to Z Pictorial Alphabets. The "ribbon" stickers are part of the sticker sheet included in the Cool Summer kit.

Here is a screen shot of what the file looked like before I printed it on white cardstock; I turned on the ruler and the grid so that I could align the sentiment and the ice cream on each side.
Once I cut and folded the cards, I added the pattern paper (from the 6x6 paper pad); added the stickers, and done! It was super quick and easy; I created the cards in about 30 minutes.
My boys loved the cards. They are so excited about the idea of writing to their friends, that they wanted me to address the envelopes right away. I have a feeling I will be making more of these soon. June 5th was the last day of school, so we are officially on summer vacation!

Until next time.

Lots of happy hugs,


Be sure to enter our current giveaway!  
Click on the image below to see all the details...
Related Posts Plugin for WordPress, Blogger...