Ads 468x60px

Showing posts with label Diana Fisher. Show all posts

Tuesday, December 02, 2014

Santa Snow Globe Card with Diana


Hi! Diana Fisher here with you today to share this Snow Globe Card with Santa Claus. I am sharing with you a different way to make the card than is featured on the example.  

I wanted to put the globe base on the inside of the card, making room for a "Merry Christmas" sentiment that I will be adding later on. 

When you download the card, here is what the studio file looks like.


I then separate the files based on what color card stock I will be cutting them out of. I had five colors on this one sheet. 


On this sheet I had the white pieces. 


This sheet was for backgrounds and the globe. 


To assemble my globe in the inside of the card, here is how I arranged that. You can see I still left room for Santa Claus to overlay the globe from the front instead of the globe coming up over Santa.


And here is the up close shot of Santa in the front of the globe. 


Remember, when working with a cut file, there are usually more than one way to arrange the pieces. Have some fun, play around with the pieces and see what you can come up with!


Tuesday, November 18, 2014

Turkey Place Card with Diana


Hi, Diana Fisher here with you today, and it's about that time for a well-set table. If you are like me, you want a little extra flair for Thanksgiving. Nothing says flair quite like turkey feathers!

Here is a quick tutorial on how I put together the Samantha Walker Turkey Place Cards. 


First, I set up my mats so that I can print quickly using multiple colors of card stock.

After cutting all of the pieces on my Cameo, I began to assemble the fan of turkey feathers. I make sure not to glue the tips of the feathers down so that they can fan out.


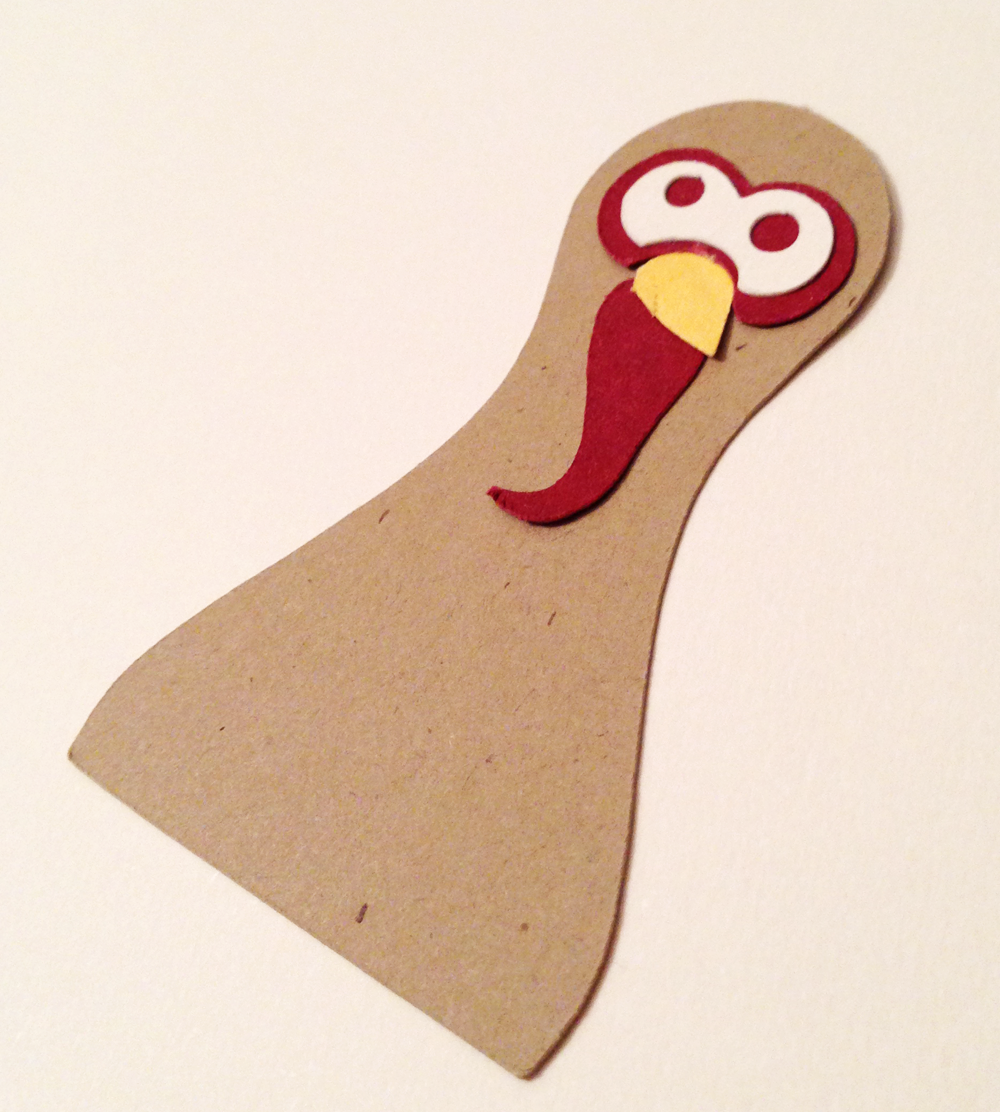
Then I assemble the turkey's face. Too cute, right? Love those eyes!


I think I assembled my place card portion a little bit differently than Samantha intended for the file, but I like the fan behind and the turkey head a bit further forward on the card. 

As you know, there are usually more than one way to assemble fun cuts like this one.


Happy Thanksgiving to those of you celebrating this month … and gobble, gobble!


Tuesday, October 21, 2014

BOO Banner by Diana


Hi! Diana Fisher here with you today to share a custom Halloween banner with you. I used the Samantha Walker Spook 31 font to make this "BOO" banner to add to my Halloween decor.


This font is so fun and versatile you could make any word or phase you would want for your banner. Here are the steps I took in the Silhouette Studio software to make my banner.


First thing is to type out the "boo" word and then select the downloaded SW Spook 31 font from your choices. You'll notice after I did that, that the two "o" letters are really close together. So close, it might affect the cut. 


To get the letter further apart, I selected the Character Spacing option and just moved them a bit further apart.  


After that was done, I added circles to the top of my letters. This gave me a space to thread the ribbon. This can be done with a small hole punch after you are done with cutting the letters, but I chose to use the Cameo for this step as well.


I cut my banner out of purple glitter paper and it turned out great, even with the small details in the spiders. 

Thanks for stopping to see my BOO banner. Download Samantha's Spook 31 font and create your own custom Halloween banner!


Tuesday, September 02, 2014

Chore Spinner by Diana


Hi! Diana Fisher here today to share with you this Chore Spinner I made for my son. As I'm sure with most of us, summer is a time to get off track and let the kiddos play a bit more than usual. Now, with fall back in the mix, it's time to get them on schedule and on task — which can mean more chores. 

For us, we have a hard time picking which chore my son should do — well not anymore! Using the Game Spinner file from Samantha Walker, I made this chore spinner to help my son choose which chore to do next. 


This is how the file looks when you download it. I did follow the advice for a more sturdy spinner and cut mine out of heavy card stock twice and glued the two pieces together. That seems to work really well.


Since I don't need the numbers, I deleted them. I then separated all of the pieces of the file and put them on two sheets. The backboard and base of the spinner on one with the double spinners, and below you can see the two sets of triangles for the spinner spaces.


Once I had all of the pieces cut, it was time to start to assemble the spinner.


Because my handwriting is not the best, I chose to use a letters stamp set that is small enough to fit the spinner's triangle shapes. I put the assembled words on an acrylic block and used black Versafine ink to stamp them,


After each piece was stamped, I assembled and adhered them to the circle. 


After that is done, you can layer the pieces together and assemble them with the small brad. Make sure that the brad is loose so that the spinner will move. 

I placed 3-4 sheets of card stock between the pieces to get them to lift off of each other and then put the brad in. I then removed the pieces and the spinner had plenty of space to spin around.


For one last touch I put a hole in the top corner of my background square and threaded it with a piece of twine and tied a loop. Now I can hang the chore spinner on a hook where we'll be more apt to see it and use it.

I hope you enjoyed this idea and fine fun ways to use the spinner file for yourself!

Tuesday, August 05, 2014

Dress card by Diana


Hello! Diana Fisher here with you today to share a tutorial on how to make this darling dress card from one of Samantha Walker's newest dress Silhouette files.

After you download the studio file, separate the pieces and set them into separate corners on your mat. You can then load all of the paper at once and make one cut. 


You can see here that I choses a palm tree pattern paper from Samantha Walker's collection Summer Lovin' from Carta Bella for my dress pieces, cream card stock for the dress base and a green card stock that matches the palm trees for the dress straps and center accent. 


After I cut them, here is what they look like off of the mat. 


After assembled, here is the pretty little dress. I resized this to just a little over three inches wide so it will fit the card, so you can image how small and cute it is assembled here. 


I want the dress to pop off of the card, but not be all alone on a white card base, so I get to work making a background with a large background stamp. I also cut a label using my die cutter to anchor the dress to the card. 


For a final touch, I tie some gold twine around the waist of the dress and then use foam adhesive to pop up the label off the card base and then the dress off the label.


The finished card is just perfect for sending a quick "thinking of you" note to a friend.


Saturday, July 26, 2014

Summertime Bookmarks by Diana


Hello! Diana Fisher here with you today. I don't know about you, but something about summertime calls for a paper book. The other nine months out of the year I am all set with my Kindle, but in the sun, I want paper. 

Since I don't always read paperbacks, I didn't have a bookmark last month when I stocked up on books. I've been using a Travis Hafner Cleveland Indians baseball card to keep my page. Obviously loaned to me by my eight-year-old son.


Today I decided no more baseball card (sorry, Travis). Using the perfect summer collection, Summer Lovin' from Carta Bella by Samantha Walker, I whipped up these three bookmarks for my summer reading. (Yes, three. I tend to read more than one at a time, and I will also lose one at some point.)


To get started, I gathered my trimmer, a tag punch, twine and the Summer Lovin' papers and stickers. If you do not have a tag punch, you can also use a regular hole punch (as seen above).

I started with a two inch wide strip cut from a piece of scrap paper. Because I chose a piece of scrap paper, the length ended up being 6.75".  It is up to you how long you would want your bookmark to be.

After I had the bookmarks cut, I started layering stickers and designs onto my bookmarks. At the end, I threaded the hole at the top with twine.


At first I loved the flamingo, but the more I worked with them, I am loving the green one in the middle. The one on the end is perfect for camping reading, I think.


Thanks for stopping today to see my bookmark tutorial. What a great way to use your scrap paper and those stickers that might never make it onto a layout. 


Tuesday, June 24, 2014

A New Silhouette Promotion!


It's time again for a Silhouette promotion! 

This month's promotion features...
 a CAMEO bundle 
and 
a Portrait bundle 
as well as 
30%* off all accessories and materials on Silhouette America.com
 (*exclusions will apply)

To get these deals, simply click HERE and enter promo code SAMANTHA!

Creative Team Member Diana created this fabulous 
Animal Party Mask Favor using her CAMEO!


Hi! Diana Fisher here with you today. It's about that time for parties for the little ones. Whether it is a pool party, a little weekend get together or a birthday party, you may want to have a little something extra for the kiddies.

Here is a step-by-step tutorial on how to make animal party masks using fun animal files you may already have from Samantha Walker. 

I started with the Ice Skating Raccoon file. She also has a fox and a bunny that would work, too.


This is the file as it is when you download it. You be un-grouping and deleting the pieces you don't need.

After you are done deleting, you'll have the body, nose and face. Using the eraser tool, erase all of the body creating a chin on the head. 


I measured a face and it seems like 10 inches wide is a good size to make the mask. It may be a little big on a toddler, but perfect for elementary ages. I also made the holes for the eyes on the mask larger.


Once all sized together, then separate the pieces and put them on two different mats. You can see here how I divided my pages. The top of the first sheet cut light grey paper. The bottom of it cut black.

Below, will cut dark grey for both the top and the bottom cuts. 


Before I cut this last file, I added circles to the sides of the head. This is where I will add twine to be able to tie the mask on.

Once you have all of your pieces cut, you can get some adhesive and twine to begin assembling the mask.


I wanted to have some flexibility for the eye holes on the head, so I did not cut them with the Cameo. I measured afterward and cut them with a small knife.


Once everything was assembled, I tied on the string, leaving one end loose for fitting.


There you have it! A fairly easy way to make masks for a child's event or party. You can have them ready and prepared in advance, or just cut the pieces and have the kids put them together for their party craft. 


Remember, these deals end July 5th!
Click HERE and enter promo code SAMANTHA!

Related Posts Plugin for WordPress, Blogger...