Thanks for popping in today!
If you've been reading the blog this week, you've already learned how to assemble a few of these glitter houses using your Silhouette cutting machine with my house files from the Silhouette store:
Today, I have a cute little red one to show you.
Here are the steps I took to finish my house:
1. Ungroup your file. Select your house piece and put in the live cutting area.
2. Cut the house piece in your desired color, I chose red for this house.
3. Cut the windows, roof in another color.
4. Cut the base in white (or green for a spring variation.)
I assembled it using American Crafts glitter card stock. It is as thick as thin chipboard and requires setting your silhouette machine blade depth to 9 or 10. It also requires use of a fairly new blade. Some glitter papers aren't quite as thick. You may find one that you like better. Just know that not all glitter paper needs the blade to be set that deep. Also be sure your mat is still sticky and that your paper is secured.
You can also use a thick non-glitter cardstock and add glitter to your house with glue. I recommend putting the glitter on the house before it is assembled.
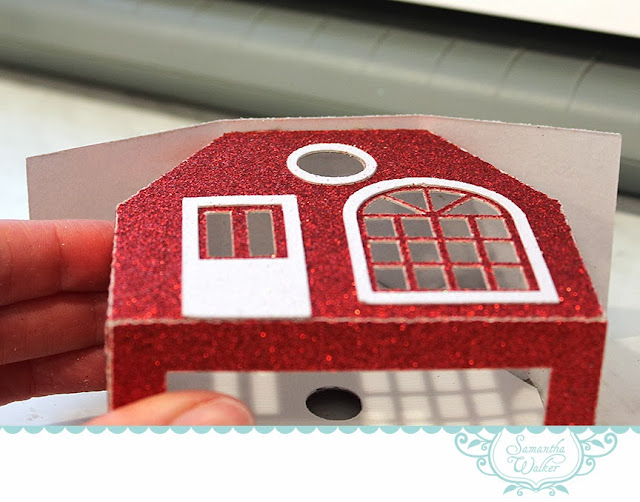
5. Gather your cut pieces, and glue the window frames around each window, and glue the door onto the front. You can use a hot glue gun, or a paper glue that works with glitter.
6. Crease all the fold lines.
7. Put glue on the tabs, and glue to the side walls of the house. You will be able to hold the tabs to the sides through the rectangle on the bottom of the house.
8. Glue the side wall tab, and close the house sides.
Notice how my house has the unsightly barcode showing from the back of the card stock? I included a wall backing piece just in case you run into this and want to cover it up. You could also put patterned paper here and "wallpaper" the interior of your house if you desire. This piece is not necessary for everyone, so some will find that it ends up being an extra piece.
9. Glue the optional wall backing piece to the back wall with a glue stick or other smooth paper glue.
10. Glue the roof on starting at the center, then do one side, then the other. I used a hot glue gun so I wouldn't have to wait for drying. If you have a very thick card stock the glue gun works great. This is not a great option for thinner card stock as your glue lines will end up chunky. Just say "no" to chunky.11. Notice that there is a little overhang on the roof. Make sure you center this.
12. Now glue each side of the roof into place.
13. Glue the house to the base…make sure to leave more room in the "front yard" and only about 1/2 inch in the "backyard".
14. Add one or two bottle brush trees to the front yard.
15. Add a wreath to the door if desired. I have both versions below:
Happy Crafting!


No comments:
Thanks for taking the time to leave a comment! Without your readership, I wouldn't be doing a blog.
My blog is supported by sponsors and affiliates. If you decide to make a purchase through my affiliate links, I am paid a small commission for it. This doesn’t cost you anything additional. These commissions help to keep the rest of my content free, and allow me to blog more often.
From time to time I make recommendations of products that I love to use, or products that I have designed. Occasionally, manufacturers send me products to play with. They have not obligated me to show them on my blog or review them. I only make positive remarks about those things that I truly love and enjoy to use. Everyone's personal experience with various products may be different, as we all use things in different ways. I am not compensated for these remarks, and merely pass on my opinion to you as a reader. I hope you find my opinions valuable.
Thank you for supporting my blog!