Ads 468x60px

Showing posts with label silhouette tutorial. Show all posts

Thursday, March 12, 2015

SVG or Silhouette Cuckoo Clock Assembly Instructions

This week I've been working on a big project...

A really...REALLY...BIG Project

I didn't realize how big, until I got into it. 

For the longest time, I've been wanting to make some of my cuckoo-clock paper piecing designs into 3-D actual working clocks. I worked up a rather large file with options to make the cuckoo clock with or without the clock face insert. I even figured out a way you can buy the clock hands mechanism and use the cuttable clock face that comes with this download. 

I'll have to split my tutorial into a two-day post...but I think it will be worth the "lengthiness" so I can really show you how to do this. 

You will find part 2 at this link here: http://samanthaleewalker.blogspot.com/2015/03/part-2-cuckoo-clock-tutorial.html

and a second cuckoo clock at this link here: http://samanthaleewalker.blogspot.com/2015/03/paper-cuckoo-clock-assembly-tutorial.html

and now...you can also create an embroidered 3D cuckoo clock out of fabric. Details for how you can get this embroidery file and project free, can be found here: http://samanthaleewalker.blogspot.com/2015/07/new-janome-free-embroidery-project.html

First off...you need a cutting machine:
Silhouette Cameo or Portrait electronic cutting machine http://www.silhouettedesignstore.com/?page=view-shape&id=76562

To make the cuckoo clock, you will need one of these cutting files:
.studio or .svg users: http://www.silhouettedesignstore.com/?page=view-shape&id=76562

Finished Dimensions: 
10 1/2 inches tall without the hanging pinecone weights, 
17 inches tall from top of the roof peak to the bottom of the hanging pinecones. 
6 inches wide
3 1/2 inches deep
2 3/4 hole for clock in optional front (you can modify the file to accommodate a larger clock if you wish)

Clock kit dimensions:
Accommodates a 2 3/4 clock face with round back Hole in front of the clock that holds the clock kit, may need to be enlarged depending upon the clock kit you get. Please test your sizing first. (see the piece in the lower left hand corner in the picture below. That big circle may need to be enlarged or shrunk down according to the size of your clock kit.)
-or-
2 1/2 inch to 3 inch clock hands kit.

Paper: 
12x12 Cover stock, or other heavy weight card stock. I used double sided Carta Bella Card stock--it was perfect for this project. 
3 sheets the same color for the front, back and sides of the cuckoo clock house.
2 sheets of one lighter and one darker for the pinecone weights and other accents.
2 sheets of one lighter and one darker for the roof shingles, shutters, fences and other accents.
1 sheet for the bird and clock face. I used white. You may need another sheet if you want your bird a different color.
1 sheet for the optional clock holding piece. (shown as a weird flat on one side circle and a strip with teeth. You do not need this piece if you are not making your cuckoo clock into a real clock.)

Other Supplies:
Brads
Tombow Mono Multi Liquid Glue
Scotch ATG or other tape runner

Software set up:
If you are using the one page color-coded version of my file, the file is grouped by color. After ungrouping the whole file once, you will be able to easily move each group of colors into the live cutting area to make paper and mat changes a breeze.
If you are using the one page black and white line art version of my file, the file is grouped by suggested color groups, you can refer to the picture above to see color. After ungrouping the whole file once, you will be able to easily move each group of colors into the live cutting area to make paper and mat changes a breeze. (Groupings may not hold when uploaded into some software.)

If you are using my multiple page version of the file, you will have to open each of these color groups separately, and they will be in a group that will fit on a 12x12 mat.

Today I'll show you how to make the clock with the cut paper face that is included in this download, with instructions for the option of using real clock hands from a clock kit.

1-3. After cutting all your card stock, sort it out, then find the circle clock pieces and the clock hands. Stack them on a brad, then attach to the front of the cuckoo clock. 
***Optional***
Cut a larger hole through the circle pieces to accommodate a clock hands kit, and put the post through the holes. Since the hands kit post will go through 4 layers of cover stock, it is sturdy enough to support the battery pack on the back side.

4-7. Find the window box pieces. Fold as shown. Make sure to glue the end tabs to the outside of the box.

8-10. Attach the window box to the front window. Next, find the side pieces, then fold them as shown, then attach the window boxes behind the windows. Use a complimentary color to show in these window boxes. 

11. Doesn't that look clean and nice with the window box behind the window.

12-14. Layer the shutter pieces, then fold the hinge. Glue on the window frames. Place the hinge behind the window, that way you know which side of the hinge you need to glue.

15. Add the fence, and scalloped roofline.

17-19. Find the pinecone weight pieces, and bottom of the box. Line them up and glue. Find the linking chain, glue so that the top of the tab lines up with the top of the tab of the pinecone weight piece. Make sure you do not get glue on the chain part...only the tab.

20. Take the pinecone weight assembly, and slide it through the slot as shown. You will have to "weave" the tabs so that all the chain and all the pinecone weight pieces come out of the other side. Glue the tabs down. 

21. Carefully fold the pinecone weight assembly at a 90 degree angle from the bottom. These will now be able to hang from the bottom.

Scroll down below the next set of photos to continue the tutorial.
22-24. Gather up your cut pieces, and find the roof pieces. You will fold these as shown, then glue the roof piece that has the one side with a single tab to the other roof piece. 

25. Find the scalloped roof pieces that have the fold lines on them. Now fold them, then glue the tab to the ends of the roof so that the fold line lines up with the second fold line on the roof. See picture.

26-28. Layer on the shingles. You may wish to line them up before gluing to give you an idea of spacing. Then glue the center shingle piece on top. You can ruffle or roll out your shingles to give texture. 

29. We now have all the separate pieces assembled, we just need to get them together to make the cuckoo clock.

30-31. Glue the two sides to the bottom as shown. Make sure that when you fold the corners that all of the tab is covered by the bottom of the clock. 

32-33. Glue the front and back of the cuckoo clock to the base as shown.

34. Glue the side tabs to the back. Check your corners that everything is lining up neatly.
35. Fold the front then glue the front to the side tabs.
36-38. Attache the shingled roof to the tabs at the top of the front and back pieces. Go around the under side of the eaves with the roof piece, so that the scallops hang on the sides, then attach the tab to the top of the side panel. 
39. This is how the inside of the roof eaves corner should look when the tabs are glued properly. 
40. Folding the last side of the roof is tricky. You'll do it the same as the other side, but you will need to tuck the last tab from the bottom of the roof in at the top of the side panel. If you are working with the open back cuckoo clock, you will be able to reach inside and make sure that the tabs are smoothed to the side panel correctly. 
41. Ad the wing to the bird, then put glue or adhesive on the bird tail feathers. Stick the tail feathers inside of the front window, then bend the bird outward. 
43. Ta da! 

Tomorrow, I'll show you how to transform this cut file into an actual working clock! Whoo hoo! 

I hope you will come back to see how it's done.

Tuesday, October 14, 2014

Tutorial: Peaked Roof cupcake boxes for your Silhouette cutting machine

This week I uploaded peaked roof cup cake/gift boxes into the Silhouette online store. You will find a few options within the files to create a box that is just right for you. There are two options for the bottom of the box. One would be better for cupcakes, and has a dip on one side so the cup cake can go in and out of the box easily. You will want to cut the cupcake base holder if you use this option. The other box bottom does not have a dip and would be better as a gift box. There are optional contrasting panels that you can use underneath the cut part of the design. You can use the box without these panels as well. The elephant box above is an example of using contrasting panels on the sides and on the peaked roof. The other boxes above only use panels underneath the roof.

For these projects you will need this Equipment:
A Silhouette Electronic Cutting machine. This file works great with both the Silhouette Cameo and the Silhouette Portrait cutting machines. If you use the portrait machine, you will need to rearrange the pieces to fit in your cutting area. To move the pieces around individually, ungroup the file under edit.

For those of you who are new to my blog, and may not have heard about the Silhouette electronic cutting machine(the machine I used to cut this file out,) I put together a product review at this link. You can read other's reviews of the machine here. This machine will change the way you craft, and most importantly, you will get lost in the fun of it all!

Adhesive:
Glue (use a good paper glue like Tombow mono liquid glue it will not warp your paper.)
-and/or-
Double Sided adhesive. (I use a Scotch ATG 714 gun. Scotch got smart and made a similar one for crafters the Scotch Cat 085--it's quite a bit less $ than the 714. I like that it has a seemingly endless roll of adhesive. It saves a ton of money in the long run when compared to little craft adhesive dispensers. Especially if you buy the adhesive reels in bulk.)

You will also need these Silhouette Files:
(links will appear here as they appear in the silhouette store.)

Here are some step shots to guide you through the assembly process:

Saturday, July 19, 2014

Creating a Chalkboard Home Decor Piece

Hi Samantha Walker fans!  Christine joining you today with a simple weekend project to try!  The chalkboard trend is still going strong and today I thought I'd share with you how I created a chalkboard home decor piece using Samantha's files!  To do this you will need one piece of black cardstock - even a faded or uneven tone will work here!  You will also need a Silhouette Sketch Pen in white.

To begin you will want to use the 12 X 12 Doily Set Large Open Scallop Edge #60394 set and eliminate all but one of them on your screen

Then add the sentiment (Home is' 43898) to the middle stretching it to a size that you are happy with!

Insert your white sketch pen and let it do it's work on the design.  Once it is done remove the sketch pen and the now sort of chalkboard looking piece.  Use your white sketch pen to add some chalky-ness to the design!

I filled in spots throughout the letters and swirls.  I also just kind of scribbled to create a smudged look in several places.  That's the cool thing about chalk - it has a messy-ness to it that makes it unique!  I then attached the whole thing to a square canvas so I can hang it up on my wall.  

Best of all you don't actually have to deal with chalk!  You get the effect without the real mess!

Thanks for joining us today and enjoy the rest of your weekend!


Saturday, June 28, 2014

Sunny Shaker Box Layout with Cathy

Hi Samantha Walker fans!  Cathy here to share a layout with you featuring an adorable baby girl, Samantha Walker's Carta Bella Collection Summer Lovin' and a couple of Samantha's Silhouette files.  I used the Sunny Word Logo Set #10879 and Scalloped Circle Border Set #9359 to create this bright and sunny layout. I did another shaker box layout for the Creative Team blog hop this month with a square shaker box, you can find that tutorial here.  You can make a shaker out almost any shape, just by adding layers of card stock in the basic shape of your cut.


I cut the Sunny first out of the white background paper...don't remove the mat yet, and offset your title, switch the blade out for a Silhouette Sketch pen and send it through again.  I backed my negative cut title with the super cute flamingo paper from the Summer Lovin' Collection.


Next, I cut my sun and border out of yellow card stock.  Ungroup the sun and you will be able to remove the swirl.  The sun without the swirl will be the back of your shaker box.  


Again, don't remove your mat, but you can delete the bottom sun and border from your screen.  Now, do an internal offset of the sun and then change the line to a dash. Switch your blade out again for a Silhouette Sketch pen (make sure to remove the original sun so that you just have the dotted line) and send it back through!


Next, cut a few circles out of yellow card stock.  These build the depth for your shaker box so that you can add sequins and such.


After they are cut, glue them all together to for a stacked circle.


 Somehow I deleted a photo step here, sorry! Just glue this ring to the solid sun, fill with sequins and add the swirly cut sun that you lined with clear plastic so that your sequins stay put.


I love this adorable photo of Kate at the beach with the Sunny title and shaker box....it highlights her personality so well. She brings sunshine wherever she goes.


Click on the pictures below to go right to these files on the Silhouette Store.


Thanks for joining us today at Samantha Walker, we can't wait to see what you create!


Tuesday, June 24, 2014

A New Silhouette Promotion!


It's time again for a Silhouette promotion! 

This month's promotion features...
 a CAMEO bundle 
and 
a Portrait bundle 
as well as 
30%* off all accessories and materials on Silhouette America.com
 (*exclusions will apply)

To get these deals, simply click HERE and enter promo code SAMANTHA!

Creative Team Member Diana created this fabulous 
Animal Party Mask Favor using her CAMEO!


Hi! Diana Fisher here with you today. It's about that time for parties for the little ones. Whether it is a pool party, a little weekend get together or a birthday party, you may want to have a little something extra for the kiddies.

Here is a step-by-step tutorial on how to make animal party masks using fun animal files you may already have from Samantha Walker. 

I started with the Ice Skating Raccoon file. She also has a fox and a bunny that would work, too.


This is the file as it is when you download it. You be un-grouping and deleting the pieces you don't need.

After you are done deleting, you'll have the body, nose and face. Using the eraser tool, erase all of the body creating a chin on the head. 


I measured a face and it seems like 10 inches wide is a good size to make the mask. It may be a little big on a toddler, but perfect for elementary ages. I also made the holes for the eyes on the mask larger.


Once all sized together, then separate the pieces and put them on two different mats. You can see here how I divided my pages. The top of the first sheet cut light grey paper. The bottom of it cut black.

Below, will cut dark grey for both the top and the bottom cuts. 


Before I cut this last file, I added circles to the sides of the head. This is where I will add twine to be able to tie the mask on.

Once you have all of your pieces cut, you can get some adhesive and twine to begin assembling the mask.


I wanted to have some flexibility for the eye holes on the head, so I did not cut them with the Cameo. I measured afterward and cut them with a small knife.


Once everything was assembled, I tied on the string, leaving one end loose for fitting.


There you have it! A fairly easy way to make masks for a child's event or party. You can have them ready and prepared in advance, or just cut the pieces and have the kids put them together for their party craft. 


Remember, these deals end July 5th!
Click HERE and enter promo code SAMANTHA!

Monday, June 23, 2014

Silhouette or SVG cutting Tutorial: Circle Baskets

This week in the Silhouette Online Store, you will find several new baskets in my store section. These are all based on a simple circle and the main part of the basket can be assembled with brads or adhesive. If you choose to assemble with adhesive, feel free to delete the brad holes in the Silhouette studio software.

For this project you will need this Equipment:
An electronic cutting machine. The download is available in .studio format for the Silhouette Electronic Cutting machine. It is also available in SVG cut file format for most other cutting machines like the Cricut Explore. Both file types through the silhouette store...links below.


You will also need these Silhouette Files:


Cardstock is from my Summer Lovin' collection from Carta Bella pattern is "Sunshine" 
Open the file in the Silhouette software. Cut the file out in a double sided card stock.

Fold inward along the dotted lines. Line up the curved sides so the brad holes line up.
Insert a brad into the lower lined up holes. Place basket handle at side and line up brad holes and insert brad. 
Get the bow piece and curve it with your fingers.
 You could also curve the bow with a pencil or a pen.
Put tape or glue at the center of the paper bow. I used a Scotch ATG tape glider. 
 Pinch the bow at the center where you applied adhesive.
 Take the small strip and apply adhesive then wrap around the bow.
Attach the bow to the front of the basket with adhesive, or a brad. (Brad holes are not included for that option, you would need to use an awl to punch a hole first. )
 This basket is assembled much the same way as the basket above with only the difference of the flag front. 
 Cut the pieces out in traditional colors for the flag, or come up with your own creative combination. 
 Simply layer the pieces as shown in the photo above, then attach to the front of the basket. Fold and assemble as shown in the steps in the basket above.

Multi Layer Bow Instructions


Find the T shaped piece, this will be your bow center. 
 Curve both sides with your fingers or around a pencil.
Curve each of the other strips around your fingers or around a pencil.
 Attach each section at the center with adhesive.
 Stack the bow pieces on top of each other and apply adhesive between each layer.
 Finish the bow with the T-shaped section and wrap that tail around the bow to secure it. 
  This basket is similar to the one above, the layered bow is pinched in the center instead of straight. 
 This basket has a fun scalloped edge and a scalloped layered bow. Assemble the bow as shown above.

 
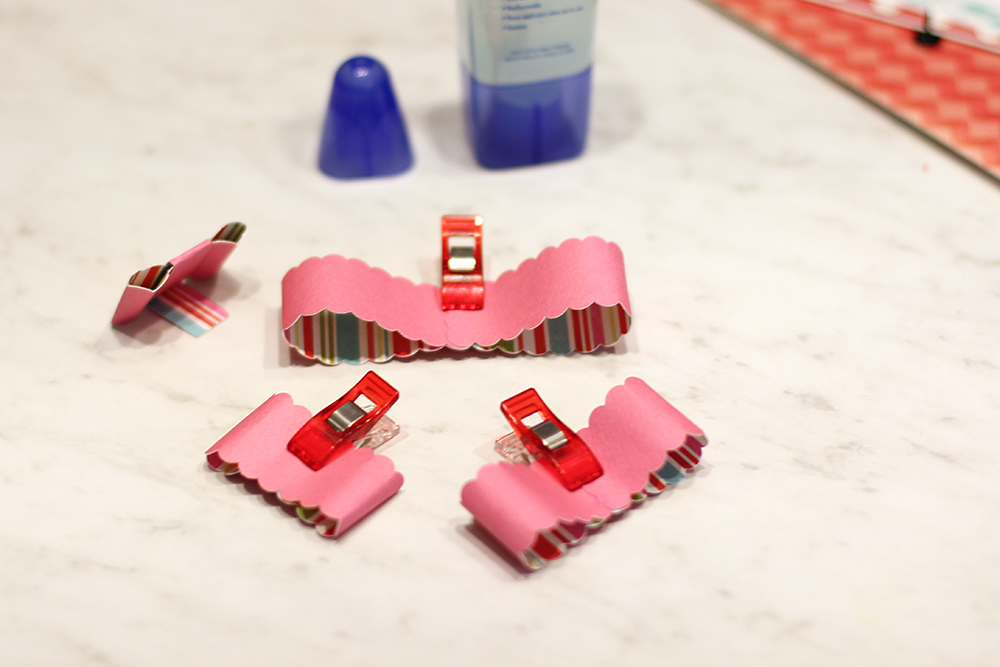
If you use glue, use wonder clips to hold your paper in place until dry. A good paper glue doesn't take long to dry...but clips certainly speed up the process even more!

If using glue, use a large wonder clip to hold the bow on while it dries. 

This basket features a large modern daisy-like flower. Simply manipulate the paper petals to fashion your flower how you would like. Layer the pieces and you have a fun embellishment for your basket.

Related Posts Plugin for WordPress, Blogger...