Ads 468x60px

Showing posts with label art licensing. Show all posts

Wednesday, January 04, 2012

"Hi Resolution - A New Year's Studio Meet and Greet"

Updated: If you are looking for my studio remodel project, scroll down...I talk about it in this studio-tour blog-hop....then you may want to hop to the other artist blogs to see their working studios. It's a treat!

Thanks for stopping by!

If you've been hopping through the other artist's blogs in our group before you came to mine, I bet you've already enjoyed so much before landing here. Your last stop should have been Phyllis Dobbs blog. If you happened upon my blog before going through the other blogs in this fun hop...may I suggest you start at the beginning Aaron Christensen's blog and enjoy the journey.  We are having a "Little Studio Tour and Meet and Greet." I have some incredibly talented and wonderfully warm friends...and I think you will agree too! After my blog, you will visit the outrageously talented Sharon Himes.
Samantha Walker copyright 2011
Now that we've made it through the holidays...and we've entered the New Year...I've had the chance to reflect on my past year with hopes of how I can make this year even better.

Last year...
was such a fantastic whirlwind of a year, with so many exciting things happening in my licensing business. In addition to continuing my design work in fabric, paper crafts and home decor, I added two more regular licenses. I am thrilled to be designing cut and emboss dies for Spellbinder's Paper Arts.
Samantha Walker copyright 2011
What's my big project this year?
This year, my husband and I decided that we would finish our basement, which will include a whole revamp of my studio space, and add a man-cave for him.

So Why remodel?
We've been in our home for a while, and our kids our getting older. We are looking for a place to to entertain older kids and their friends.  I'm also looking forward to creating a creative space that works. I started working more...and my space wasn't sufficient to all the kinds of work that I was doing. It will be so nice to finally have one central area that I can design, sew, craft, play, work...etc.  I've been divided between areas as my computer is currently upstairs...and all the crafty stuff is downstairs.  Bringing it all together this year is going to be fabulously fun!
Samantha Walker copyright 2010
Well...this is what my studio used to look like...
In all it's uninspiring glory, and not connected with my computer area--which is upstairs in the office. It would be a great place if it were just a hobby space, but my hobby has now become work, and this space just hasn't been very practical these days. I spend a lot of time traveling between the computer upstairs and this space here.

It was also the only room finished in our basement. You had to walk across the entire unfinished basement part to get to this room that was finished by the previous owners. I was grateful to have it...but it was time for a total makeover. 
Tearing down walls...
We decided to tear down the closet wall, and put the door on an entirely different wall. The closet area, will become my main crafting area. Here's a crude drawing of what I hope the crafting alcove will look like when it's finished:
Collecting used items:
I've been buying used cabinets through local classified adds and have been putting the area together with the pieces that I've collected. The turquoise cabinet in the middle is a kitchen buffet cart that I'll be painting turquoise and distressing. The cabinet group in the middle is a bargain I found on an IKEA glass cabinet and two side cabinets. I also found 4 file coordinating file cabinets for my room...two will serve as a base for holding my countertops--we will put bead board on the outside edge to make them look nice. My husband will help build some shelves to connect the cabinets.  The panel on the right side wall is a fold down ironing board that mounts between the wall joists.  It will fold over the top of the counter, I'm using every inch of space I have.  

This is what my room looked like a few weeks ago...
So in this picture...I'm standing in the area that used to be my closet looking into my room...
What a mess!   The contents of my studio and a myriad of other basement contents are under that tarp! You've heard the phrase you have to make a mess in order to organize a mess. It can only get better from here...right?
You can see the full effect of tearing down that wall here...
Yup...the walls are completely gone on the closet side. We had to install a beam and a post...because evidently, the front wall of the closet happened to be a support wall.  Dang...
Framing it in...
Here, we've framed in the back crafting alcove and built the post that holds the beam right into the wall. You may wonder why the strange cut-out shape on the backside of my room...we have a clever idea of adding a kitchenette with a restaurant booth in that alcove.  If you use your imagination...that black post thing-y in the middle of the alcove will attach to the wood support between the wall joists to hold up the table between the booth seats. We have literally measured the furniture on both sides of the wall to determine where the walls will go...there won't be a wasted millimeter of space when we are done. 
A room with no doors...
In the above picture, you are looking at my room but can't see in. The wall in this picture is where a fun sliding barn door will go...if you haven't figured it out already...the room has no door at present...we boxed it in on the other side too, where we rebuilt the closet area into a craft alcove. 

So right now, if you want anything from that room, you have to go through the wall studs to get it. 

Unfortunately, all the Christmas wrapping paper is in there under the tarp somewhere, and I still have lots of things to wrap. I felt as magical as Santa Claus with the ability to go through walls.  Not really...I felt more like the abominable snowman getting a nice white coating of dust and trying to squeeze through the studs while holding boxes of wrapping stuff. I made it back through to the other side, but the box didn't. I had to grab single rolls, one by one through the studs. It's going to be crazy around here for the next few months.
In this photo, I'm standing where we are going to cut the space for the barn doors in my room looking out to the room that will be next to mine. This will become our wide open family room.  Unfortunately, I didn't get a picture of the more interesting window side of the room. It is light and bright for a basement.  My ultimate goal is to get the basement not to look like a basement in the end.
The Plans:
You can see what I mean from using every last millimeter of space...and building our walls around furniture. If you visited my blog a few weeks ago and saw the post on my studio remodel then...I've modified my plan a bit as we've moved along on our project.

Updated to add... This was just one of 9 posts detailing my studio remodel project.

If you want to catch up on the whole project you can read more in these posts here:

The beginning plans sketched out (don't laugh at the timeline here...Putting it together has truly been a process.)
The story of the Printers Cabinet and Armoire (the debate to paint or not to paint...so glad I did not paint!!!)
The Floors this post
The extras 

Thank you again for stopping by! I am grateful to those of you support my products...I wouldn't have the opportunity to design for these companies, without those of you who choose to create or decorate with my designs...Thank You!  For those of you who aren't familiar with my designs, and this is your first time visiting my blog...Thank You also for taking time to get a little glimpse into my world.  I appreciate you too!

The next blog on the hop is Sharon Himes, make sure to pay her a visit...she is a You'll love here art studio in a quiet hideaway! 

If you get lost....
Here is a complete list of the bloggers participating in this studio meet and greet...you are in for a treat!


Tuesday, November 23, 2010

Introducing Karen Maldonado

The next Creative Team member I would like to introduce to you is, Karen Maldonado. She has a very ornate, yet graceful style, and loves to work with sultry colors.  She caught my eye because of the little details that she adds to each of her creations.  You can tell she loves crafting as she pays attention to placing everything "just so" on her cards by adding little flowers or ribbons in just the right place.  I know the recipients of her art must feel loved when she passes on a little piece of herself through her creations.  Heck, I feel loved anytime she puts a few of my products into her designs.  I have linked any of the Silhouette dies that she used directly to that file on the Silhouette site to make it easy for you to find the die. 


I love pennants...they just scream Celebration!  Combine them with fun colorful paper, and you've got a paper party going on.  This card is so cute!  For Karen's "Birthday Wishes" card she used die cuts from the silhouette digital download store (Polka Dot Pennant  -C00951-19210) She used two of the four layers to create this string of pennants.  There is an addtional polka dot layer and offset pennant layer you can use too!


Karen gives a festive twist to a Halloween card by creating a hand made paper carnation.  She has a tutorial on her blog for this technique. She used a few of my Sillhouette die cuts to complete her design:
"Bats" (C00927_19210) and The card base is another Silhouette die cut "Artisan Nesting Rectangular" (C00685_19210) which can stand upwards or sideways!!


What kid wouldn't love to receive this little treat bag that Karen created for Halloween.  She used  my Silhouette die,"Scalloped Favor Bag (C0156)" and also used my "Hanging Ghost (C00931_19210)" Silhouette die. She cut two each of the ghost, covered the back of the ghost with black cardstock so the eyes would be black.  This is an excellent tip for minimizing layering details when using the Silhouette. Cute and clever!

In celebration of World Cardmaking Day, Karen created this beauty. The card has a antique vintage feel complete with lace and aged ink techniques. She used my Silhouette (Crown Border Square/C00637-19210) as her card base.  There are also some more of those cute handmade paper flowers...tutorial here.


Isn't this fun? I love the way Karen added a pink bow to my Silhouette "Kitty Cat Favor bag" die.  One of my favorite things about this project is how she used little pearls for the shine in the cat eyes...that's brilliant!!

Karen made a little mini album with a couple of my Silhouette dies (8 piece scalloped round corner set C01032_19210 & swirly frame C00796-19210) which she squeezed so it was more square and omitted the swirly center.  That is something that is always good to remember about the silhouette, you can always choose which lines you want to cut by ungrouping the file and deleting what you won't be using in that cutting pass.  Karen makes use of that feature all the time to make shapes work for her projects. and I tell you what...Karen is like the queen of flower making...here's another cool handmade flower...details for making this sweet beauty are on her blog.

Karen also has a lot of fun with Copic markers...a fun blending markers for stampers...if you haven't heard of them...check them out...very cool stuff!  She used several of my my silhouette dies to create the center of her card including: artisan_with_swirls_C00487_19210, she omitted the swirl part of the design and just used the out line. That is a cool thing you can do from within the Silhouette software. She also used: 8_piece_mini_scalloped_oval_set_1_C01037_19210


I think this card is just lovely.  Karen put an unexpected bright pop of color in the ribbon and the pink pearls--great idea to add contrast against the muted background. She used a few of my dies from Silhouette including the dual_edge_half_moon_scallop and 3_nesting_retro_flowers_C00494_19210 for the base of her flower.  

Karen has a knack for making cute little journals like this beauty. She used one of my Silhouette Dies called "3 Nesting Artsian Shapes" (C00493_19210) " it comes with three different files in this one set!!  Of course you know I am going to say I love her flower and ribbons.  


This card that Karen designed makes me feel warm and fuzzy.  Love the autumn cozy colors of the designer papers she used (Basic Grey's Wisteria collection!)  I love Basic Grey and how they revolutionized the scrapbooking industry when they entered the market.  They are an awesome company. She also used my "Artisans Nesting Rectangular (C00685_19210)" Silhouette die design to mat her cute little stamped girl.  Then, she tucked three of my Silhouette "Snowflakes (C0301)" dies to go with her autumn/winter theme!  She was clever and cut the snowflakes in 3 different sizes.  I think the snowflake die would also be cute cut large and used as a doily under a plate of holiday cookies.

I hope that you enjoyed getting to know Karen.  I certainly have been enjoying getting to know her through her designs.  I hope you visit her blog and frequent it often as there is always some kind of inspiration there for you to enjoy.  

Thursday, November 18, 2010

Introducing creative team member Eva Dobilas!

Last month I selected a team of 10 fabulous crafters to work with my product over the next year.  I selected them because each of them had a unique "something special" about the way they design.  Some love bright and bold...some like a simple graphics approach, some love to make cards, some paper mache, and others are true scrapbookers at heart.  I have had the joy of watching them post projects on my Facebook page that feature the use of my products.  I would love to introduce you more in-depth to each of them over the next week.  


Today, I am starting with Eva Dobilas.  


Let me introduce you to Eva.  She is a delightful person to know...always up-beat and positive and it's catchy...not only in her words, but also in her craft.  I discovered her beautiful work about a year ago, when she did a lovely project with my birdhouse Silhouette die. I loved how she added so much life to this simple die design...and particularly loved the stamps she was using.  To make a long story short...she was the one who introduced me to Unity Stamp Company...and the rest...is history.  I am grateful for that introduction as I have been having so much fun designing stamps for Unity! Eva loves to use bright colors, and pays attention to detail.  Here are some of the things she has been busy making over the last 6 weeks...I bet you she crafts every day...because this is just a sampling of many projects she has created in the last little bit.  She has a true love for design.
To make this gorgeous fall card, Eva used one of my digital cutting files from the Silhouette digital download store called:  2_layer_swirly_leaf_C01028_1921010/19/2010.  I love her choice of fresh gingham ribbon to make this card POP! 
Eva used stamps from the Ippity Fall for You set  (this is Unity Stamp Co. sister company)  to create this festive fall pumpkin. The Thanksgiving sticker is from my Harvest Collection for Creative Imaginations and the label that holds the cute arrangement of  stamps at the top, is one of my digital dies: 1_label_frame_tag_C00885_1921008/09/2010available from Silhouette designs.  Here adorable project was created with papers from my Harvest paper line by Creative Imaginations.  I love Eva's detail in her rolled flower at the top of her pumpkin!  

For this lovely card, Eva used my fern_artisan_C00375_1921012/17/2009 Silhouette cut set and my Encompassed Grace stamps from Unity. Eva started out with white paper, but she inked it up with Ranger Distress inks--very cute! Love it, Eva!


This cute pair of dimensional projects by Eva, make me smile! She made this adorable little Halloween House with my birdhouse die from Silhouette, papers from Basic Grey (a company I LOVE--they are good people) and stamps from Ippity and Unity stamps.  Eva's second project uses another one of my dies from Silhouette called, spider_web_treat_bag_C017107/07/2009 , which you can fill with candy for your favorite little trick or treater.  She also used Copic markers, which Eva is really good at...as she demonstrates on the witch in this project. The bats are also some of my digital Silhouette cuts, bat_circle_set_C01015_1921010/18/2010.  I think these projects are precious!
Eva created this card base with my Silhouette die: jack_o_lantern_card_C20090904130829_19210
09/04/2009 .  Her card turned out so fun with all of her extra layers and embellishments, including stamps from Ippity.  I sure love it! 

Eva used my Ooh La la paper collection from Creative Imaginations to complete this cute card.  My favorite thing about this card is her choice to add an unexpected pop of blue!  Clever way to add spark!
I have to Credit Eva for inspiring me to design this snow globe die for Silhouette (christmas_snow_globe_C01068_19210)  She asked if I could do it for a project she had in mind...I was happy to oblige...as I knew Eva would do fabulous things with it! I added the scalloped border around the snow globe knowing this kind of motif is something Eva already loves to do with her cards.

Eva used My Wanna Be a Cowboy papers from Creative Imaginations and all the shapes were cut with the following Silhouette digital cutting files:  

Here is another card by Eva.  For this card she used papers from my Harvest collection for Creative Imaginations, and coordinating stamps from my Fall Family Memories set for Unity Stamp Co.  Eva also used my artisans_nesting_rectangular_C00685_19210 05/04/2010 available as a digital download on the Silhouette die cut machine site.

Make sure to check out Eva's blog.  She is a regular blogger and always has inspiration to share.  

Friday, November 05, 2010

Pinch me...I think I'm dreaming!

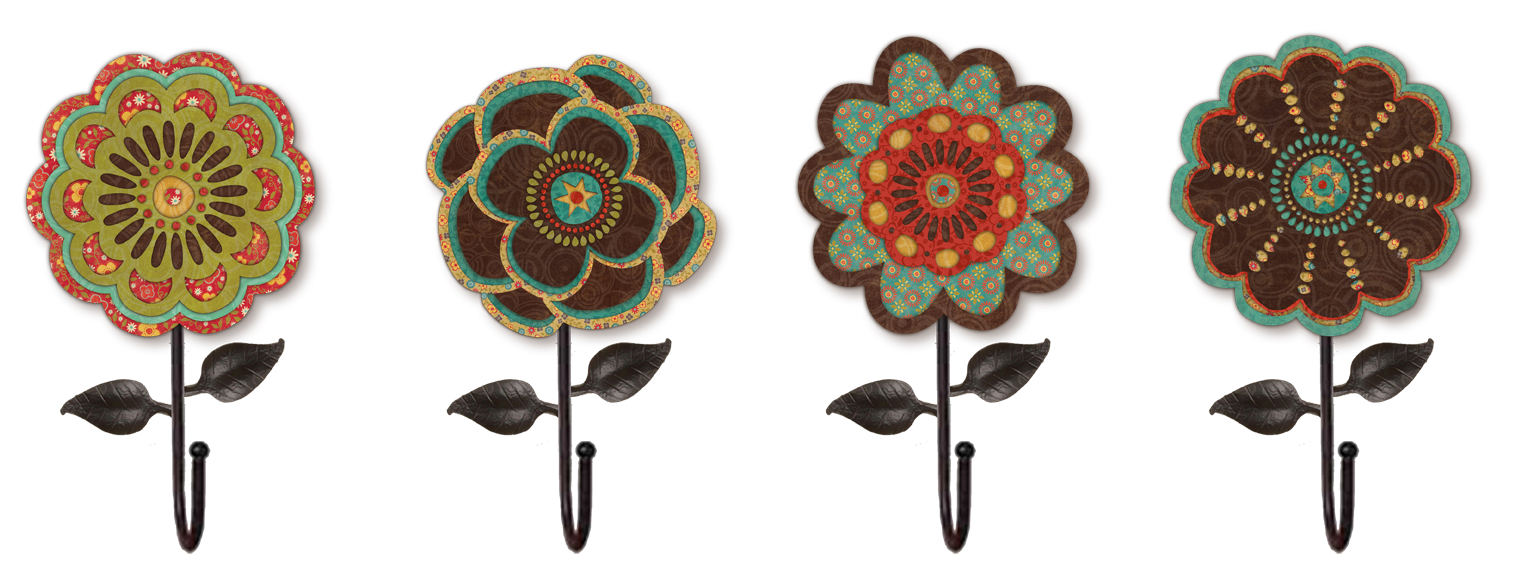
Last June I was offered the opportunity of a lifetime...to create a line of home decor products.  Did I just say that out loud?  REALLY...that's HUGE! I have been over the moon about it for months...but cautiously, as I just didn't know how it was all going to go down. I worked many late nights and weekends to pull off the magnitude of this project, and today, I got to see it come to fruition.  My samples were ready to view!  I had no idea what to expect, and so I was floored to see it all come to life. I quickly snapped a few pictures to give you a preview of what we created. I cannot take all the credit as Mark and Kristen Tuttle shopped overseas for what my artwork would be laid into...wooden frames, clocks, marble coasters, frames, wall tins, magnets, wood wall art and more! So together, their choices of products combined with my art...we came up with this:

This is just a sneak peek at the products that will start selling in January at the gift market trade show in Atlanta.
 The Pear stacked wood prints are among some of my favorite pieces in this collection.  Actually...there are three collections if you break it down into Pears, Owls and Flowers, and black and white.
 This is just a small sampling of the owl and flower collection.  These are prints done on metal tins.


This is a close up of some of the flower designs...

 This is a close up of some of the owl prints.  

I'm crazy excited to see this go to the next step...and that is being presented in the VIP International booth in Atlanta at the trade show in January.  Here's to hoping this line will see much success!
Related Posts Plugin for WordPress, Blogger...