Ads 468x60px

Showing posts with label Silhouette instructions. Show all posts

Friday, February 14, 2020

Lucky Shamrock Horseshoe Purses


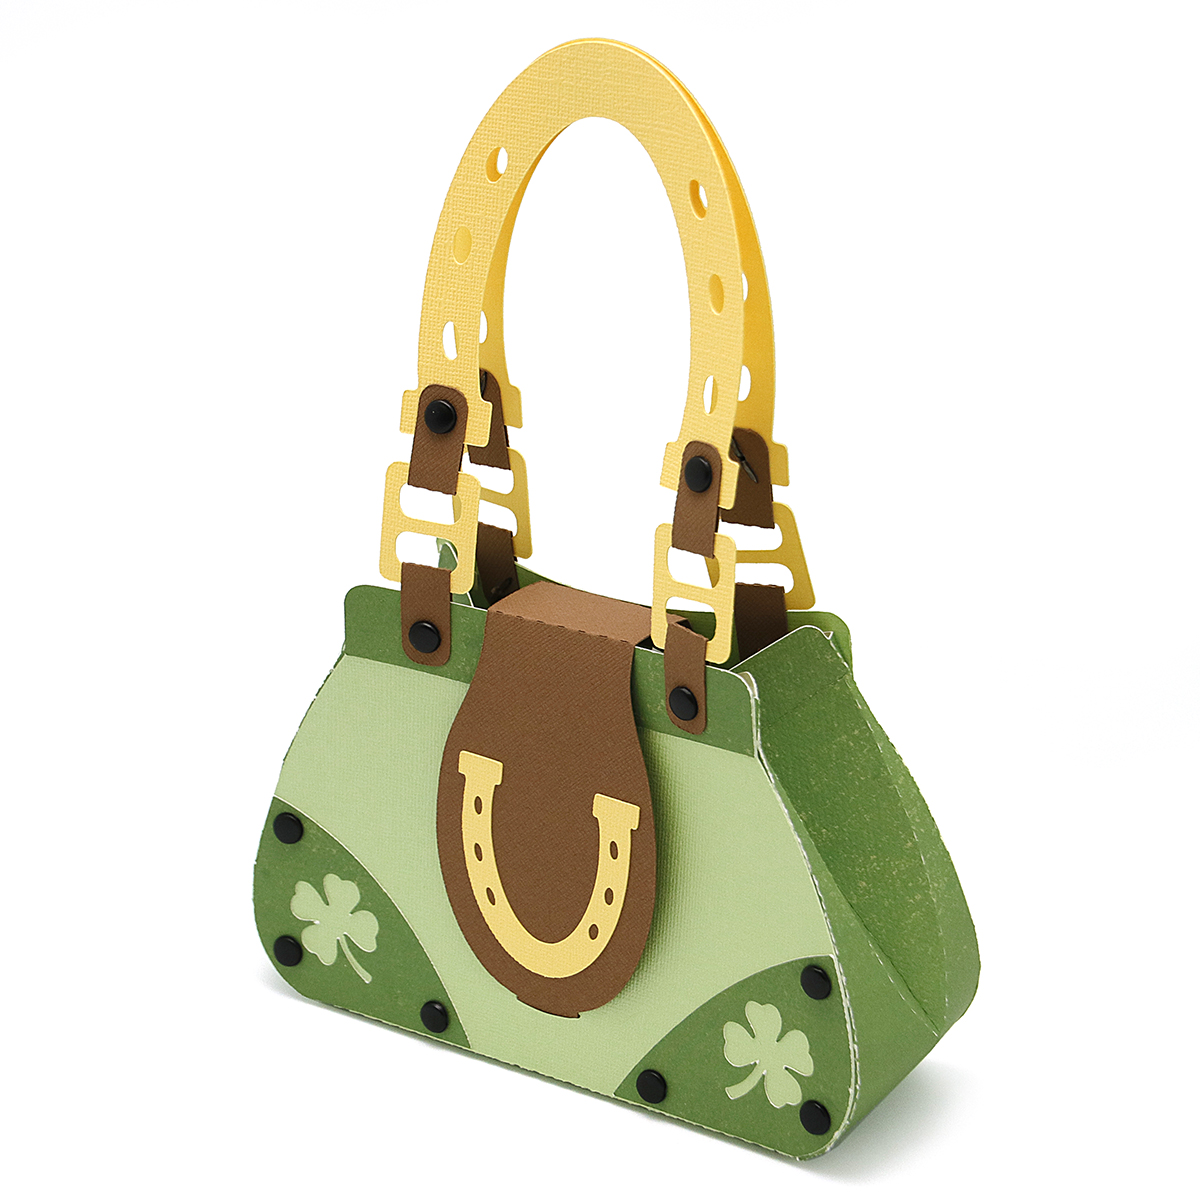
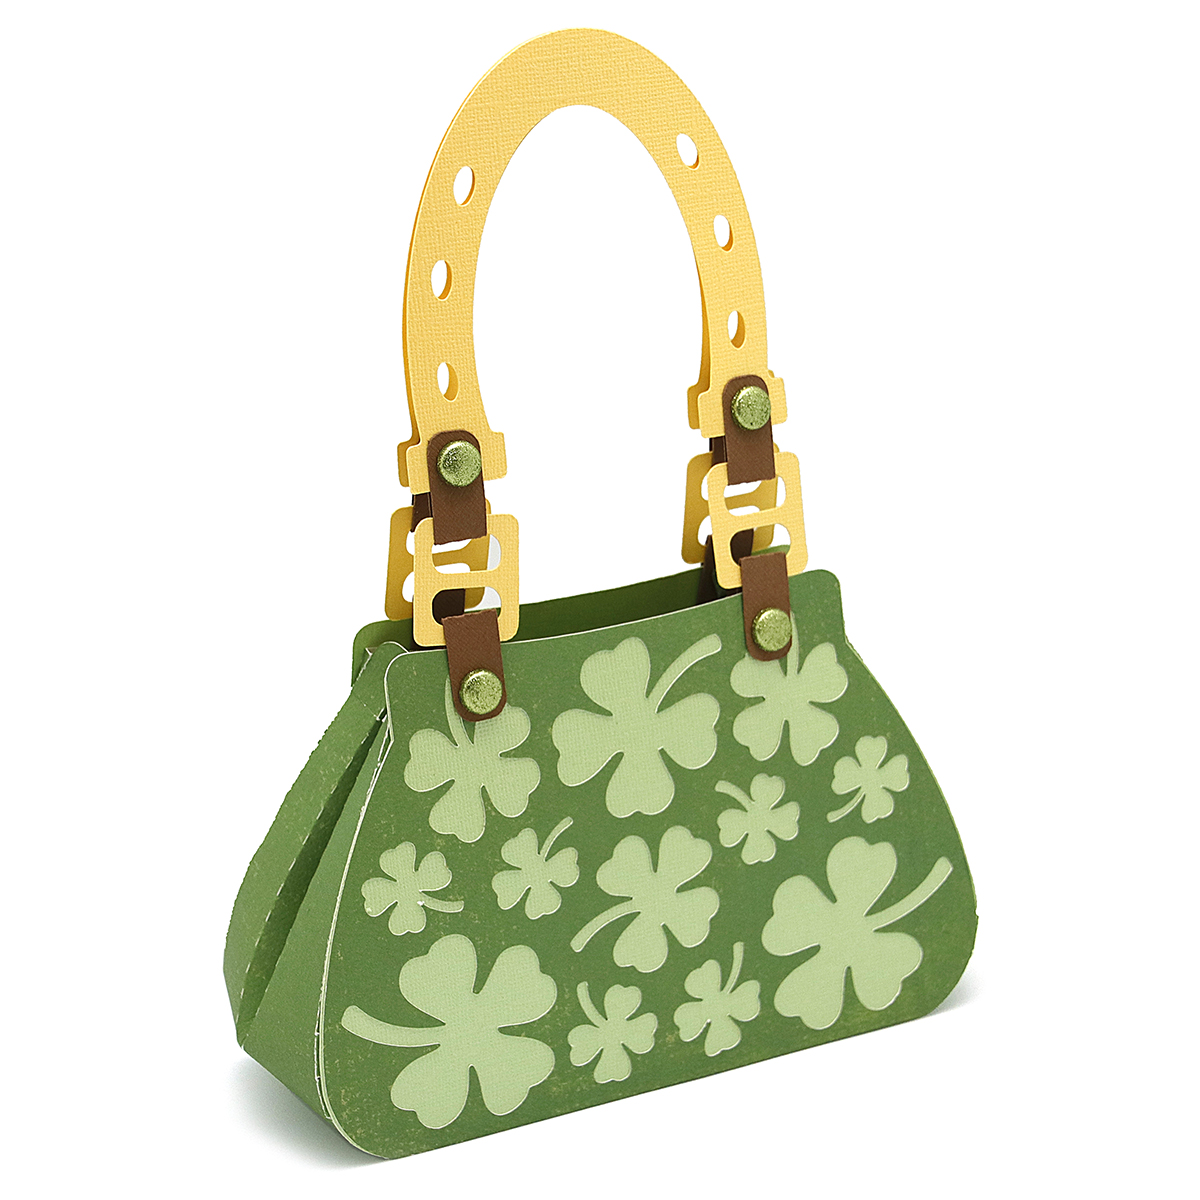
This week in the Silhouette Design Store, I have a few new purse designs just in time for St. Patrick's Day. They are adorned with shamrocks and horseshoes, and have lots of fun little details. They could be the perfect party favor for a St. Patrick's day event. Fill with treats, making them the perfect gift bag for your favorite leprechaun.

This is similar to another shamrock purse I did for Silhouette a few years back. However, the two purses are not quite the same. This one is new and improved. It has wider sides to fill it with more goodies, and a new and improved horseshoe themed handle, and updated buckles and purse flap.  You could call them your lucky purses!

I'll post a link to the files in the Silhouette store as soon as they are available. 

Both purses go together in a similar fashion. I will demonstrate just the one with the horseshoe flap, as that has an extra step. Here's how to assemble them:


First step, choose your papers and plan your cutting mats in the Silhouette Cameo software. When you open the file in the Studio software, it will be layered on a 12x12 mat. You can resize your file to use the maximum space on a 12x12 sheet of card stock. To see how it fits, you will need to ungroup your file, then arrange the color coded groups onto the live cutting area. The light green pieces are your two largest pieces. Determine how much you can enlarge your file by how you can arrange that on a 12x12. Make sure everything is selected when you enlarge. Once you have it the size you want, cut each color group separately, until you have cut all the parts. For more information on how to use your Silhouette Studio software, visit the Silhouette 101 blog. (Click on the Tutorials tab.) That is where you'll find a wealth of information about all the latest tricks and tips for the most recent software updates.

Once everything is cut, glue your decorative pieces to the front and back side of the purse. Make sure to use a good paper glue like Tombow Mono adhesive. A good paper glue won't warp your paper. I like to buy mine in bulk for obvious reasons.


Assemble the Horseshoe handles by folding the little brown tabs around the buckle pieces. Attach them with brads, as shown below.


We will attach these to the main purse later, as it's easier to do that step last. That way they aren't in the way when you get to the fancy glueing part.


Find the brown flap and attach the decorative horseshoe element. Then fold as shown, and attach the flap to the back side of the purse. You may want to align the flap with the little flap insert on the front of the purse to be sure that everything lines up.


Now you will glue the side pieces onto the front and back of the purse as shown above. Then you can attach the decorative brads through the little pre cut holes. I love precut brad holes! Makes assembling a project so much easier. I've shown you pictures of the front and back so you know what this will look like.


You will want to fold the gussets on the side before we get to the fancy gluing part of the project. Fold the center part inward, and the curved fold lines outward, so it's accordion style. You do not need to fold along the horizontal fold line at the top. Please note, your side gussets may have slightly different fold lines, as I adjusted it in the final design for ease of movement.


Now we will glue the tabs along the curve of the front of the purse. This can be tricky if you've never glued tabs along a curve before. Here are some hints to make this part go smoother. Only use a small amount of glue on each tab. Use your hands on both sides of the side piece. One to hold down the tabs as you glue, the other to guide the side piece along the curve of the purse. You may have to push and slide the tabs as you go, and they will start sticking as your glue dries. Good paper glue, really makes this part much easier. If you are frustrated with too much movement while you are gluing the tabs, you can use scotch tape to temporarily hold it down. (see below)

You will continue to glue the tabs until you have attached all four sides with the front and the back of the purse.


In the final step, attach the horseshoe handle to the purse using the brown tabs and brads to fasten. I love this new design, because the flap now has a tab to insert into a slot on the main purse. 


Friday, September 19, 2014

Pocket Pages Mini Album

For this projects you will need this Equipment:
A Silhouette Electronic Cutting machine. This file works great with both the Silhouette Cameo and the Silhouette Portrait cutting machines. If you use the portrait machine, you will need to rearrange the pieces to fit in your cutting area. To move the pieces around individually, ungroup the file under edit.

For those of you who are new to my blog, and may not have heard about the Silhouette electronic cutting machine(the machine I used to cut this file out,) I put together a product review at this link. You can read other's reviews of the machine here. This machine will change the way you craft, and most importantly, you will get lost in the fun of it all!

Adhesive:
Glue (use a good paper glue like Tombow mono liquid glue it will not warp your paper.)
-and/or-
Double Sided adhesive. (I use a Scotch ATG 714 gun. Scotch got smart and made a similar one for crafters the Scotch Cat 085--it's quite a bit less $ than the 714. I like that it has a seemingly endless roll of adhesive. It saves a ton of money in the long run when compared to little craft adhesive dispensers. Especially if you buy the adhesive reels in bulk.)

You will also need these Silhouette Files:
(the files will be linked as soon as they appear in the Silhouette store.)

Studio software set up:
Choose a selection of coordinating card stock for the pages and tags, and white card stock for journaling bubbles. I used card stock from my Summer Lovin' collection for Carta Bella. In your Silhouette Studio software, you will need to ungroup the parts (found under object tab) and slide the parts into the active cutting area. You may need to do a few ungroupings to get down to the level of parts you want to move into the active cutting area. Now select the cardstocks you want to use for the parts in your live cutting area.

Assembly Instructions:
1-2. Crease each of the pocket pieces as shown.
3-6. Apply adhesive to the tabs and press them to the inside of the pockets.
6. Fold pocket as shown.
7-8. Fold back the scallops, and adhere to the reverse side.
9. When you flip it over, it should look like this picture...still having access to the pocket.
10-11. The cover section does not have scallops to flip over. Instead, glue a contrasting scallop piece over the scallops on the cover.
12. Cut out the journaling bubbles and the mats. I prefer to write on white card stock, you can use whatever you want. You can cut out more journaling bubbles that what is in the file, by copying them and pasting them into the live cutting area.
13-14. Select which journaling shapes you want to use, and adhere them throughout the album in whatever you feel works best. You can also tuck them under scallops as shown in pictures 13. and 14.
15-16. Place the layers into the order specified within the file. The cover has a wider spine, the next layer has a narrower spine, and the centerfold piece has just a single fold at the center. This makes the album go together with a neat clean look that fits beautifully. Thread small ribbon through the holes and tie a bow.

This mini album can also be used for gift cards. 

Wednesday, September 17, 2014

Silhouette instructions: Halloween Candy Bar Crate and Gable Boxes

Due to an "interesting" summer, it's been a while since I've had some new releases in the Silhouette store. I hope you had a great summer. Mine was good, but busy and challenging beyond belief. Now that the kids are back in school, and things have settled down for the moment; I hope to catch my breath and have a more regular release-schedule of Silhouette designs. 

To start things off this Fall, I have designed a grouping of Halloween-themed boxes and crates. I hope you will find them useful for Fall gift giving. I would love to see what you do with them. Remember, you can share your projects with us through my blog e-mail address found in the sidebar.
For these projects you will need this Equipment:
A Silhouette Electronic Cutting machine. This file works great with both the Silhouette Cameo and the Silhouette Portrait cutting machines. If you use the portrait machine, you will need to rearrange the pieces to fit in your cutting area. To move the pieces around individually, ungroup the file under edit.

For those of you who are new to my blog, and may not have heard about the Silhouette electronic cutting machine(the machine I used to cut this file out,) I put together a product review at this link. You can read other's reviews of the machine here. This machine will change the way you craft, and most importantly, you will get lost in the fun of it all!

Adhesive:
Glue (use a good paper glue like Tombow mono liquid glue it will not warp your paper.)
-and/or-
Double Sided adhesive. (I use a Scotch ATG 714 gun. Scotch got smart and made a similar one for crafters the Scotch Cat 085--it's quite a bit less $ than the 714. I like that it has a seemingly endless roll of adhesive. It saves a ton of money in the long run when compared to little craft adhesive dispensers. Especially if you buy the adhesive reels in bulk.)


You will also need these Silhouette Files:
spider and web gable box #66773
Halloween witch gable box #66750
Gable Box with Candy Bar crate #66749
Candy Bar Crate #66747
Design can be created with 1 sheet of 12x12 card stock

Candy Bar Crate instructions:
Cut the design out of double sided card stock that has a complimentary color or design on the reverse side.

1. Crease the center handle piece on dotted lines.
2. Crease both of the side boxes as shown.
3. Glue bottom tabs to the inside base of the box. (do twice. Once for each side box.)
4. If your small side tab is in front of the larger side tab, as in this picture, reverse them so they look like step 5.
5. Glue the small side tab to the inside of the side box. Flip down the scallops to reveal the reverse side of your card stock and secure it with glue or tape. (do twice. Once for each side box.)
6. Your side boxes should now look like this picture.
7. Now we are going to take the center handle section of the crate and attach the side boxes. Glue the back of the side boxes and the large side tabs that are sticking out. Attach the back of the box to the center handle section.
8. Wrap the large side tabs around the handle center piece so that it lines up with the scored dotted line. We will be folding this part underneath the bottom of the box. Look at the picture for placement.
9-10. Fold the bottom flap of the center section underneath each of the side boxes and use adhesive to secure.
11-12. Cover the bottom with the rectangle piece.
13-14. Cover the sides with the rectangle pieces with the fold-down scallops.
15-16. Fold the divider section, and glue to the inside of each side box.
17. Ta Da! You are done. Admire your work, look for anything that needs a little tweaking. Add a ribbon if you wish, then fill with your favorite candy bars.


Witch Gable Box instructions:
1. Open the file in the Silhouette Studio software. You will notice that color recommendations are made for different parts of the design. You can place those colors on your cutting mat at the same time according to the grid and how they show up on your screen. That is what I did in photo 1.
2. Glue the light green pieces to the black box as shown. I have designed this so it has as few pieces as possible for easy assembly.
3. Glue the eyeballs, teeth and tongue onto the box.
4. Glue the nose on, (it is the large oval with the little oval cut out of it, and the little oval that was cut out with the light green witch face parts.) Insert the light green highlight to the oval hole in the large nose piece.
5. Crease the box.
6. Fold the box around. Layer the bottom flaps as shown. The two slanted sides have a rounded rectangular piece that tucks slightly under the straight edge.
7. Insert the flat top triangle tab into the slot that is made. Adhere the side tab with glue or double sided-adhesive. Close the top by Inserting the top gable tabs into the slots on the top triangle pieces.
Now you are done! Fill it with goodies for your little goblins.
Candy Bar Gable box instructions:
This box combines the candy bar crate and the witch gable box instructions. With a few small differences.
Silhouette Studio set-up: This project requires 2 sheets of 12x12 card stock. You can resize and rearrange your pieces if you are using the silhouette Portrait.
Cut the Gable Box piece out of a contrasting color if you wish, fold it as instructed in the witch gable box above.
Now we will follow the numbered picture instructions.
1. Find your side box pieces for the candy bars.
2. Fold down the scallops and secure with adhesive.
3. Crease the side boxes as shown.
4-5. Fold the side boxes and apply adhesive to the tabs, as shown in pictures. You will end up with a box-like shape with extended sides jutting out.
6-7. Apply adhesive to the back of the box, and the jutting side pieces. Position the back of the box to the center gable box as shown, with the jutting side pieces lining up at the sides, then adhere.
8. Do this for both side boxes.
9-10. Cover the jutting side tabs with the fold over scallop rectangle pieces.
11-12. Fold the crate dividers.
13. Insert the crate dividers into the side boxes, secure with adhesive.
Fill with candy! You are done!

Monday, March 17, 2014

Silhouette Assembly Instructions for Purses

I had so much fun this last week designing these new files for you. 
I have five new purse cutting files available at the Silhouette Online store .

If you want to see other purse tutorials on my blog, here are a few others:

If you make any of these, please feel free to share your projects with us on my Facebook page. 

For all of these projects you will need this Equipment:
To cut these purses you will need an Electronic Cutting machine like the Silhouette Cameo or Cricut Explore. These files work great with both 12x12 and 8.5x11 format cutting machines.

You will also need the Silhouette Studio Files or SVG files that are linked in the instructions below.

Okay...now for the project instructions...


File Name:
Purse Round Canteen Silhouette ID #56891

Default Size:

5 1/2 inches wide by 9 inches tall. (canteen purse)


File Set Up in the Studio Software:
For all of these files except the Canteen purse, the pieces fit on a 12x12 sheet of card stock. Use double sided card stock to get contrasting elements. If you are using a portrait machine, there is no need to shrink these, but you will need to move them around so the pieces fit into the live cutting area on your screen in your Studio software.

After cutting out all of your pieces, assemble as instructed below:

1. Glue the dotted edge details to the front and back of the purse as shown. Attach the strap with brads in the pre-cut holes. Attach the strap band (the piece that holds the strap down) with two brads. Ink the edges with stamping ink if desired.

2.-3. Start glueing on the first side at the top first tab. (use a good paper glue that dries fast) You may want to clip the first tab to make adhering the other tabs easier.  Curve the side around the tabs. Now Glue the opposite side.

4. Glue the back of the purse to the sides.

5-7. Glue on the bottom of the purse. You can cut two of the purse bottom pieces if you want to line the inside of the purse to sandwich the tabs between layers of cardstock. Picture 5 shows a liner piece of card stock on the inside of the purse covering the tabs on the bottom.

8. Fold the sides as shown and pinch them together to give the purse shape.

9. Add adhesive velcro dots to secure the flap to the purse.


File Name:
Purse Baguette with flower lace Silhouette ID #56892
Default Size:
6 inches wide by 3 inches tall (7 inches tall with handle.) 
1-3. Glue the strap inside the slot. Picture 2 shows the reverse side. Picture 3 shows what it will look like on the front side after being glued in the slot.

4. Glue the contrasting lace panels to the front and back of the purse.

5. Glue the bottom pieces together and attach with brads.

6. Fold up the sides, making sure to fold the little tabs in.

7. Fold the sides as shown.

8. Curve the sides as shown.

9. Attach the side pieces to the tabs with a good paper glue. Use a clip to make it easy on yourself.

10-11. Attach the side buckles by using the little rounded rectangular piece that folds in half. Run it through the buckle, then attach it to the purse with a brad. 

12. Roll the flap a few times with a thick marker or dowel. This will give the flap it's curved shape.

13. Apply adhesive velcro dots to the purse to hold it shut.

File Name:
Purse Trapezoid with pocket Silhouette ID #56895

Default Size:
5 1/2 inches wide by 6 1/2 inches tall.
1. Assemble the front to the back with glue and brads as shown with the pink and green purse above. Fold the side pieces as shown. 

2-3. Glue the side to the tabs on the front of the purse. Make sure to line up the top of the side panel with the top of the front of the purse. 

4-5. Curve the side piece down, and glue to the tabs. Tuck in the side piece over the bottom, use glue to hold it. (you may need to move the brad ends up while glueing the side panels. Then move the brad ends back down.)

6. Pinch the purse to shape the sides.

7. Assemble the pocket. Add the little scallop to the top of the pocket.

8. Accordion fold the sides of the pocket. 

9. Put glue on the last accordion fold of the pocket. Press it to the front of the purse. Cut two if you want one on the back too.

10. Glue the scallops to the front and back of the purse around the curve. Add your circle handles.

File Name:
Purse with dotted trim Silhouette ID #56898

Default Size:
5 1/2 inches wide by 4 inches tall without strap. 9 inches tall with strap.

I am not showing you the full instructions on this one as it would be repetitive of the purses assembled above. However, I do have some close ups of where the little embellishing pieces go. You may want to ink the edges if you are using the same color for the contrasting pieces. 


File Name:
Purse angled pocket Silhouette ID #56902

Default Size:
5 1/2 inches wide by 4 1/4 inches tall without strap. 9 inches tall with strap.

Once again, this purse is constructed like the above purses. I only have close ups on the details so you know where to add those pieces. I did show a close up of the inside of the purse when glueing the side panels on. This may help you to see how the side panels tuck under the brad wings. 
I'd love to see your creations! 
Please share them with us on my Facebook page, or send me a picture. 

Monday, November 11, 2013

Silhouette Tutorial: Card Wraps, Fall Pop-Up cards, and window bag

Thanks for stopping by today! I've got a few new designs entering the Silhouette Online store this week. They are relatively simple designs, but still might require a little guidance to assemble them. I'll show you some tips and tricks to make sure that you have success with these files.
This is just a selection of some of my files that you will find at Silhouette this week.

First let's assemble the leaf bag:

 Fold all the scored edges first. Make sure to fold the sides toward the inside of the bag, and the "V" on the sides toward the outside of the back.
 Next we will assemble the bottom of the bag. This has become my favorite way to close the bottom of a box, so you will see this type of fold often. To assemble the bottom, tuck in one of the angle tabs into the "U."
Now tuck the second angle tab into the "U."
 Now tuck the wide "trapezoid" tab into the "U" tab. Voila...Now you have closed box on the bottom and it is strong!
 Glue the side tab...be sure to use a good paper glue like Tombow that won't wrinkle your paper.

Hold the sides of the bag together with your fingers, or use clips.

Then guck the flap slot into the slot on the bag. You can also put a piece of contrasting paper behind the leaf if you wish.

Now for a tip on a card wrap!

The card wraps don't need much instruction...just fold the sides on the dotted lines...fun and simple! 
However, tying them shut just right, may be another story. I have found the easiest way to do this is to thread the ribbon or string from the underside of each triangle in an "S" like order. Just follow the order of my letters in the photo above. Then with the ribbon ends, pull the corners together, and tie! 

Now for instruction on the Pop-Up leaf cards:

 First start curling out the edges of the leaves. Be careful not to get too aggressive with this step as you may rip the paper where the leaf is attached.
 Some of the leaf cards have a dotted line in the center of the leaf. You may choose to leave that as a decorative element, or you may choose to try to manipulate your paper further by scoring that edge with your thumbnail and using your index finger on the reverse side to somewhat crease the dotted line to give the leaves a little more life. (really, this step is not mandatory...my original purpose with the dotted lines was decoration...then I decided to try this just for fun.)
 Keep on going until all your leaves are popped up! Then glue the popped up leaves onto a contrasting cardstock. I used double sided textured cardstock from Carta Bella. If you used this cardstock, set your blade to a depth of 4, for detailed designs like this one, turn the speed down to 2. Then choose the "double cut" box if your blade is not brand new. With new blades, double cut isn't necessary...but if you are like me and want to get all that you can out of your blade...then go for the double cut.


Now to assemble and fold the envelope. The key here is to make sure you are assembling your envelope right side up. The envelope should be laid out as in the picture above. Notice how the bottom of the side tabs goes wider toward the bottom...that's what you are looking for. Now Glue the envelope liner to the inside of the envelope. 
Fold the side tabs in then put a dot of glue where the overlap and press to hold.
Then fold the bottom tab up, and glue it to the sides. Done!
This is what your card and envelope will look like at this point. Look's great, right? But let's embellish it just for fun!
So cut your tag piece in another contrasting color. Glue the little leaf  to the tag. This is left over from the envelope liner or the leaf provided in the file (this will be an either or...the maple leaf card has a smaller leaf included in the cut file...the autumn leaf and the oak leaf are just using the envelope insert leaf.) I used this crimson and gold double sided textured cardstock from Carta Bella...it's more of a green than a gold, but that's a technicality.

A fun embellishment for the tag would be some curling wire or beading wire.

Insert the wire into the tag, then curl the wire...by just wrapping it around a pen or pencil. 
 Choose a coordinating ribbon, then thread the wire around it, then glue the  ribbon onto the card.
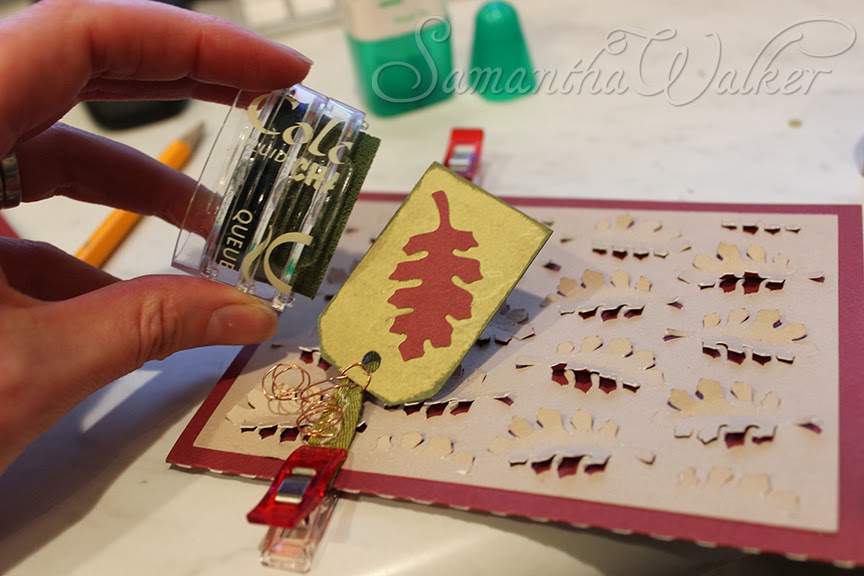
 Oooops...just an after thought...I didn't like how the tag didn't "pop" from the card background...so I decided to ink the edges with chalk ink. I used a Colorbox fluid Chalk cat's eye ink pad. These are super easy to use for direct inking to paper.

Ta Da! it's done...your autumn leaf card set!
Samantha Walker

Related Posts Plugin for WordPress, Blogger...