Ads 468x60px

Showing posts with label Print and Cut Tutorial. Show all posts

Saturday, April 26, 2014

Kite Interactive Card and Sentiment Tutorial by Nicole

The school year is ending in a little less than a month for us.  With it comes lots of changes for our family.  One big change for my Wesley is it's his last year in elementary school.  His teacher has helped him learn to be more independent and really get ready for junior high (too bad she couldn't help me get ready to have a junior high student!).  When I saw Samantha's new interactive card this idea immediately came to mind and knew it would be a great thank you card to give to his teacher.  


I used the bicycle card as my base, but modified it slightly putting the cut out section on a slight angle and shortening it length wise.  


I decided to print the sentiment right on the card base and did this with the print and cut feature in the Silhouette program.  It's not hard once you get the hang of the registration marks and it makes putting the card together a breeze.  

First you'll need to select the text tool.  
Select the (2) font, (3)size, and then click on your project and type.  Once you have your text exactly like you wanted it printed you'll need to do a few things to make it ready to print.  

Click and highlight the text.  Go up to Fill Color and select the color you want your text to be printed.  Then click on Line Color and select the same color as the fill color you just selected.  

Now go up the the Cut Style Window and select your text.  In the Cut Style menu click the "no cut" feature. 

No go to (1) page and select (2)letter in the menu to change the background size.  
-I probably should have done this at the very beginning to set it up to print size, but didn't think about it-

You'll now need to select both the card base and the text by clicking and dragging to highlight both and rotate them to fit on the new 8.5x11 size.  

Select the (1)Registration Marks Menu and click the box next to the (2)"Show Reg Marks".  
The marks will now appear on your background.  (3)You just need to now make sure your card base is inside the red lines and not in the grayed out areas.

Go up to File and select Print.  Follow the onscreen directions.  
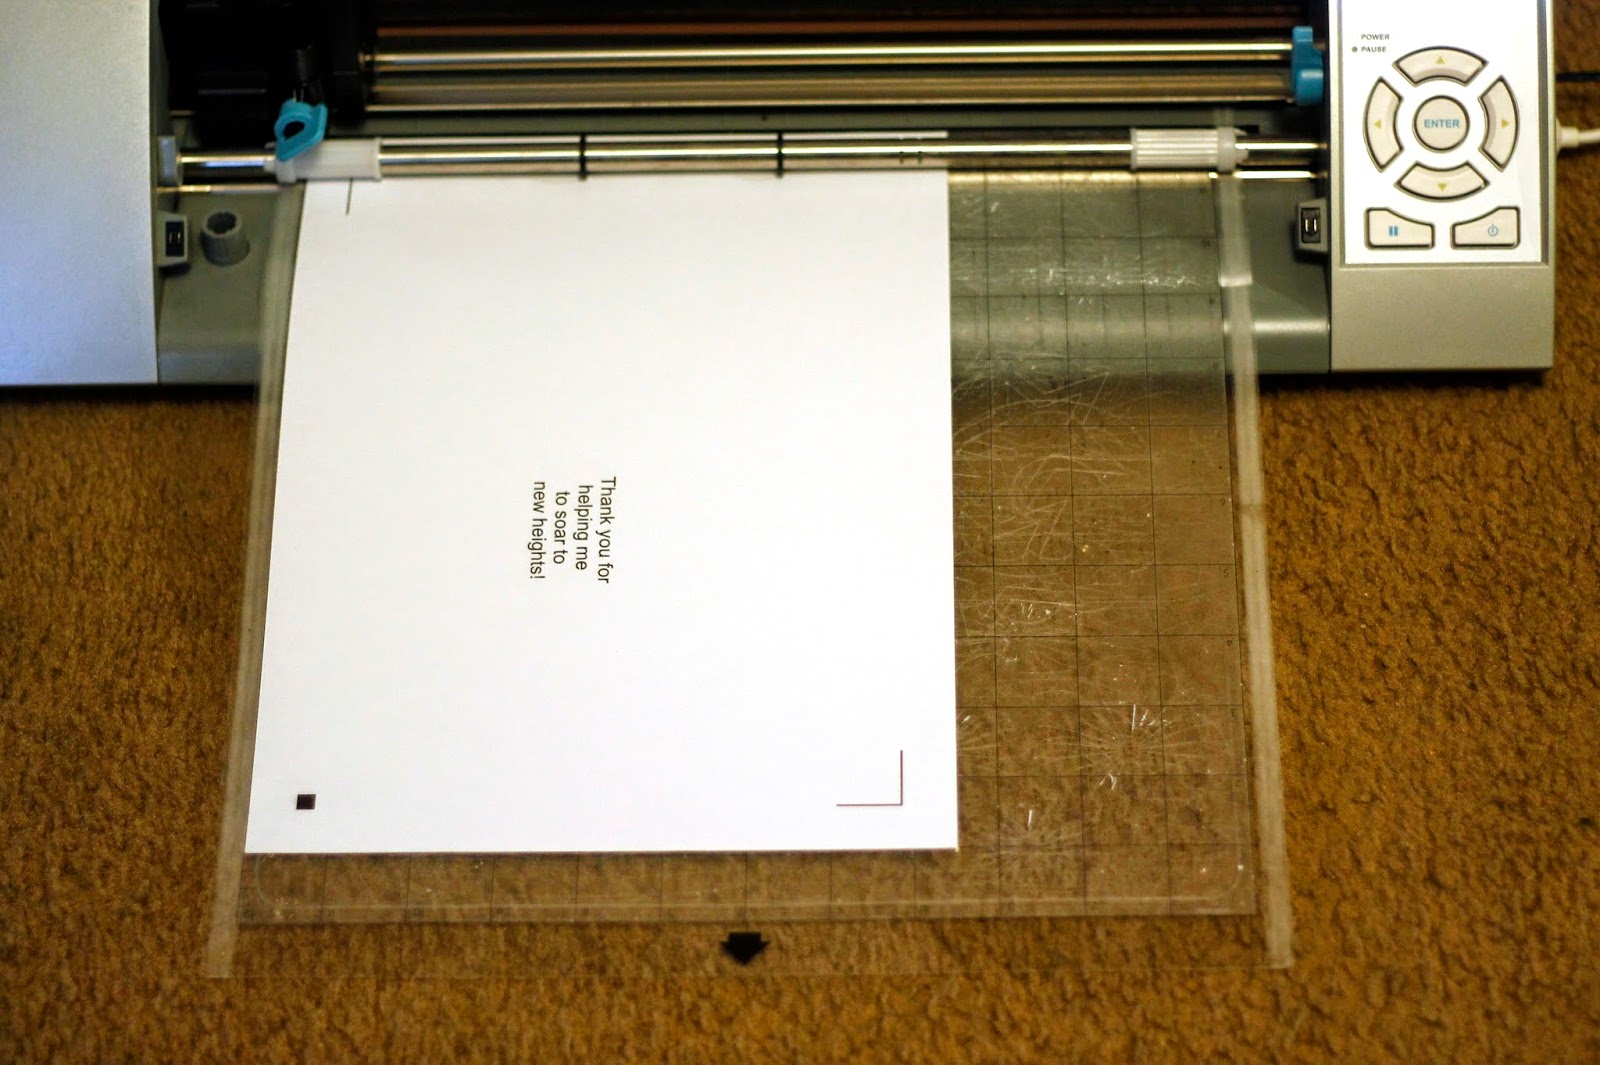
Here is what it looks like after printed.  

Place the paper onto your cutting mat.  Make sure you place your paper on your mat according to how the mat looks on your computer (the first time I did it wrong and my machine couldn't read the registration marks).  Load into machine and cut. . 


Once my card base was cut I then cut the decorative elements from Samantha's Cool Summer line for Carta Bella.   The kite is an older file that I'll link to in the bottom.  

I added the slide to the front and back of the slot with brads and then attached the kite to the top with Helmar Zapdots to add some dimension.  I also glued a little twine to the kit tail to add color.  
  
Here is another look at my finished card:
and with the kite slid to the top.

Thanks so much for stopping by the blog today and I hope you give the cut and print feature a try as well as these fun new interactive cards. 


Supplies
Pattern paper: Cool Summer by Samantha for Carta Bella
Cardstock: Georgia Pacific
Twine: Doodlebug
Chalk ink: Martha Stewart Crafts
Adhesive: Helmar 450 Quick Dry Adhesive, Helmar Quick-fix Adhesive, 
and Helmar Zapdots 


Saturday, March 22, 2014

Matryoshka Dolls - A Print and Cut Tutorial


Print and Cut is a two part process. Your printer prints, and your Silhouette cuts. You can print and cut your own images, fill images with printable patterns, or just use items from the Silhouette store that are ready to Print and Cut. Today, we're cutting one of Samantha's images that is ready for the Print and Cut process. 

The small P indicates this project is for Printing and Cutting.

Silhouette has a step by step tutorial as well, and that can be found here.
  1. Open a new file.
  2. From the FILE menu, select Page Set Up. Because I'm printing on 8.5x11 cardstock, I chose US Letter, then clicked OKAY.
  3. From the FILE menu, select Registration Mark Settings and check the box "Show Reg Marks" - I also increase the Reg Mark Size to Thick. (see below) 
  4. Open your chosen Print and Cut image from your Silhouette Library. I opened and made an extra copy, and rotated the two images 90ยบ Clockwise. I'm using the Accordion Fold Matryoshka Doll #14597 designed by Samantha Walker for the Silhouette Online Store. 
  5. Send the project to your Silhouette. Select "Click here to print." and print your project.
  6. Place your printed page onto your Silhouette mat in the same orientation it appears on your screen. Send the project to your Silhouette. Select "Click here to skip printing." Follow directions and "continue." Now you will see the Cut Menu. Select "detect automatically." Your Silhouette will immediately begin to register the marks. Nothing is being cut at this time. Once the registration mark detection is completed, you will then have an option to CUT.
If you plan to re-create your project, just save your project, reopen and repeat steps 5 and 6.

For those of you that prefer a video, this video is provided by Silhouette. The project uses Silhouette's White Sticker paper, but the Print and Cut process would be the same.


Note: For best results, use a nice cardstock. I have my images printed locally for just .17 on my printer's "House" cardstock(Pegasus by Mohawk papers) and it looks really nice and cuts very smoothly. I make sure to use a clean mat in good condition. If you have debris or some deep cuts, it can throw off the cutting ever so slightly, and you may not be as pleased with the results. If you find that your image is not being cut well even with a nice mat and quality paper, you may need to calibrate. Please refer to Silhouette's Calibration instructions here

Now that we've cut our Matryoshka Dolls, let's make something!

I am wrapping a gift, so I thought a doily would look nice on top. I'm using Samantha's Doily Making Set #42323, but just two of the pieces.

  1. Open Doily Making Set from your Silhouette Library.
  2. From the Object menu, select Ungroup.
  3. Delete the parts you won't need. I've deleted all but the largest doily and the middle mat. 
Select UNGROUP from the OBJECTS menu and click on any pieces you don't want, then delete. I'm using the largest doily and the mat directly underneath. I dragged the mat away and filled it in with red. See below. Note: If you'll be moving the doily, be sure to highlight all the pieces and "re-group" - it's 


I like to color my pieces just so you can see what's what in the finished project. I'm cutting the doily in white and the mat in red.


Once my pieces were cut, I matted the doily on some patterned paper and tucked the folded Matryoshka Doll on top of the doily under a Hemp bow and a few flowers. I wrote a little message on the back of the doll. The card slides right under the knot in the Hemp bow and flowers and can easily be pulled out, no adhesive needed.

Supplies:

Pegasus Cardstock by Mohawk, Red Cardstock, Patterned Paper (October Afternoon), Kraft Paper on the Roll (available at Amazon), Hemp/Jute, Flowers (Prima, Wild Orchid), Adhesive (ThermoWeb, AdTech)

Related Posts Plugin for WordPress, Blogger...