
Tonya here with my first Guest Designer post for Samantha Walker Designs.
I am excited to share my ideas and projects with you.
While looking at other crafter's blogs, I came across a flower pop up card, and thought to myself - 'I would love to be able to make that!' As I scrolled through the post, I saw the picture of a lily version. Lilies remind me of my parents. Lilies are my mother's favorite flower; and my daddy used to send Easter Lilies to me and my sisters every Spring, before his passing in '98. I knew I wanted to try my hand at a lily version, of my own.
The instructions in the post show how to cut an 8 petal flower with a die cut machine (she provides a free file), then hand cut to make a 7 petal flower. Her file provides a rounded petal flower...and I wanted a lily like flower. I figured I could create a file with my Silhouette software to fit what I wanted.
With that in mind, I headed to the Silhouette Store to look through Samantha's files. I did not find a flower file that perfectly suited my needs. So I thought I could adapt/create one.
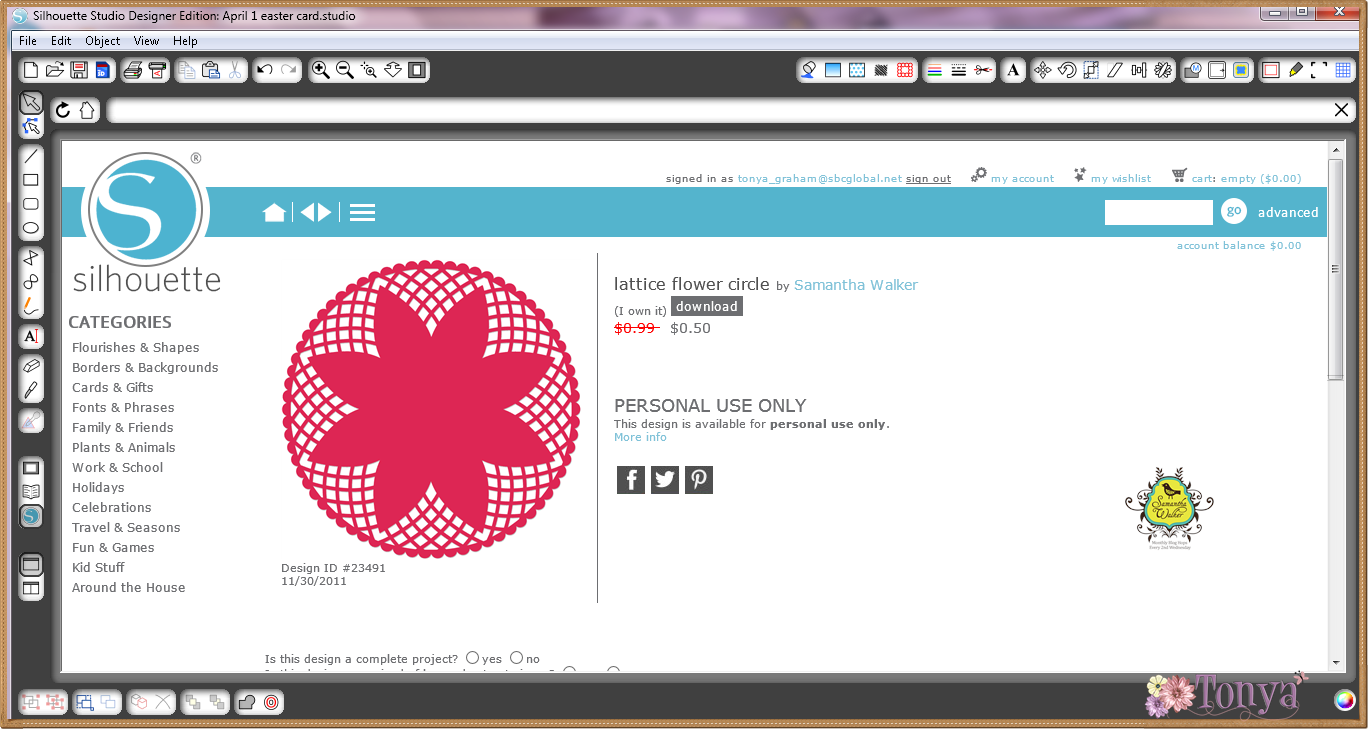
Samantha's Lattice Flower Circle file (#23491) worked nicely as a starting point.

I created an internal offset for the flower outline. To do this, I highlighted the image and clicked on the offset icon (upper right). I put the offset distance as 0.150. This created a more pointed flower petal (closer to a lily petal) and moved the offset away from the image so that it was easier for me to drag it away from the base cut file.

Next, I moved the offset away from the base file, and deleted the original image.

For the flower, I needed 7 petals, and this one had 8. I used the knife tool to cut away one petal. I lined up my curser so that the crossbars were centered between the top and side petals to find the midpoint of the flower, and 'cut' from the center out.

Next, I created score lines between the petals for folding. I used the same method as the knife tool above, drawing dashed lines from the center out between each petal.

To keep the pieces together, I highlighted all the parts and grouped them.

Since these were to be lilies, I needed some stamens. I used a stamen (top) from Samantha's Hawaiian Hisbiscus Flowers (#4170).

All I needed to do was duplicate the flowers to the number needed for the card (7 total), and size the stamens accordingly.
*Note* - there are 14 stamens in my file, instead of 7. This is just in case a couple do not cut cleanly or I make a mistake/rip one while embellishing the stamens.
The stamens are not yellow in the original file. I tend to 'color' my pieces so when I cut them out, I have a visual reference.

Here are my flowers - one assembled (center) and 6 unfinished. The flowers were dry embossed for detail. I cut the stamens out of the same white cardstock as the flowers. They were colored with a Wild Honey Distress Marker mixed with water and highlighted with yellow Stickles.
Supplies: Samantha Walker Silhouette files #23491 & #4170, Silhouette Cameo, Recollections Cardstock, Distress Marker, Stickles, Paper Studio Embossing Folder, Sizzix Texture Boutique


No comments:
Thanks for taking the time to leave a comment! Without your readership, I wouldn't be doing a blog.
My blog is supported by sponsors and affiliates. If you decide to make a purchase through my affiliate links, I am paid a small commission for it. This doesn’t cost you anything additional. These commissions help to keep the rest of my content free, and allow me to blog more often.
From time to time I make recommendations of products that I love to use, or products that I have designed. Occasionally, manufacturers send me products to play with. They have not obligated me to show them on my blog or review them. I only make positive remarks about those things that I truly love and enjoy to use. Everyone's personal experience with various products may be different, as we all use things in different ways. I am not compensated for these remarks, and merely pass on my opinion to you as a reader. I hope you find my opinions valuable.
Thank you for supporting my blog!