Ads 468x60px

Showing posts with label eggs. Show all posts

Sunday, February 24, 2013

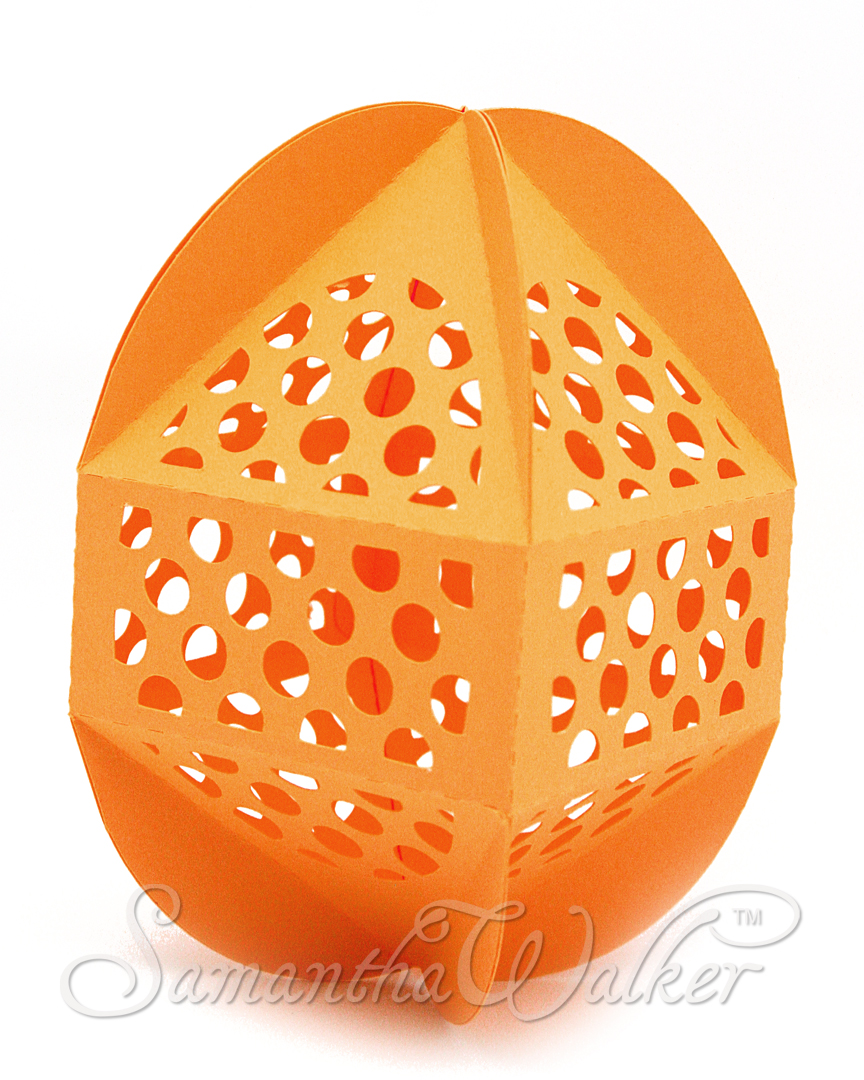
Egg Box Tutorial By: Aimee Maddern

Aimee here to show you how to but the 3d egg boxes together!
You can also go to this tutorial here for multiple ideas on how you can close these boxes.
You can really do so much with these eggs. 
Fill a jar, string on lights or use as a garland. fill a basket or add to a wreath.


 Here is a picture of all the eggs I made folded and ready to be glued.


My adhesive of choice is glossy accents.
 I like that you need very little, it’s strong, long lasting and dries very quickly.

     Cut eggs from cardstock
 I copied and pasted an additional egg so I could get 2 eggs from 1 piece of 12x12 card stock


 To fold the egg, start by folding the top crease lengthwise. 
{Some of the eggs are really delicate, and by doing this step first helps the egg from tearing}


   Fold bottom crease lengthwise
 Here you can see I have both creases folded lengthwise


  Fold over the creases at the top of the egg 


     Fold creases at the bottom of egg

    Fold the crease where each egg is connected


  Once all crease have been folded you are ready to put the box together

     The end of the egg has tabs, fold there crease, and insert the tab into the slot provided


 Once egg has been connected at the end to from a box, glue the top creases together. 


Hold for a few seconds while glue dries
You now have a completed egg


Embellish with ribbon, glitter etc. depending on the use of your egg


 thanks for joining me today


Get Amazon Prime Membership! Enjoy Free 2-day Shipping on Prime products, plus access to Free digital content like videos, books, and more!

Saturday, April 07, 2012

Different Ways to Close Samantha's Egg Boxes!

Happy Saturday!  Jamie here with you today sharing several different ways to fasten Samantha's Egg boxes!
You can also visit this post on different ideas on how to use the egg boxes.
For my first egg, I am using Samantha's 8-sided Easter Egg with repositionable adhesive which allows me to close the egg securely as well as reopen it and close it again!


My next egg is Samantha's 4-sided Easter Egg Box.  I used Glue Arts High Tack Micro Squares, placing one micro square on each bottom tab and on two of the top tabs.
 By only placing two micro squares on the top tabs, I am able push open the top of the egg so that I can load it full of Easter surprises...and the little ones can easily get them out!

  If you want to secure the contents within the egg, you can punch two small holes and use twine to hold the egg shut.

For my third egg, I placed adhesive on all tabs except the tabs on the side with the latch.  This allows me to push open the egg sides to fill (and empty) the egg and by using the latch, it holds the contents securely!


For my fourth egg I am using another 4-sided Easter Egg from Samantha.  With this egg, I stapled the bottom tabs together with four staples and then punched eight small holes along the top tabs.

 I used twine and laced all of the holes and tied it into a bow so the top can easily be opened and closed.


And for my final egg, I punched holes in all of the tabs and used brads to keep it closed! 


We also found several others doing many creative things!  
Just check these out:

Get your eggs here:

Monday, February 27, 2012

New This Week! February 27, 2012

Happy Monday Everyone!  
 New this week at Samantha Walker's Silhouette die cut store

Decorative Eggs!


 Also new this week at  Samantha Walker's Silhouette die cut store
Nested Shapes!

  
Layered Flower


Lace Borders


and Lace Square!


Please note, designs may not be up in the store at the beginning of the week, but they have been uploaded to the queue.  Watch for them as the queue rolls out the new designs!
Related Posts Plugin for WordPress, Blogger...