Ads 468x60px

Showing posts with label Aimee Maddern. Show all posts

Monday, November 03, 2014

Home Decor Projects with Guest Designer Aimee Maddern

Aimee is back today with more Home Decor projects using Silhouette Cuts!
  2
I have always wanted to be able to make my own vinyl decals. I just have always been a little bit afraid. So for this tutorial I bit my lip and went for it.

I found one of my favorite phrases from Samantha and decided this one would look great on a mirror. The best part about the vinyl is, you can change it out anytime you want! So if I decide I don’t like it anymore, or I want to change the décor in my home, it’s a easy as cutting it with my Silhouette Cameo!

I first found the phrase I wanted to use. In the Silhouette Program I made it to the size I wanted which is about 7.5 x 10.5 inches. The silhouette can cut up to 12 inches wide, and the vinyl comes 12 inches x 6 ft. So I am only limited on width for this project.

Screen Shot 2014-10-15 at 5.04.41 PM

I then changed the setting on the machine it’s self to load media, and feed the machine my vinyl. I made sure I adjusted my setting in the program and also on my blade.

After the vinyl was cut I weeded out the negative space and placed my transfer sheet on top of the design, making sure the design stuck really well to the transfer paper.
  1
I cleaned my mirror really well and lined my design up. I then peeled the vinyl backing of my “sticker’ and stuck it to the mirror. I rubbed over the sticker many times to make sure the vinyl stuck to the mirror, I then very carefully pulled the transfer paper up making sure the vinyl stuck to the mirror.
DSC_0464

For Aimee's second project, she made this “when pigs fly” pillow!

  3
I recently went to a baby shower and the theme was “when pigs fly”. Before making this pillow I was going through Samantha’s designs in the Silhouette store and came across this design and knew I needed to make something with it.

The pillowcase I used is from Ikea {$4} and measures 20x20 inches.

In the silhouette program I ungrouped the design and found “just” the pieces I was going to use, which were the simple pig and wings.

I then made the pig and wings almost 11.75 inches big. To keep the shapes the same scale, I pulled on the corner of the design The design was now way bigger than my cutting mat, so I copied and pasted the wings to a new “untitled” cutting mat. 

Before cutting my material, I cut the shapes from cardstock to see if I liked the size on the pillowcase, this also helped me see how much fabric and interfacing to cut.

Once I figured how much fabric and interfacing I needed I ironed the 2 together following manufactures directions.

I placed the fabric on my cutting mat and cut away. I cut the pink fabric first for the pig and the off white second for the wings {I cut a third wing from a plain off white fabric and adhered it to the wing on the pig body to help give the wing definition}.

After the fabric cut I carefully pulled it off the cutting mat and placed on to my pillowcase.

I then ironed the fabric to the pillowcase.
2

To see more of Aimee's work, be sure to stop by her blog: http://aimeesarmoire.typepad.com/

Thursday, October 30, 2014

Halloween Pillow with Guest Designer Aimee Maddern

Guest Designer Aimee Maddern is with us today to share how she made her bat pillow using the 1 piece bat moon circle frame Silhouette cut!
  6

I was feeling the need to release some creativity and came upon the idea to make some Halloween home décor. I came across the bat moon design and thought of making a vinyl decal. But I then decided I wanted a pillow for my front porch. So I decided to make the bat moon a stencil using vinyl. I used a pillowcase that I purchased from Ikea for $4} and measures 20x20 inches.

First I opened the design in the Silhouette Studio Program. I made the design about 11.75 inches big. The silhouette can cut up to 12 inches wide, and the vinyl comes 12 inches x 6 ft. So I am limited on size for this project since the design is square.
  Screen Shot 2014-10-15 at 4.44.48 PM
I first cut the design out on cardstock so I could see what the negative pieces were. Now that I know what those pieces are I changed the setting on the machine it’s self to load media, and feed the machine my vinyl. I made sure I adjusted my setting in the program and also on my blade.

After cutting the vinyl I weeded out the actual design of the bat moon leaving a square piece of vinyl to adhere to my pillowcase.

1

I stuck the negative piece of vinyl to the pillowcase making sure it stuck as well as vinyl can to material. At first I planned using a dye in a spray bottle to dye the fabric. I then came up with the idea to use spray paint, which I had on hand. {Later I found out I should have just used an acrylic fabric paint}
  2

I used painter’s tape and wax paper to cover the pillowcase to catch any over spray. I also placed the whole project on the grass so incase there was over spray, the lawn would be mowed removing any of the over spray.
3

 I also sprayed the stencil with a color mist {I now regret} giving it a shimmer.
  4

I then let the pillow dry for a few hours in the sun, but I could have used a heat gun to speed up the process

  5

Be sure to stop back in Monday to see more Home Decor projects from Aimee!


Sunday, December 29, 2013

Silhouette Tutorial: Cube Surprise Box by Aimee

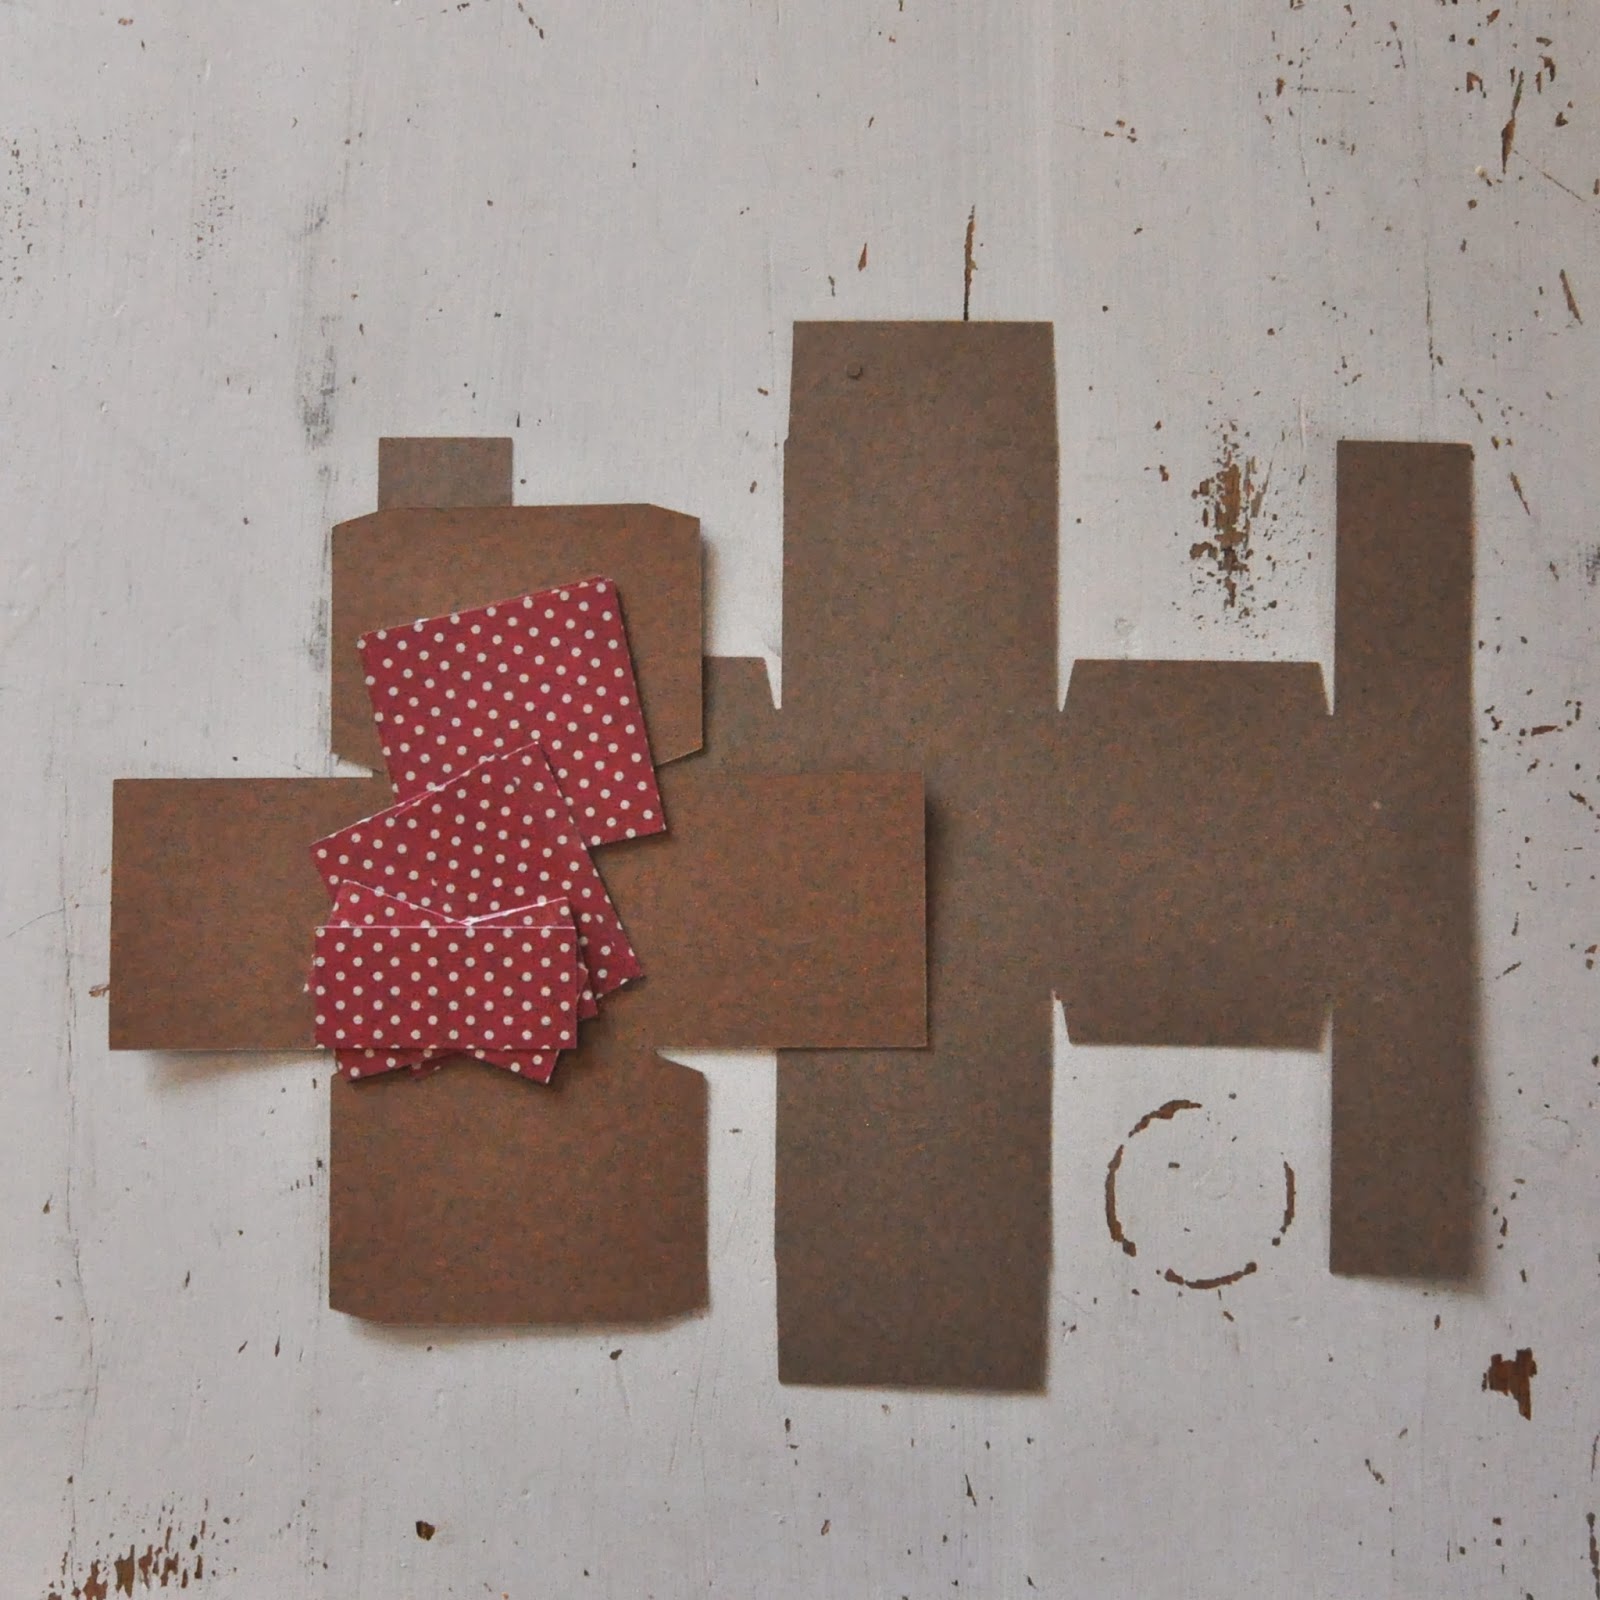
Aimee here to sharing how to make Samantha’s cube surprise box!
I opened the file in the silhouette program, and ungrouped the images, copying and pasting them to new pages. 


I cut the box and cube from two pieces from Kraft cardstock. I cut the polka dot squares from Samantha’s Giddy Up Line. {I cut 2 extra squares}

I started folding all the perforated lines on the 2 box pieces.


I glued all the tabs to the inside of the cube and box, except the 2 top ones on the box, they will get folded in the cube once the cube has been placed inside the box.


I placed the cube inside the box, glued it down folding the 2 tabs over into the box and adhering. 

I then glued all the polka dot paper to all sides of the cube {that's where the 2 extra squares come in} and outside panels of the box.

I hope you enjoyed this little box as much as I do! Thanks for stopping by the blog today, to see how I made it!

Tuesday, November 05, 2013

Fish Scale Thank you Card By Aimee

Happy Tuesday! Aimee here to show you how to make Samantha’s “pop up rain drops” card. 
When I first received this file, I knew I wanted to use a peacock feather on it. You can find these at your local craft and hobby shop or at this link here:

These are the files that I used from the Silhouette Online store.

I opened the file in the silhouette program and ungrouped the image. I find this is the easiest thing for me to do. You could also take the time to two pieces of paper and tape them to the cutting mat or cut the pieces separately like I did.


I copied and pasted the pop up rain drops image to a new page, cutting it from a dark brown cardstock. And I cut the card from an Aqua/Teal colored cardstock.
I also cut the thank you sentiment from some yellow cardstock.

I folded the card on the perforated line. I then bent back all the “scales” from the card to give some definition. With the “scales” looking like raindrops, I adhered the “scales” to the main card. I then adhered the feather to the card and layered the “thank you” on top of the feather. When the card was all dry I sprayed the whole thing with some gold glimmer mist.


Thanks for stopping by the blog today, I hope you enjoyed my card!
-Aimee
Products used to create this project:

Sunday, October 27, 2013

Bat Card & Envelope by Aimee

Hello 
Just days till Halloween, you still have time to send out some Halloween cards!
Aimee here to show you how to make Samantha’s Bat Card, & Envelope


Cutting the material:
I first opened the envelope file in the silhouette program. I ungrouped the images copying the liner, and opening a new page. I then pasted the liner to the new page. I went back to the original page, deleted the liner then positioned the envelope onto the page. I then cut the envelope from some Kraft cardstock.
Second I opened the bat with moon card. Again I ungrouped the images, copying the square and pasting it on to the page with the liner. I then went back to the card positioned it on the page and cut it from Kraft cardstock.
Third I opened the “May Your Halloween be Spooktacular” sentiment on to the page with the liner and square. I resized the phrase to fit inside the card, and then cut these 3 images out of a thin black paper.


Assembling the Card & Envelope:

The Envelope:
I laid the liner on the inside of the envelope and found where I wanted to adhere it. I then took a ruler and bone folder a scored a line at the crease of the envelope, onto the liner. I then adhered the liner into the envelope. Once the liner dried I folded the envelope at the perforated marks, and adhered it together.


The Card:
I took the square that was cut from the black paper and carefully adhered it to the inside {backside of the moon} of the card. I then folded the card on the perforated line. I then adhered the sentiment inside the card on the right side.


Thanks for stopping by the blog today and hop you enjoyed the card!

Tuesday, July 16, 2013

Sail Away With Me Card and Wave Tutorial by Aimee

Hi!  Aimee back today!  A couple of weeks ago I made some tag shaped cards for the Samantha Walker and JustRite blog hop. Today I am going to show you how to make the tag shaped card and the “waves” from my “sail away with me” card


Here's the tutorial...
To make the tag card:
1.     Cut a 4x12 piece of cardstock, fold in half
2.     Cut dog ears and punch hole

To make the waves:
3. Use Samantha Walker JustRite Bunting & Button Die. Cut 4 pieces of cardstock {different colors optional} with the scalloped bunting.
4. Fold each bunting over the other; this will allow the paper to be manipulated and the bunting to go straight
5. Add a small amount of adhesive to the top {in this case the bottom} of the bunting. Adhere to the tag
6. With alternating colors lay the next piece of bunting so it just over laps the first layer. Repeat this for steps 7 & 8
9. Cut the “tails” of the bunting off
10. Carefully fold the bunting up to give a 3-d effect {this is why you only glued the top of the bunting and not the whole bunting}
11. Stamp and hand cut Samantha Walkers All Boy sentiment and sailboat stamp
12. Add foam adhesive and place where desired


Thanks for stopping by today and seeing how I made this card!


Saturday, June 01, 2013

Hello Summer Card By Aimee Maddern

Hi there, Aimee here to show you how to make this sweet Summer Card using Samantha’s “Cool Summer” line from Carta Bella


 Start out by cutting a 5x 10 piece of One Scoop. 
Fold in half using a bone folder, confetti side out.


- Glue down a 5in round doily. 

-Punch a 2” circle from Ice Cream Border. I distressed the edges and glued it to the middle of the doily green gingham side up.

-Then take some yellow jute and waded it up in your hand smash it against the card and staple the center with tiny attacher.


-Place chipboard accent “summer” on top of jute covering staples.

-Using alpha stickers spell “hello” above summer on card.

-Cut blue chipboard pennant flag to size, remove sticker back.


Place twine on backside.


Tie bows with tails, attach with tinny attacher.


-Adhere pennant at top right corner

-Add foam adhesive to back of chipboard pinwheel. Adhere to card. 


-Thread pink floss through chipboard button tie bow. Place in center of pinwheel


And there you have it, a fun summer card 
thanks for stopping by the blog today!


Related Posts Plugin for WordPress, Blogger...