Ads 468x60px

Showing posts with label decadence. Show all posts

Friday, October 26, 2012

Natural Therapeutic Hot/Cold Pack Tutorial by Pinky

Hey there friends, 
Pinky here today with a tutorial for Therapeutic Hot/Cold Packs that are all natural and easy to make yourself. Samantha Walker's beautiful Decadence Fabric line makes them perfect for fall or just to make a stunningly styled hot/cold pack. 

Uses for these?? 
Migraines, aches and pains, bed warmers (much larger of course), lovies (in the shape of animals) bread basket warmer- to keep food warm or cold. 
You can freeze them or heat them,just leave in freezer or heat in microwave for 1-2 minutes. 
Step 1. Cut strips of fabric 2-3"X8-16". 
Your choice depending on area you want to apply it to. 
I chose the shorter ones because I will be giving them to a friend who has migraines. 
I made them the perfect size for the forehead.
 Step 2. With right sides facing together, 
stitch sides and bottom making sure to leave opening at the top. 
 Step 3. Snip corners and thread. 
 Step 4. Turn bags right way. 
Step 5. Pour rice into a bowl. Add all natural oil (just a drop or 3 not too much). 
Stir into rice thoroughly.
 Step 6. Funnel rice into bags. (I use a sheet of paper as a funnel). 
Step 7. Stitch ends closed. 
These make wonderful gifts but you cannot wash them.


Friday, May 11, 2012

A Crafty Gift by Angi Barrs

Hello everyone!  Angi here with a fun tutorial and gift idea using Samantha's adorable fabric and die-cut embellishments.

Baker's twine is a popular trend right now. Here's a way to give "The Gift of Twine" in a fun and unique way.

First you will need the following supplies:

1. A spool of baker's twine. I used the "Honeydew" twine from The Twinery.
2. Samantha Walker "Decadence" fabric - You can find it in the Riley Blake store.
3. Samantha Walker die cuts - You can find the "Heidi" collection die cuts.
4. A lollipop stick - (from Michael's Craft Store)
5. Pop dots

Step #1 - Cut a piece of Samantha's fabric - 9 inches long x 2-1/2 inches wide. Wrap it around the center of the spool of twine. Use three pop dots to adhere it.


Step #2 - Add pop dots to the back of your Samantha Walker die-cut embellishments.


Step #3 - Place the die-cuts on top of the fabric. Tie a small piece of baker's twine to the larger tag die-cut embellishment.


Step #4 - Add pop dots to the other die-cuts, then add them to the lollipop stick.


Step#5 - Place the decorated lollipop stick in the center of the spool of twine. Now you are ready to give a crafty gift that will make anyone smile!


I hope you enjoyed my tutorial.
Have a Happy Crafty Day!


*****

Thursday, April 05, 2012

Introducing Guest Designer Jennifer Rodriguez!

Hi everyone, my name is Jennifer Rodriguez and I blog over at All Things Belle. I love to quilt and spend most of my days sewing with  my two little girls playing at my feet. I am so excited to bring you a project today using Samantha Walker's amazing Decadence line! I love the playful pears and the rich colors. When I first saw this line, I thought it would be perfect in an outdoor space. The pears are a fabulous natural motif and the rich, strong colors of the fabrics would be colorful fun on our patio.

Today I will be doing a tutorial on how to create a fussy cut, reverse applique table runner for your patio table. That was a mouthful! It's actually quite easy and adds a great comfy touch to your outdoor living area.

Final Size: 11" x 32"

Materials needed:
1/3 yard of brown print
1/3 yard of pear print
1/2 yard of orange print
1/3 yard of light weight fusible stabilizer
1/4 yard of light weight fusible webbing

*All seams are 1/4" unless otherwise noted.

Directions:
1.) Cut a 5"x32.5" strip of brown print fabric and light weight fusible webbing. Iron on the webbing to the wrong side of the brown fabric strip.


2.) We will now make the windows for the pears to peer out of. We ironed on the webbing to the brown fabric  for a couple of reasons: reduce the inner window fabric from becoming ragged, stabilize the piece, and add extra adhesion to our fussy cut pears.

Each pear measures about 2.5" x 3.5" on the fabric and that is how big we will make our windows. Starting at 1.5" inches in from the side, I drew with an iron-off pen 2.5"x3.5" rectangles every three inches. I had 6 windows on my piece, but you could play with the measurements and increase or decrease as desired. Once you are satisfied with the placement of your windows, carefully cut them out.


3.) The definition of "fussy cut" is that you are cutting the fabric in a particular way to spotlight a certain area. I think Samantha Walker's pears are a delicious motif and I really wanted to spotlight each one.

For your next step, audition the pear fabric by placing different pears behind the brown fabric so that they peer through the window. Once you are happy with their placement, pin the fabric together. You will need to cut off the excess fabric that surrounds your chosen pear.


4.) With a zig zag stitch, sew around the perimeter of each window. I chose a bright white for contrast, but if you want a more subtle look then pick a thread that matches the brown fabric.


Your piece should now look something similar to this. Don't worry about the fusible webbing yet, that will be taken care of later in the project.


5.) Now you will need to cut (2) orange strips measuring 3" x 32.5". Sew on to the long sides of the runner and press.


6.) Now cut the remaining brown fabric into (2) 1.5"x32.5" strips. Sew on to the long sides of the runner and press. The front of the runner is now complete - set aside.


7.) For the back of the runner, you will need to cut an orange fabric piece and fusible stabilizer 11.5"x32.5". Iron on the stabilizer to the wrong side of the large orange back.

8.) We will now complete the runner. Pin the front and back, right sides together. Sew around the border, leaving a 4" hole opening to turn.

Clip the corners up to the stitching line as it will give you a sharper corner edge. Turn the runner right side out and press. When you press, the fusible webbing will adhere to the runner back, increasing the stability of your reverse applique.


9.) Topstitch the border of the runner, making sure that you close the hole opening. For this step, I did use a matching thread to the brown fabric.


And that's it! Doesn't this porch look comfy and inviting? I'm planning on spending many late afternoons here with a drink & a book watching my children play. I think our outdoor living spaces are sadly overlooked when it comes to our sewing projects. This is a fun and quick way to liven and comfy it up!


Thank you so much for spending this time with me! I hope you are inspired to go play with this yummy fabric  for the summer ahead. If you love that pillow on the porch chair, be sure to come by my blog, All Things Belle later this month. I will show you how to create two oversized pillow covers as well as a doll quilt with the Decadence fabric.

Friday, December 09, 2011

A Cute Apron and Purse with Decadence

Now, just for fun...

I've got two projects to share with you using my Decadence fabric collection.  The first is a darling purse made by my creative team member Jamie Cripps.  There's nothing better than orange to get a second look...this is so cute!

The second project I want to share is this flirty apron. Don't you think those colors work so well with retro ruffles!  This colorful creation was crafted by my creative team member Guiseppa Gubler.  


These are just two of my creative team members...if you come back often, you will get the opportunity to get to know all 10 creative team members.  You will LOVE what they do! They work on all kinds of projects with my designs...from paper crafts to sewing, to so much more! 

Before you hop along to the next blog...I just wanted to say "Thank You" for stopping in today!   

Wednesday, September 14, 2011

Painting at the Cabin

I love the families I am a part of. Art and creativity ooze from both my husband's side and my side of the family. The best part about that...is that is that while we are all creative...we are all very individual in how we go about creating.  My sister is a sculpter, her husband is a painter. My brother is a writes copy for advertisements (Have you ever seen the Vikings "what's in your wallet" ad campaign?) My brother in law designs over-the-top trade show booths that would blow your mind. My sister in law teaches Art in an elementary school and the kids love her.  My other sister in law is a landscape architect who creates beautiful plans for homeowners and commercial business alike. My Mother in Law is a budding "Grandma Moses" as she has discovered her love of paint only recently. My grandmother painted scenes of China Town and San Francisco in watercolor. My Uncle Ray paints acrylics and is inspired by the bright colors and themes of Mexico.  The ones I haven't mentioned may not be making careers in art, or painting daily, but I assure you, their talent and creativity is there. 
Over Labor Day Weekend, we had the opportunity to get together for a Family Reunion in Bear Lake, Idaho.  This is one of my favorite places to be. It is so peaceful to get away from the computer, the phone and all other things that might tie me down otherwise, and just spend time with my family. I love it! 

One of my brother in laws insisted that we have an "art day" while up at the cabin, where we could sit around and paint for an afternoon. I have to admit...I was a little nervous about this idea.  Even to the point that I thought I might hang out around the kids craft table and help out there instead of getting brushes out and making a mess on a canvas. The kids craft table was a happening place as they were customizing their own wooden boats to float in the ditch in front of the cabin. 
It has been so long since I've picked up a paint brush and made an actual painting. Did I just say that out loud? I enjoy to create alone. I am intimidated by spectators--I feel some sort of pressure for perfection. The funny thing is, is that is such a selfish way to think. I suppose all artists have their own inner insecurities. Soon I realized, that this was not what this activity was about. This afternoon was about having fun...pushing aside any insecurities, and "just enjoying the feeling of pushing paint around with a brush." At least that is what my Mother in Law kept on insisting. I started to believe her, so I finally gave in and joined my family. I'm so glad I did.  It was so good for my inner artist to do something not computer related...and to get back in touch with my traditional creative roots. It took a little time, but I  truly did push away thoughts of having to make something perfect. It was super fun and relaxing to just push paint around with no pressure. 
Here's our little family "art colony." Okay...maybe not such a little art colony...our family was a total of 34 people up at the cabin.

Here is my brother in law Dan...painting an ocean scene from a favorite photograph.  His pseudo name he uses for his art is "Otis Ash" you can find his creative page on Facebook here. He's only recently discovered his love of painting and design in the last couple of years.  He has some original artwork displayed in a few restaurants in the Idaho town where he lives. I think he's onto something...he's always trying something new and different.
 Ocean scene by Otis Ash.
This grove of trees painting is by Jeremy Walker. This miniature painting was created by my brother in law who is the fab industrial designer.  Did I tell you about the dungeon playhouse he created in his Mother in Laws basement...equipped with an animatronic Dragon a la Disney style?  Beyond cool, I tell you!
This flower painting is was what I did that weekend...I tell you...I took this several directions before I came to this point.  I tried doing this stiff and clean lined like my work I create on my computer...but I could not deny my inner love of texture when it comes to oil paint...so I just let loose, gave up my brushes and went with a painting knife.  Funny, once I lost the brushes...and picked up a knife, it was like I had found an old lost friend.  I ought to paint more.  I enjoyed myself so much.
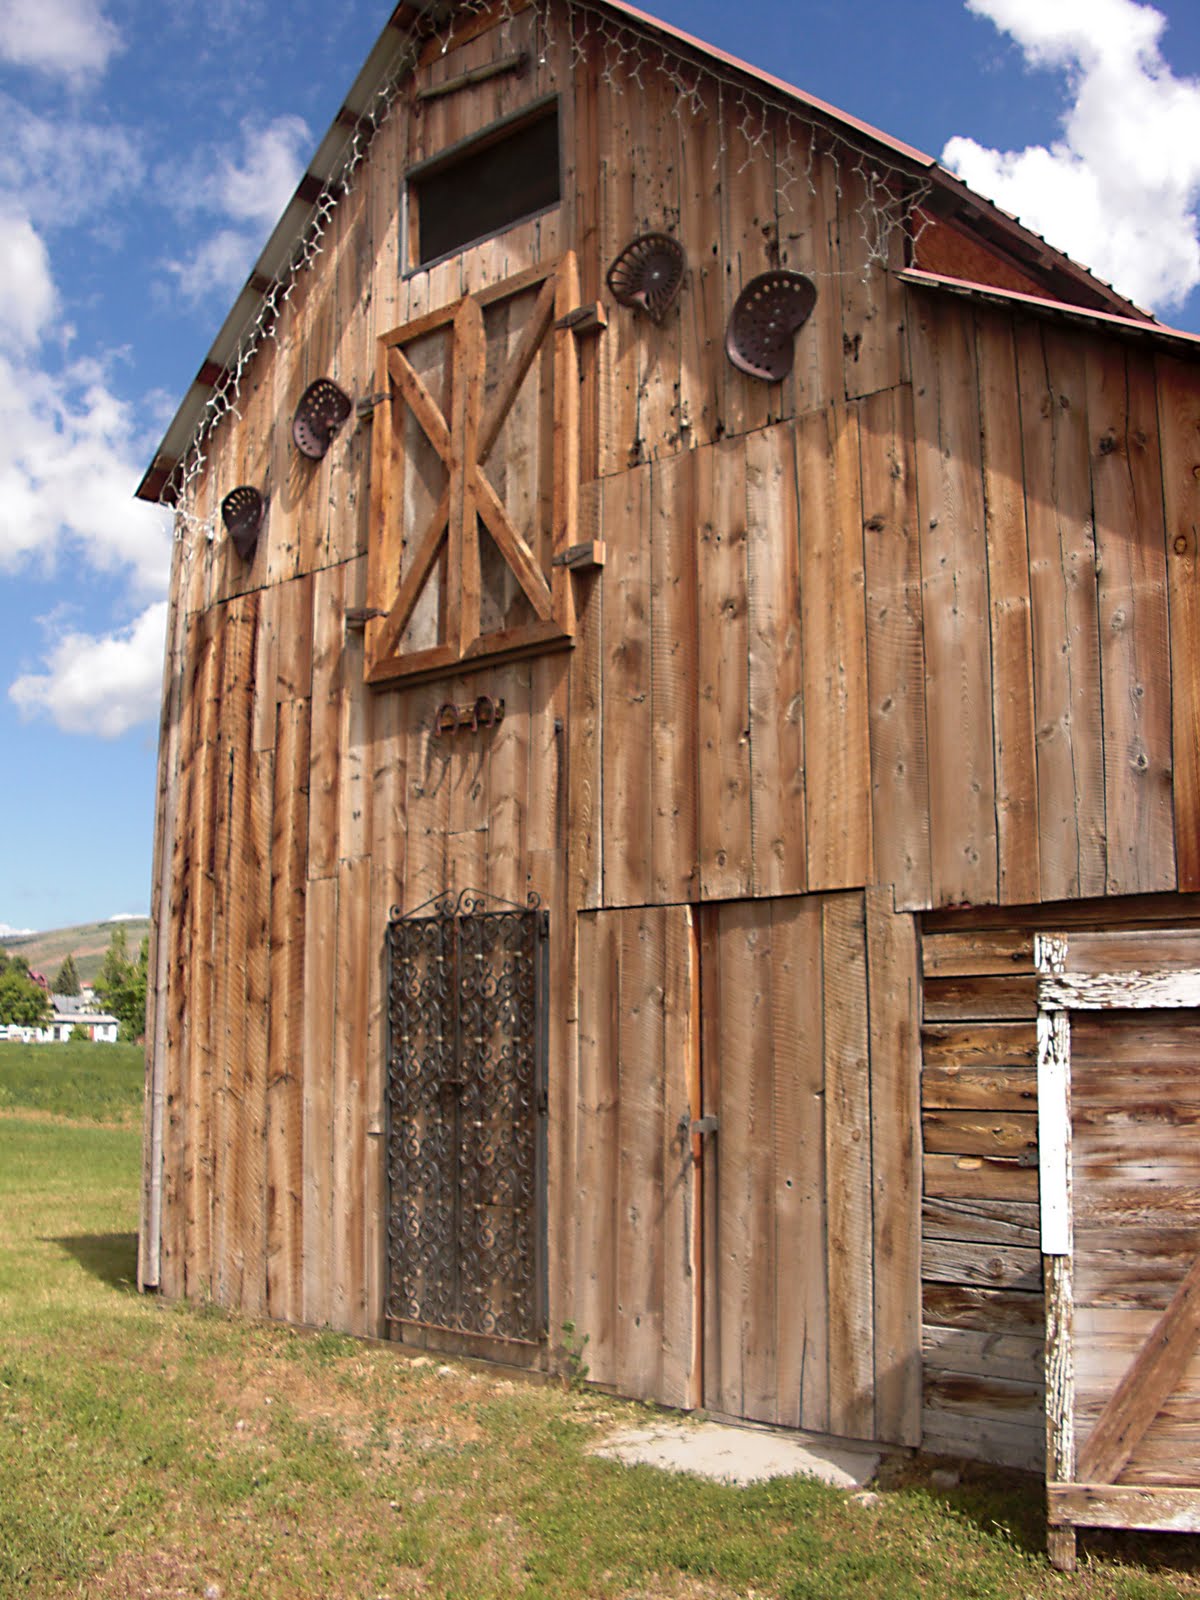
This is the gorgeous barn that is on my sister in law's property at Bear Lake.
 Close up of the barn. LOVE that iron gate on the side!
The barn painting here is by my sister in law Shalynn Andersen.  She is the elementary school art teacher. I love the texture she made in the grass in front of the barn...and love the yellow sky.  The duck painting is another Otis Ash. 
The tree painting is done my my Mother in Law Rita Walker.  I love the raw texture and moodiness of this little painting.
This photo makes me smile...as it is the perfect story of our weekend up at Bear Lake.  You can see the corner of a beach towel hanging up to dry on the fence (from our beach trip the day before), just above the paintings below, which are also hanging around to dry. The one on the left is an Otis Ash, the one on the right is a Laura Andersen.  She is my niece who is in college...she said that her painting was a representation of her feelings.
On the left is my brother in law Jeremy Walker's painting in better light, and on the right is his 9 year old daughter Katie's painting. I thought her under the sea painting was so delightful.

As you can see...not a one of us paints like the other.  We are all very individualistic in the way we create.  We all had access to the same tools but the outcome was completely different.  This is much how it is in the crafting world. You have access to the same tools and papers, fabrics and stamps, and yet what you create is so individually you!
Related Posts Plugin for WordPress, Blogger...