Hi everyone, my name is Jennifer Rodriguez and I blog over at All Things Belle. I love to quilt and spend most of my days sewing with my two little girls playing at my feet. I am so excited to bring you a project today using Samantha Walker's amazing Decadence line! I love the playful pears and the rich colors. When I first saw this line, I thought it would be perfect in an outdoor space. The pears are a fabulous natural motif and the rich, strong colors of the fabrics would be colorful fun on our patio.
Today I will be doing a tutorial on how to create a fussy cut, reverse applique table runner for your patio table. That was a mouthful! It's actually quite easy and adds a great comfy touch to your outdoor living area.
Final Size: 11" x 32"
Materials needed:
1/3 yard of brown print
1/3 yard of pear print
1/2 yard of orange print
1/3 yard of light weight fusible stabilizer
1/4 yard of light weight fusible webbing
*All seams are 1/4" unless otherwise noted.
Directions:
1.) Cut a 5"x32.5" strip of brown print fabric and light weight fusible webbing. Iron on the webbing to the wrong side of the brown fabric strip.
2.) We will now make the windows for the pears to peer out of. We ironed on the webbing to the brown fabric for a couple of reasons: reduce the inner window fabric from becoming ragged, stabilize the piece, and add extra adhesion to our fussy cut pears.
Each pear measures about 2.5" x 3.5" on the fabric and that is how big we will make our windows. Starting at 1.5" inches in from the side, I drew with an iron-off pen 2.5"x3.5" rectangles every three inches. I had 6 windows on my piece, but you could play with the measurements and increase or decrease as desired. Once you are satisfied with the placement of your windows, carefully cut them out.
3.) The definition of "fussy cut" is that you are cutting the fabric in a particular way to spotlight a certain area. I think Samantha Walker's pears are a delicious motif and I really wanted to spotlight each one.
For your next step, audition the pear fabric by placing different pears behind the brown fabric so that they peer through the window. Once you are happy with their placement, pin the fabric together. You will need to cut off the excess fabric that surrounds your chosen pear.
4.) With a zig zag stitch, sew around the perimeter of each window. I chose a bright white for contrast, but if you want a more subtle look then pick a thread that matches the brown fabric.
Your piece should now look something similar to this. Don't worry about the fusible webbing yet, that will be taken care of later in the project.
5.) Now you will need to cut (2) orange strips measuring 3" x 32.5". Sew on to the long sides of the runner and press.
6.) Now cut the remaining brown fabric into (2) 1.5"x32.5" strips. Sew on to the long sides of the runner and press. The front of the runner is now complete - set aside.
7.) For the back of the runner, you will need to cut an orange fabric piece and fusible stabilizer 11.5"x32.5". Iron on the stabilizer to the wrong side of the large orange back.
8.) We will now complete the runner. Pin the front and back, right sides together. Sew around the border, leaving a 4" hole opening to turn.
Clip the corners up to the stitching line as it will give you a sharper corner edge. Turn the runner right side out and press. When you press, the fusible webbing will adhere to the runner back, increasing the stability of your reverse applique.
9.) Topstitch the border of the runner, making sure that you close the hole opening. For this step, I did use a matching thread to the brown fabric.
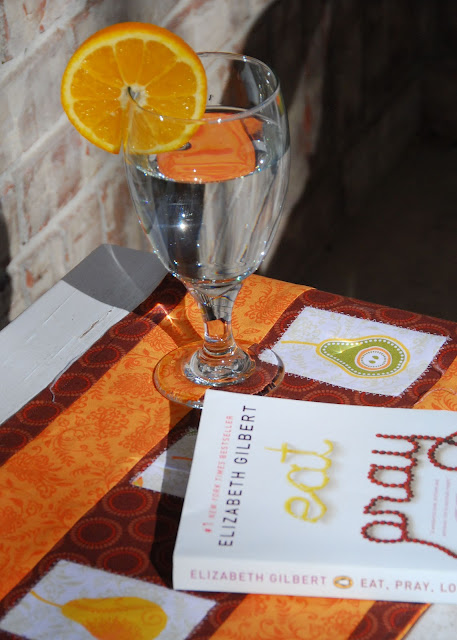
And that's it! Doesn't this porch look comfy and inviting? I'm planning on spending many late afternoons here with a drink & a book watching my children play. I think our outdoor living spaces are sadly overlooked when it comes to our sewing projects. This is a fun and quick way to liven and comfy it up!
Thank you so much for spending this time with me! I hope you are inspired to go play with this yummy fabric for the summer ahead. If you love that pillow on the porch chair, be sure to come by my blog, All Things Belle later this month. I will show you how to create two oversized pillow covers as well as a doll quilt with the Decadence fabric.


These projects are so wonderful and your tutorial is fabulous! Thank you so much for sharing these with us Jennifer!
ReplyDeleteJennifer...welcome! Your projects are absolutely gorgeous! You did a wonderful job. So glad you could share your talents with us!
ReplyDeleteThank you so much for having me! I simply adore Samantha's designs. My daughter's whole nursery is decked out in her cowgirl designs.
ReplyDeleteLove, lover her work!
Thank you again!!
Jennifer! Your projects are fantastic! I totally adore what you did! Thank you so much for being a guest designer this month!
ReplyDeleteThese are beautiful!
ReplyDeleteSuper fabulous projects. I really love that adorable pillow! :)
ReplyDelete