Ads 468x60px

Showing posts with label card. Show all posts

Tuesday, December 02, 2014

Santa Snow Globe Card with Diana


Hi! Diana Fisher here with you today to share this Snow Globe Card with Santa Claus. I am sharing with you a different way to make the card than is featured on the example.  

I wanted to put the globe base on the inside of the card, making room for a "Merry Christmas" sentiment that I will be adding later on. 

When you download the card, here is what the studio file looks like.


I then separate the files based on what color card stock I will be cutting them out of. I had five colors on this one sheet. 


On this sheet I had the white pieces. 


This sheet was for backgrounds and the globe. 


To assemble my globe in the inside of the card, here is how I arranged that. You can see I still left room for Santa Claus to overlay the globe from the front instead of the globe coming up over Santa.


And here is the up close shot of Santa in the front of the globe. 


Remember, when working with a cut file, there are usually more than one way to arrange the pieces. Have some fun, play around with the pieces and see what you can come up with!


Saturday, May 31, 2014

I Love Summer by Cathy

Hi Samantha Walker fans!  Cathy hosting the blog today and I have a summer card full of sequins to share with you. I am so ready for summer, this past winter was just way too long.  I used Samantha's Rainbow card file, you can find the file here.


First, I enlarged my card just a bit so that the cloud base was almost 5/12 inches.  Next, click ungroup so that you can separate the rainbow pieces.  I used three pieces, starting at the top, grab every other rainbow piece and place them where you want them on your card base.


Group your card together and click duplicate.  I cut two card bases so that I could used one card (cut in half) as a template to follow for the sequins and the other half to back the sequined piece, to give it a nice finished look on the inside! I used Bazzill Dotted Swiss Salt card stock for my base and I cut my white clouds along with the card bases.  I just forgot to take a screen shot of that.

Next, fold you card base and glue your sequins.  I used Helmar's 450 Quick Dry adhesive and it worked like a charm. 

Here's where you cut that second card base in half.  The back piece adheres to the inside front of the card and the top with the rainbow will be pop dotted and adhered over the top on the sequins giving you that nice 3-D effect.

Now, cut two more clouds with the blue gondola's paper from Samantha's newest collection from Carta Bella...Summer Lovin'.  I offset the clouds .244, cut them and then went back and inset them just a bit, changed the line style to look like stitching and then switched my blade out for a blue Silhouette Sketch pen.


Now all you have left, is to layer your clouds together and adhere them to your card.  My clouds overlap so that I could add that super fun sticker from the Summer Lovin' collection. Finish with a button and a bit of ribbon.  You can find the file for this card on the Silhouette Store, just click the photo below and it will take you right to it.


Thanks for joining us today at Samantha Walker!
~Cathy

Thursday, May 01, 2014

Personalize Projects with Silhouette and Digital Files by Tonya

It's Tonya, from Scrapping Fun with Tonya, & I have a great way to use your Samantha Walker Silhouette files and Samantha Walkers Digital papers.

I just LOVE how I can personalize my projects with the Silhouette and Samantha's products.  

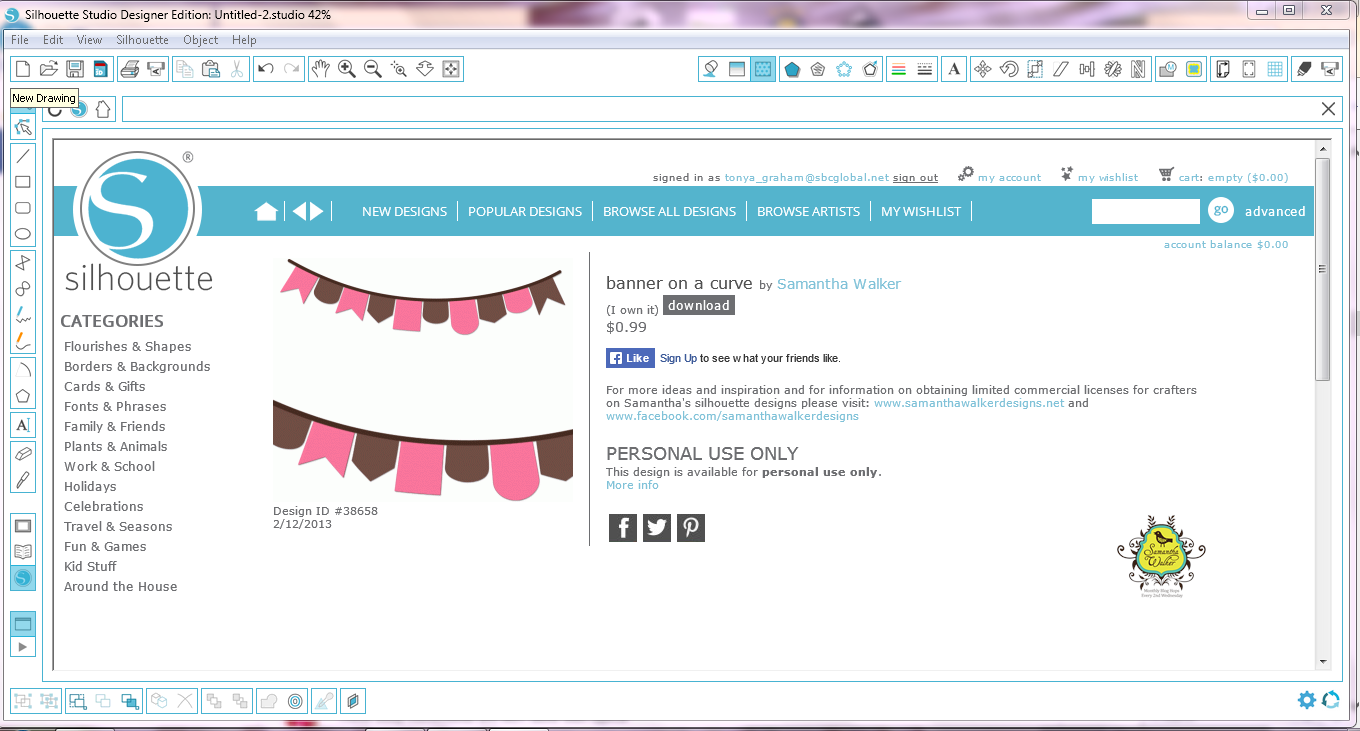
   One of my favorite Samantha Walker files is the Banner on a Curve (Design ID #38658).


When the file is first opened, it is sized for a 12x12 mat, and all one piece.  To be able to manipulate the file, you must first ungroup.  (Click on the image, then click/select ungroup)

 I moved the banner base away from the pieces.  Then next step was to 'release the path.'  To do this, click on the banner pieces, and open the modify window.  While the image is 'highlighted,' click release.  Doing this will separate the banner pieces so that you can alter each one individually. 
 

I wanted to use digital papers from the Samantha Walker Nautical Mega Pack.  With the Silhouette software, you can import your own papers/images. 
Click file...library....import to library.
To fill in the banner pieces, just click on the shape of choice so that it is 'highlighted.'   All papers that are imported are available in the patterns window.  (As you can see, I organize my papers/patterns by artist/collection.)  . 

Scroll through until the pattern you want is found, click, & VOILA! 


 You can adjust the pattern to your liking by using the advanced settings.


I used this banner on a card (see below)...so I regrouped the pieces and resized accordingly. 


To finish, just do a print & cut. 


Here is the card I created with the banner......... 


(Close up of the banner)

I also used more elements from the  Samantha Walker Nautical Mega Pack for the main image (sailboat), the Together 'sentiment,' and the patterned mat.   

For more information on that, please follow my blog and be sure to read my next post.  


Supplies:
Samantha Walker Silhouette File (#38658 & #14232)
Silhouette Cameo
Printer
Recollections Cardstock
ATG Gun


Tuesday, December 03, 2013

Tri-fold Holiday Scene Card by Diana Fisher


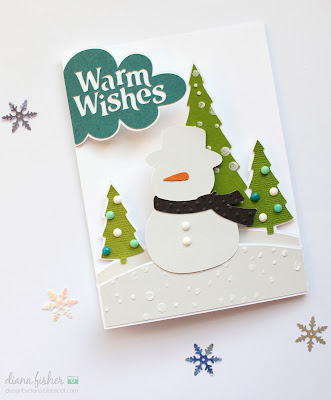
Hi! Diana Fisher here with you today to share a tutorial on how to best use the tri-fold scenery cards available from Samantha Walker in the Silhouette store. You can find the file for this card here.

To get set up to cut your pieces, you'll want to select the file and 
then ungroup all of the pieces. 

Once they are ungrouped, you can reposition them into the areas of the cutting mat where you will be assigning them colors.

My top area is white card stock — the base for the card. Bottom left is green and bottom right is grey.


I started a second file and moved the snowman, the warm wishes, the carrot nose and the scarf into their own quadrants. This makes it easier for me to just use 6x6 papers set up into fours. 


After all of your pieces are cut, you can start to assemble the card. I adhered the green trees to the white card stock base. 

Since this is a wintery scene, I have to share one of my favorite things to use this time of year: embossing paste. Using a stencil, you smooth it through the dots using a sponge or brush to make a textured, soft-looking snowfall effect. I've used gesso, too, but the embossing paste looks the most like snow. It dries pretty fast and has a texture to it once dried. 


Once the layer with the trees is finished, I assembled the snowman layer. He also gets a brush of embossing paste for some more snow fall.


Once the basic pieces from the card are assembled, you can put some finishing touches on the card. I added enamel dots for ornaments to the trees and some more for the snowman's buttons.


For this cad, you'll want to write on the areas covered by the other layers, so you won't see your writing through the trees. 


Thanks for stopping by here today to see my holiday scene tri-fold card. These are some of the most rewarding cards you can make, and they are worth every step it takes to make them. Check out Samantha Walker's silhouette files for more cute card ideas.

* * * * * * *

Get Amazon Prime Membership! Enjoy Free 2-day Shipping on Prime products, plus access to Free digital content like videos, books, and more!

Tuesday, November 05, 2013

Fish Scale Thank you Card By Aimee

Happy Tuesday! Aimee here to show you how to make Samantha’s “pop up rain drops” card. 
When I first received this file, I knew I wanted to use a peacock feather on it. You can find these at your local craft and hobby shop or at this link here:

These are the files that I used from the Silhouette Online store.

I opened the file in the silhouette program and ungrouped the image. I find this is the easiest thing for me to do. You could also take the time to two pieces of paper and tape them to the cutting mat or cut the pieces separately like I did.


I copied and pasted the pop up rain drops image to a new page, cutting it from a dark brown cardstock. And I cut the card from an Aqua/Teal colored cardstock.
I also cut the thank you sentiment from some yellow cardstock.

I folded the card on the perforated line. I then bent back all the “scales” from the card to give some definition. With the “scales” looking like raindrops, I adhered the “scales” to the main card. I then adhered the feather to the card and layered the “thank you” on top of the feather. When the card was all dry I sprayed the whole thing with some gold glimmer mist.


Thanks for stopping by the blog today, I hope you enjoyed my card!
-Aimee
Products used to create this project:
Related Posts Plugin for WordPress, Blogger...