Ads 468x60px

Showing posts with label Daniela Dobson. Show all posts

Tuesday, December 31, 2013

Mini album by Daniela Dobson


Hi, Daniela here with a cute mini album. 
Samantha Walker products:


1. Open and cut 3-d  Samantha Walker lace-close box using Silhouette Cameo and patterned paper.

2.  Assemble the box and adhere. Add jewel brads.
3. Cut 6 3x4 pages from patterned paper. Add patterned paper strips, chipboard and stickers. Bind the album
4. Finish by decorating the front of the box with chipboard and stickers.
Note: I decorated the box so that it can be used in vertical position with the small flap opening on the right. When adding stickers, remove the adhesive by applying some baby powder to the back. Add adhesive only to the left side or right side of the stickers so that the box can be opened. The right flap tucks under the brad and stays secured. 


Thank you for stopping by today!.


Minted Letterpress Wedding Invitations

Saturday, October 19, 2013

Boy Card by Daniela Dobson

Good Morning!  Daniela with you today to share a fun boy card 
using lots of Samantha Walker goodies...

Samantha Walker products:

1. Using a chevron stamp from Pattern Basics, stamp on the glassine bag using VersaMark ink. Heat emboss using embossing powder. Do the same thing with the sentiment using black embossing powder. 


2. Layer two different pieces of patterned paper on the cardstock base. Adhere the glassine bag, and different chipboard elements. Add sequins to the card front. 


Thank you for stopping by today and let me know if you have any questions.

Tuesday, September 17, 2013

Flower tag by Daniela Dobson

Hello, Daniela here with a tag.

Samantha Walker products:

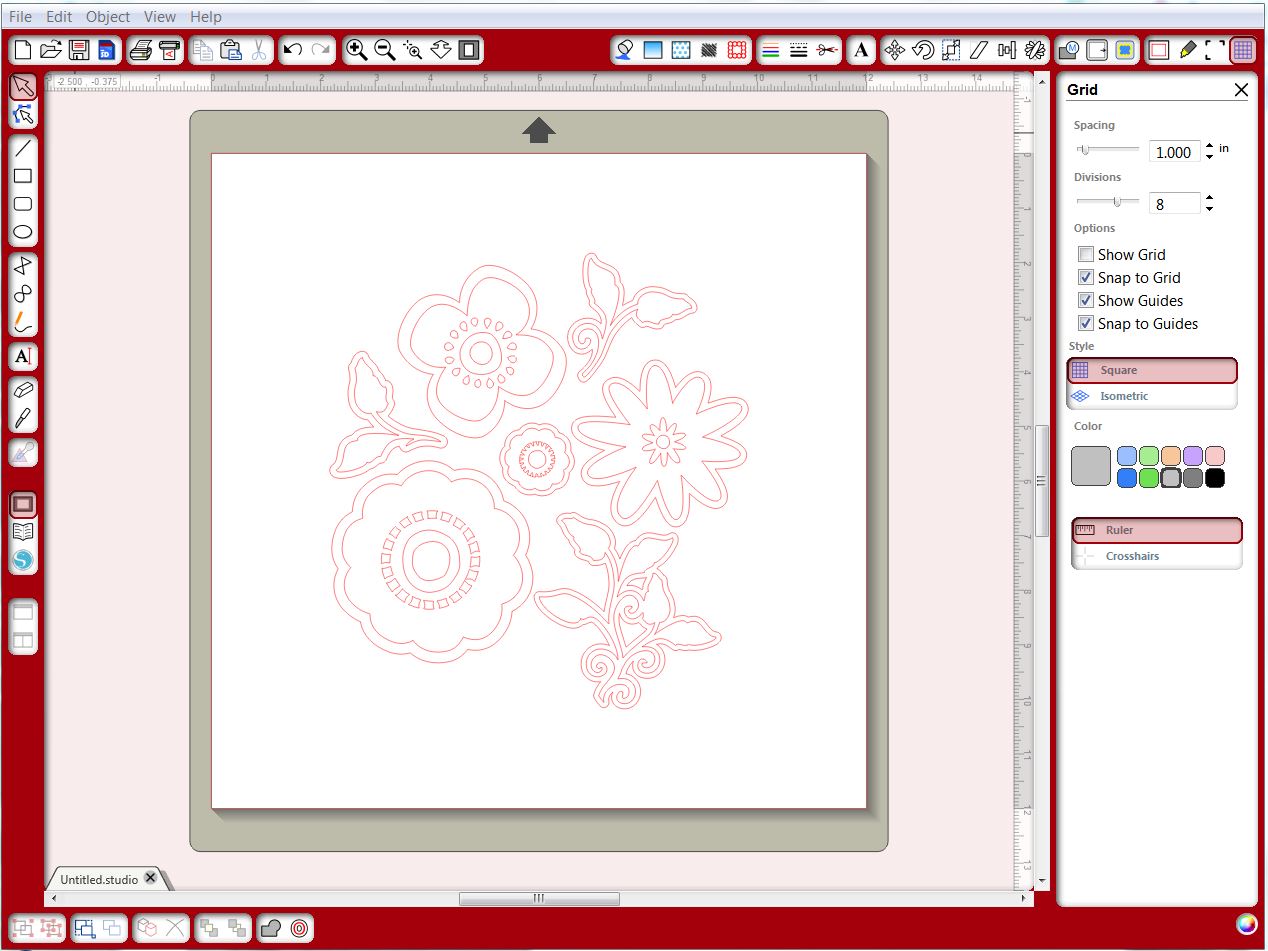
1. Open 4 flower pack in your Silhouette Studio. Click on the designs to select them and right click to ungroup. Be very careful now since all the pieces are separated.


2. I selected the right flower and the leaves below, right click and cut. Open a new document and right click and paste. Once you are here, in your new document you can separate all the elements. I resized them to 2.25". Make sure you select all the elements and resize them all together so everything is the same size. 


3. Once all the pieces are cut, from white cardstock, color the flowers and leaves with watercolor paint.


4. Once the flower are dry, stamp them using Leafy Background stamp. Using light color ink adds little more dimension and texture to the flowers. 


5. Make a tag from patterned paper and ink all paper edges. Add other embellishments. Layer the flowers together with leaves and other elements. 


6. Add ribbon to the tag, twine to the flower and pearls to the tag.

Thank you for stopping by today!
Here are some supplies that you can use to make today's project, and other fun stuff.
 

Sunday, August 04, 2013

Happy birthday card by Daniela Dobson

Hello, Daniela here with a Happy Birthday card. 


Samantha Walker products used:

1. Make card from brown patterned paper.
2. Cut pink patterned paper slightly smaller thatn the card frot and adhere. 
3. Stamp banner on white cardstock with black ink two times. Cut banner and adhere across the front of the card. Paint the second samped banner with watercolor crayons and cut out. Adhere different color banners to the card. 


4. Adhere sticker with 3D Foam Squares. Adhere flair badge to the center. 
5. Stamp "Happy birthday" on a sticker from the patterned paper set and adhere to the card using 3D Foam Squares. 


Thank you for stopping by today!

Here are some of the supplies Diana used to make today's project, including hard to find supplies like the fun watercolor crayons!


Saturday, July 27, 2013

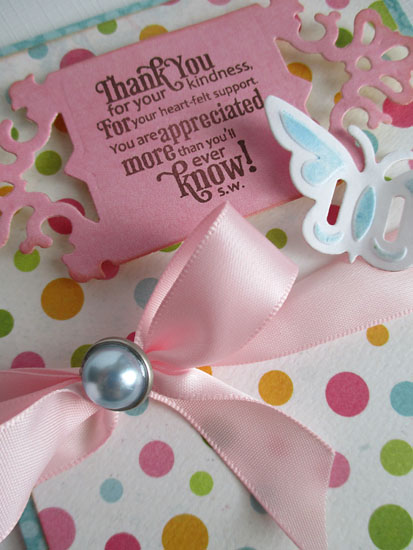
Thank You Card by Daniela Dobson

Hello, Daniela here with a Thank you card.


Samantha Walker products used:

1. Make card base from Cool Summer paper collection. Cut a smaller piece from polka dot paper and adhere to the front. 
2. Die cut ornate square from pink 6x6 paper pack and stamp a sentiment from For All You Do Vintage Labels Three stamp set. Adhere to the top of the card using 3D foam squares.

3. Die cut and emboss butterfly from Butterfly Corners dies in white cardstock. While the cardstock is still attached, color the exposed/embossed parts with chalk.


4. Adhere butterfly to the card with 3D foam square. Tie ribbon into a bow and add a brad.


Thank you for stopping by today and let me know if you have any questions.


Tuesday, June 18, 2013

Make a wish display by Daniela Dobson

Hello! Daniela here with a little display you can place anywhere in your work area or your house.


Samantha Walker products used

1. Open antique oval frame in your Silhouette Studio, shown in pink. 
2. Go to your offset button and offset to how you like it. I made sure it was a nice edge. 


3. Click on the offset frame and release compound path. That will release all the little pieces inside the frame. Delete all the little pieces so that you are left over with just the frame or the base, shown in gray. 


4. Move the gray frame over to the right and open "you can make a wish" phrase. I sized it so that it fits in the frame, but once that was done I moved it to the gray base to cut. Cut antique oval frame in blue patterned paper.
5. Center the phrase on gray frame. 
6. Turn off cut for the frame edge and make sure only the phrase is cutting. 
7. I used a black Silhouette sketch pen for the phrase. Once that was done, turn off phrase and turn on frame/mat edge. Still with the same black pen it will outline the shape. 
8. Go to offset settings and offset again, mine was to 0.55. Replace your pen with the blade and cut the edge. 


9. Using colored pencils color the phrase. I used Prismacolor pencils in rainbow order. 
10. Adhere the frame to the base. 


11. Die cut a flower from yellow patterned paper using a flower die from Ornate Squares die set. Add to the frame using a brad from Cool Summer Brads.


Thank you for stopping by today and let me know if you have any questions.


Saturday, May 04, 2013

Friends Card by Daniela Dobson

Hello, Daniela here with a friends card.


Samantha Walker products used:

1. Make card from Summer Words patterned paper. Cut a piece of pink patterned paper from 6x6 paper pad and adhere to the card base. 
2. Die cut a banner from watercolor paper.


3. Add color to banner using watercolor pencils. 


4. Sprinkle with color shine.


5. Add stickers and chipboard. Adhere banner to the top of the card at an angle.  Add brads and twine. 


Thank you for stopping by today and let me know if you have any questions.


Tuesday, April 02, 2013

Hello Sunshine card by Daniela Dobson


Hi, Daniela here with Hello sunshine card.


Samantha Walker products used:

1. Create a box size: 4 x 5.25. 
2. Open 'hello sunshine' and resize to fit in the box.


3. Select all and open the align window and click on align center. 
4. Select all and make compound path. The image is colored so you can see it better. 


5. Open 4 flower pack and flower. 
6. Ungroup the 4 flower pack and move the leaves only. Delete the flowers. 
7. Duplicate the flowers. I cut three, but only used 2 on my card. 
8. Cut the card portion from white cardstock and all the other elements from patterned paper.


9. Make the card base from yellow patterned paper and adhere the white cut part over the top. Lightly spray the card with blue color mist.
10. Cut tag from patterned paper and adhere. 
11. Roll two flower and ink the edges. Ink the edges of the leaves. Adhere over the tag. 
12. Add sequins and 3D color lacquer. 


Thank you for stopping by today and let me know if you have any questions.


Related Posts Plugin for WordPress, Blogger...