Ads 468x60px

Showing posts with label Spellbinders. Show all posts

Tuesday, August 05, 2014

Dress card by Diana


Hello! Diana Fisher here with you today to share a tutorial on how to make this darling dress card from one of Samantha Walker's newest dress Silhouette files.

After you download the studio file, separate the pieces and set them into separate corners on your mat. You can then load all of the paper at once and make one cut. 


You can see here that I choses a palm tree pattern paper from Samantha Walker's collection Summer Lovin' from Carta Bella for my dress pieces, cream card stock for the dress base and a green card stock that matches the palm trees for the dress straps and center accent. 


After I cut them, here is what they look like off of the mat. 


After assembled, here is the pretty little dress. I resized this to just a little over three inches wide so it will fit the card, so you can image how small and cute it is assembled here. 


I want the dress to pop off of the card, but not be all alone on a white card base, so I get to work making a background with a large background stamp. I also cut a label using my die cutter to anchor the dress to the card. 


For a final touch, I tie some gold twine around the waist of the dress and then use foam adhesive to pop up the label off the card base and then the dress off the label.


The finished card is just perfect for sending a quick "thinking of you" note to a friend.


Friday, April 04, 2014

JustRite Projects and Spellbinders Sale!

We have some stunning creations to share with you today
from some of the JustRite Stampers crew!  


Eva Dobilas designed this awesome Bendy Card using the Bendy Card with Fence (#53893) Silhouette file with JustRite's Home Tweet Home Clear Stamps
Don't you just love it?  You can see more about her project here.


For all the details visit Michele's blog post.


Spellbinders CHA Winter Release dies will be arriving early next week over at JustRite and they are celebrating with a Spellbinders 25% off all Spellbinders Dies. (Please note that this sale does not include JustRite Dies).   You will find over 55 new die additions to their website assortment!  Just click HERE to see more!

Saturday, July 27, 2013

Thank You Card by Daniela Dobson

Hello, Daniela here with a Thank you card.


Samantha Walker products used:

1. Make card base from Cool Summer paper collection. Cut a smaller piece from polka dot paper and adhere to the front. 
2. Die cut ornate square from pink 6x6 paper pack and stamp a sentiment from For All You Do Vintage Labels Three stamp set. Adhere to the top of the card using 3D foam squares.

3. Die cut and emboss butterfly from Butterfly Corners dies in white cardstock. While the cardstock is still attached, color the exposed/embossed parts with chalk.


4. Adhere butterfly to the card with 3D foam square. Tie ribbon into a bow and add a brad.


Thank you for stopping by today and let me know if you have any questions.


Wednesday, July 17, 2013

Introducing my NEW Delicate Doilies die Set for Spellbinders

Hi! Hope you are enjoying your summer! 
I know I am. My kiddos are keeping me busier than ever between swim team with my oldest, swim lessons with my youngest two, Chinese day camp, piano, and guitar...and a few trips to the local water park. Summer by far is my most favorite season, and this one has been fantastic!

As much as I love to spend time outside in the summer, when my new Delicate Doilies die set from Spellbinders arrived in the mail on Monday, I couldn't wait to get a chance to play with them! 


I have to say, I think this project went together in record time. I started playing...tried an idea...then the project practically built itself. I know you will love playing with this die set too. 

There's just so much you can do with it!
You can cut windows, you can cut doilies, you can cut circular shapes with delicate edges, or any combination of those!

In this project, I'll show you how to use the die in each of those ways...

Ribbon Rosette Card

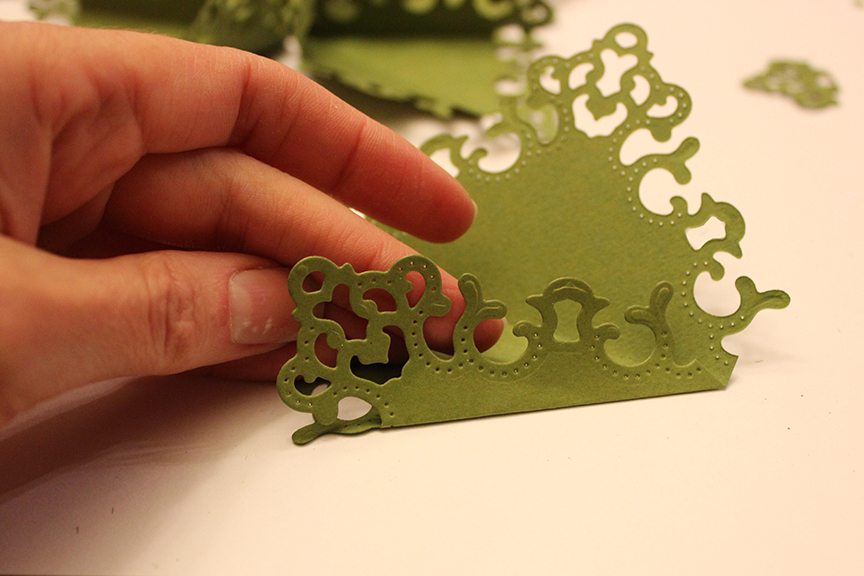
First I ran just the large doily center piece through the Grand Calibur.
(here, I'm using the die like a window by just using the lacey center of the doily)

 Then I folded the card stock in half like a card.
Next, I centered the outside ring of the large doily around the cut center...making sure to leave a few tips of the die hanging over the left edge along the fold, so that my cut would cut a card that is hinged.
When I am trying to get my die in an exact place, I like to tape it down with painters tape. 
This tape is easier to get off of the card stock without pulling up any paper fibers.
 (here, I'm just using the outside shape of the doily...it will serve dual purpose, as it will cut my doily window now with a doily edge, but the inside of the card will just be the outside shape of the doily. That's the really cool part about this set...you can use the centers and the edges independently of each other.)
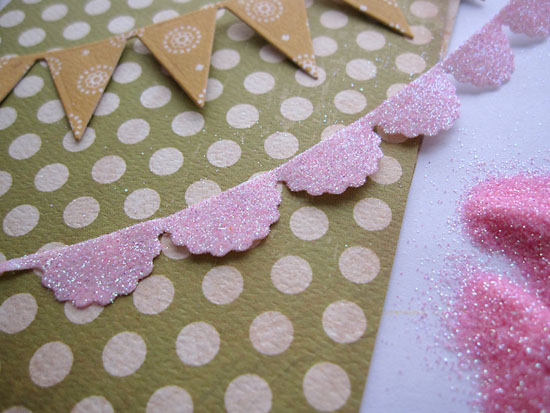
 Then I cut a little doily rosette using both the ring and the center at the same time. 
(Here, the dies are getting used at the same time to cut the center and the edge simultaneously)
Then I used the medium circular shape to cut a yellow 'mat' for this little doily.
(now I'm just using an outer edge again.)
I layered the doilies onto the front of the card to make it like a fancy rosette.
 Then I glued ribbon onto the back of the card.
In a contrasting card stock, I used the large pointed circular shape to cut a back for the card. 
I rotated it so that the points alternated on the front. 
(I used a double sided card stock that is light pink on one side and yellow on the other.)
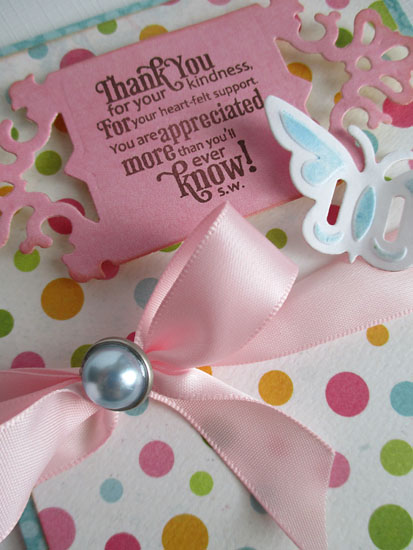
and here's how it turned out. I think it's really pretty, and best part, it was a really quick design.
Here's the card when it's open. You can see how it is attached at two of the points where the card folds.

I'm looking forward to playing with this set again soon, and exploring even more ways to use it. Feel free to share your Spellbinders creations with me, using my sets, at my e-mail link on the right. 
I love to see what creative things you are doing!

Products used to make this project:
Happy Crafting!
Samantha


Sunday, March 03, 2013

Happy Birthday Card by Daniela Dobson

Craftsy
Hi, Daniela here with a Happy birthday card.


Samantha Walker products used:

1. Make card from cardstock. 
2. Cut two strips of patterned paper, ink edges and adhere to the card front. Tie ribbon across the seam.
3. Die cut scalloped banner from an adhesive sheet, peel off top layer and add glitter.


4. Die cut second banner from patterned paper and stamp with coordinating stamp in black ink. 


5. Adhere both banners across the card. Add 3D paint. 


6. Die cut a button from white cardstock and stamp with coordinating stamp. Tie to bow with jute. Stamp happy birthday on white cardstock, cut into a banner and adhere to the card. Add pins to bow.


Thank you for stopping by today and let me know if you have any questions.

Saturday, March 02, 2013

Spellbinders projects


Today I am working with my new Butterfly Corner and Ornate Square dies!


But first...

Shhhhh....I'm going to let you in on a dirty little secret...I take shortcuts! 

I do it all the time, because I am human...
and as such, I often get caught up in life. It creates the need to find ways to modify how I do things, so that I can fit in all the things that I want and need to do in a day. 

So here's one of my favorite quick crafty-tips that can save you a bundle of time when you are in need of a quick card, or crafty gift. 

On days when I do have a good slot of time to get my crafty on...I work double time with my Spellbinders Grand Calibur...

As I'm working on my project, I get out my paper scraps too--you know...the ones too small that you think you ought to throw them away...

but no...don't do that...

Instead, while you have all your crafty stuff out, run those scraps through your Grand Calibur with some of your favorite Spellbinders dies and then save them in a special place for a day when you don't have much time. 

I like to file my "pre-cuts" in a file labeled with the die set they were created with. That way I can find them on the fly when I really need to craft fast. This works great for Birthday cards, tags for gifts, or even holiday crafts that need a special shape. 

I have learned to craft this way, especially right now, as my craftroom is in serious limbo. We have been working to finish our basement for over a year. (My husband has been doing a fabulous job, but it is definitely a process.) I have a lot of my crafty stuff packed in boxes, or stashed here and there as it awaits a permanent home. So I find myself using my dining room table as my craft zone, which is not ideal, when you have to gather everything up, and then put it all away before dinner. 

This week has been crazy. Parent teacher conferences, school projects, swim team stuff, gymnastics, music lessons, deadlines, and more deadlines...it's all good stuff...but my week went by so quickly, that it left little time for crafting. 

This was the perfect week to get out my pre-cuts, and make some quick cards. It took me about 20 minutes to complete all three cards...and then I was off to my last parent teacher conference of the week. 

I went through my files and quickly found some colors I wanted to work with that had been cut with my newest dies from Spellbinders. 

Even though I did not have much time to craft this time...I wanted to make sure each project had something special, or a little twist in the design. I'll walk you through what I did in each project below:
For this first card, I took the tag die from my Ornate Square set and did what I call a "double take." That's where I use a die that is shaped one way, and make it appear another way by criss-cross stacking it with a duplicate cut. It's a great way to change up your die sets to get lots of looks from one set. So the original tag die is rectangular...by stacking it, I made it appear as a square. Then to add a little finishing touch to my card, I took some fabric and ran it through the center of the tag, like ribbon. I added a few knots for interest. In this case, I had also "pre-stamped" this with my coordinating stamps from JustRite, when I did my cutting session on a prior day. I just filed it away stamped and ready to go for a quick card. 
-Spellbinders, Samantha Walker, Ornate Squares Die
-Just Rite Clear Stamps Samantha Walker Botanical Swirls
-Carta Bella cardstock Traditions by Samantha Walker
-Riley Blake Fabric Serenata by Samantha Walker

Here's another pair of cards that I created on the fly...
Once again these were created with pre-stamped pre-cuts, that I created one day, and filed away for a day when time was short. 
I have two twists on this card...I first split my butterfly into two separate wings...to embellish the sides of my "happy" tag. Don't you feel like you have wings when you are happy? I thought it was a fun way to say "happy." The next twist on my dies, is that I took the smallest square from my Ornate Squares set, and just snipped off the ornate corners to use as a layered lace edge at the bottom of my tag. It was something simple, that really made for a nice way to "ground" my tag design...after all I had just given it wings...I didn't want it to fly away just yet. ;) 
-Spellbinders, Samantha Walker, Ornate Squares Die
-Spellbinders, Samantha Walker Butterfly Corner Die
-Just Rite Clear Stamps Samantha Walker Botanical Swirls
-Carta Bella cardstock Paris Girl by Samantha Walker

I did another "double take" on this card. I used my largest ornate square die, and criss-cross stacked it to make it go from a square shape to a lacey snowflake shape. I also double stacked two of my butterflies from my butterfly corner set to give it a little lift. 
-Spellbinders, Samantha Walker, Ornate Squares Die
-Spellbinders, Samantha Walker Butterfly Corner Die
-Just Rite Clear Stamps Samantha Walker Botanical Swirls
-Carta Bella cardstock Paris Girl by Samantha Walker


Since I made such quick projects for this blog frenzy, I wanted to make sure that I left you completely satisfied with some "knock your socks off" inspiration...so I asked my uber talented creative team to help show off my new dies with their interpretation.  

You'll LOVE what they did!

Supplies:
Die Cuts: Butterfly Corner and Ornate Square by Samantha Walker (Spellbinders)
Patterned Papers: Traditions by Samantha Walker (Carta Bella)
Stamps: For All You Do Vintage Labels Three by Samantha Walker (JustRite Stamps)
Tools: Grand Calibur (Spellbinders)
Cardstock: Cream (Recollections and Bazzil)
Ribbon: Cream Crinkly (May Arts)
Twine: Buttercream (The Twinery)
Pearls: Cream (The Paper Studio)
Wood Chips: Hearts (Freckled Fawn)


 Projects below all by Aimee Maddern:
Supplies:
-Spellbinders, Samantha Walker Butterfly Corner Die
-LCI White Wood Grain Cardstock, Bazzill, 
Bo Bunny & American Crafts Cardstock
-Heidi Swapp Color Mist in Sweet Cherry & Primrose
-Dylusions ink spray in Cut Grass
-Mister Huey’s in Hot Dog, Lemonade & Bonny Blue
-Sequins, Misc
-3L adhesive squares, Glossy Accents


Supplies:
-Spellbinders, Samantha Walker, Ornate Squares Die and Butterfly Corner
-Just Rite Clear Samantha Walker For All You Do Vintage Labels Three Stamps
-LCI White Wood Grain Cardstock, Bazzill, Bo Bunny 
& American Crafts Cardstock
-Heidi Swapp Color Mist in Sweet Cherry & Primrose
-Mister Huey’s in Hot Dog,
-Charcoal Twine from the Twinery
-Hat Pin From My Minds Eye
-Sequins, Misc
-3L adhesive squares, Glossy Accents


Supplies:
-Spellbinders, Samantha Walker, Ornate Squares Die
-Just Rite Clear Samantha Walker For All You Do Vintage Labels Three Stamps
-Card Stock, Misc
-Stayton Ink in Timber Brown
-SEI ink in Tobacco
-Cantaloupe Twine from the Twinery
-3L adhesive squares, Glossy Accents

Monday, January 14, 2013

Stenciled Butterfy by AJ Otto

Hi all-
AJ here to share how to create this stenciled butterfly card using Samantha's Newest dies Butterfly Corner from Spellbinders paper arts and stamps from JustRite.

 Here's my finished card-I love how the yellow pops off the butterfly after being stenciled using the die template.


 After you cut and emboss your die, leave it in the die template, and sponge ink over the open spaces.

Gently work the ink around all the open areas until you get the coverage you like.  I used a pigment ink, so I let it sit to do dry a bit before popping it out.  You can get this same stenciled effect with any of Samantha's dies.

enjoy!!


Sunday, January 06, 2013

Spellbinders Sneak Peek


Today I am revealing my new licensed designs, the new Butterfly Corner set (S5-165) and Ornate Squares set (S5-166). The corner die will allow your creativity soar and the Ornate Squares work perfectly with Spellbinders basic square templates, allowing you to build off the core, expanding your collection's versatility!  


3-D Hanging Snowflake Decoration

Supplies:
Spellbinders dies: S5-166 Ornate Square
green card stock
ribbon
brad
Tombo Mono Adhesive

Instructions:
Using the Spellbinders S5-166 Ornate Square set, use the ornate square to cut 12 square shapes, repeat with an embossing pass, then snip off one corner of each of the 12 square shapes, as pictured. 
Fold in half, so that the cut end is mirrored, and the other end comes to a point.
Fold edge up at an angle as pictured.
Fold the opposing edge as pictured.

Very carefully match up the lace edge of the square with another lace edge of a different square. Continue combining the lace squares until you complete a set of six to form a star-like shape or snowflake. Then repeat this step to create another set of six.


When you have your lace squares combined into sets of six, then cut off most of the lacey edge. Start at about 1/2 inch from the outside, down to about 1/4 inch in the center. Continue all the way around the circle until all are trimmed, then trim the other set of six that you glued together.
Now we will combine the two snowflake shapes. Carefully line up the inside edge of one snowflake with the other, then glue each of the edges to combine both snowflakes.

Each point of the snowflake should look like this when combined.

Now you have your combined snowflake. Lets add a little embellishment.
With the Ornate Square set, cut two of the littlest square shapes by running the die through the Spellbinders Grand Calibur, then switch to the embossing plates and run it through to emboss.
Next combine the two squares by interweaving the corners. 
Cut and emboss the flower shape, then add that to the center of the interweaved squares.

Now add a brad to the center, and feed it through the snowflake.
Add a ribbon to hang it up, and enjoy!


Here is another card using the S5-166 Ornate Square that also features a coordinating stamp from my JustRite stamp collection:
Supplies:
Spellbinders dies: S5-166 Ornate Square
JustRite Happiness is...Ornate Square
blue card stock
Yellow card stock
grey card stock
white embossing powder
Tombo Mono Adhesive


This next card features the new S5-165 Butterfly Corner die set:

Supplies:
Spellbinders dies: S5-165 Butterfly Corner
Dark Pink card stock
Light Pink card stock
Green card stock
Tombo Mono Adhesive


Related Posts Plugin for WordPress, Blogger...