Ads 468x60px

Showing posts with label Bunting and Banners. Show all posts

Sunday, August 04, 2013

Happy birthday card by Daniela Dobson

Hello, Daniela here with a Happy Birthday card. 


Samantha Walker products used:

1. Make card from brown patterned paper.
2. Cut pink patterned paper slightly smaller thatn the card frot and adhere. 
3. Stamp banner on white cardstock with black ink two times. Cut banner and adhere across the front of the card. Paint the second samped banner with watercolor crayons and cut out. Adhere different color banners to the card. 


4. Adhere sticker with 3D Foam Squares. Adhere flair badge to the center. 
5. Stamp "Happy birthday" on a sticker from the patterned paper set and adhere to the card using 3D Foam Squares. 


Thank you for stopping by today!

Here are some of the supplies Diana used to make today's project, including hard to find supplies like the fun watercolor crayons!


Tuesday, July 16, 2013

Sail Away With Me Card and Wave Tutorial by Aimee

Hi!  Aimee back today!  A couple of weeks ago I made some tag shaped cards for the Samantha Walker and JustRite blog hop. Today I am going to show you how to make the tag shaped card and the “waves” from my “sail away with me” card


Here's the tutorial...
To make the tag card:
1.     Cut a 4x12 piece of cardstock, fold in half
2.     Cut dog ears and punch hole

To make the waves:
3. Use Samantha Walker JustRite Bunting & Button Die. Cut 4 pieces of cardstock {different colors optional} with the scalloped bunting.
4. Fold each bunting over the other; this will allow the paper to be manipulated and the bunting to go straight
5. Add a small amount of adhesive to the top {in this case the bottom} of the bunting. Adhere to the tag
6. With alternating colors lay the next piece of bunting so it just over laps the first layer. Repeat this for steps 7 & 8
9. Cut the “tails” of the bunting off
10. Carefully fold the bunting up to give a 3-d effect {this is why you only glued the top of the bunting and not the whole bunting}
11. Stamp and hand cut Samantha Walkers All Boy sentiment and sailboat stamp
12. Add foam adhesive and place where desired


Thanks for stopping by today and seeing how I made this card!


Tuesday, March 12, 2013

Banners Card Set Tutorial by Maya


Hello, Samantha Walker fans! 
This is Maya, sharing with you a simple card set.

I like giving card sets as gifts. I am always looking for simple and cute designs that can be mass produced easily and are not too bulky.


To make the card, ppen the Samantha Walker Bunting Borders cut file  in Silhouette Design software and reduce the width to 6". Do not forget to click "Lock Aspect Ratio".

Ungroup and drag all banners expect one outside the canvas. Duplicate the shape as many times as needed and arrange on the cutting mat. Cut and repeat the same process with other banners.

I used new 12x12 sheets of paper so I cut all colors separately. If you are using smaller pieces of paper you can cut all banners at the same time.


I used beautiful papers from Samantha Walker Traditions Collection from Carta Bella and American Crafts pearl cardstock


After everything is cut, the fun part begins.  Layer the banners using dimensional adhesive. I like that each card looks a little different. I finished the cards by stamping a sentiment from Samantha Walker "Buntings and Banners" stamp set and by adding a thin line of glitter to the top banner.


I made a band for my card set using the label from the 12 piece tag set.

I cut the inner oval from different patterned paper and added a wood veneer bird and few glittery dots.

I wrapped the band around the stack of 6 cards and 6 enveloped and secured with adhesive on the back. All done!

Thanks for stopping by the blog today!
-Maya

Sunday, March 03, 2013

Happy Birthday Card by Daniela Dobson

Craftsy
Hi, Daniela here with a Happy birthday card.


Samantha Walker products used:

1. Make card from cardstock. 
2. Cut two strips of patterned paper, ink edges and adhere to the card front. Tie ribbon across the seam.
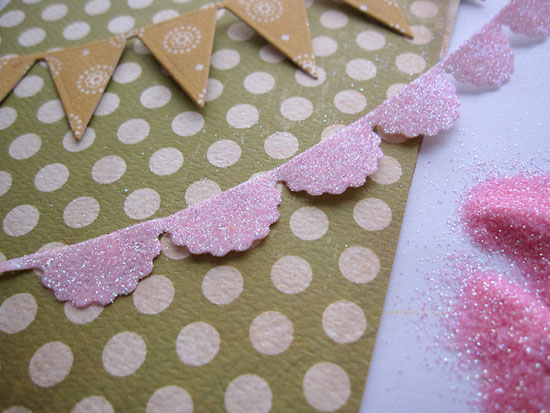
3. Die cut scalloped banner from an adhesive sheet, peel off top layer and add glitter.


4. Die cut second banner from patterned paper and stamp with coordinating stamp in black ink. 


5. Adhere both banners across the card. Add 3D paint. 


6. Die cut a button from white cardstock and stamp with coordinating stamp. Tie to bow with jute. Stamp happy birthday on white cardstock, cut into a banner and adhere to the card. Add pins to bow.


Thank you for stopping by today and let me know if you have any questions.

Related Posts Plugin for WordPress, Blogger...