Today I have a fun series of boxes that have cute little feet which make the box portion sit above what the box is resting on. (If you like this box, you will want to see my carousel hexi box tutorial too.) These instructions will work for all of the variations of the box in the Silhouette Online store.
First off, this box will work with both the Silhouette Cameo and the Silhouette Portrait cutting machines. If you use the Silhouette Cameo, you will not have to resize the box, it is already at the maximum size for 12 x 12 paper, so skip the Silhouette Portrait users paragraph.
Silhouette Portrait users only:
You will need to make sure that your paper orientation is right, and then in your Silhouette Studio software, you will need to select the cutting file, then in the go to the Object menu and select the first option:"transform" then select "scale options," then in the dialog box on the right hand side of the screen, scale this to 90% by typing in 90% in the box that says 100%. After you have successfully scaled your cutting lines, then move the design onto the live cutting area of your screen--making sure that not edges hang off. You will need to cut the main box portion and the contrast windows separately to fit all the pieces.
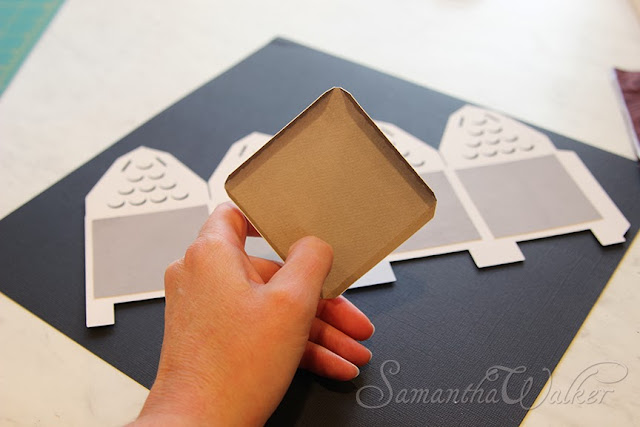
Cut all the pieces and lay them out.
Please note that I used double sided card stock, so that I didn't have to use two different papers. (Card stock is: Carta Bella double sided card stock All Hallow's eve collection Marshmallow Kraft)
Orient your cut object so that the color you want on the inside of the box is facing up.
Then glue on the backside of the design, and around the edge, then press on the contrasting "window." Make sure that you have the correct side facing out the window. My box will be a kraft color, with white showing through the windows.
After you've glued on all 4 squares, then find your square that has tabs on all sides.
Fold up each tab along the dotted line.
Now crease your box on all dotted lines.
Now we are going to set in the bottom of the box. I like to use a good paper glue like Tombow Mono Adhesive.
It won't warp or wrinkle paper--and it sticks REALLY good. I buy this stuff by the case...literally.
I hate to run out in the middle of a project, and I've become quite a fan of this glue.
Now orient your main box so that the side without the tab is on the left.
**IMPORTANT step** Glue two of the tabs in this way:
One tab go ahead and make a glue bead all the way across the tab.
On the second tab, Glue about 3/4 of the way across the tab--leaving a 1/4 inch making sure there is no glue on that end.
Find the 3/4 glued tab and line it up with the box side on the left that doesn't have a tab. We are leaving this glue-less portion to make sure we can tuck in the tab on the opposite side of the box. Now Line up the next side with the bottom box piece, this will naturally form your first corner.
Note:
I'm not a self proclaimed octopus. I wish I were. It would be dreamy to have eight arms while crafting--being able to hold multiple things while waiting for glue to dry. Recently, I found a way to mimic having 8 arms. I discovered these quilting clips a few weeks ago for my new obsession with fabric.
These clips have seam markings on them for 1/4 and 1/2 inch seams. While they are intended for aiding sewing projects, I've discovered that they are fantastic for so many other things--like holding things together while you are waiting for glue to dry. I can hear the angels singing hallelujah praises over these little clips.
Now go ahead and glue the other two tabs on the bottom of the box and attach the remaining two sides of the box around the bottom piece.
Now we are going to glue the box tab--make sure you put the glue on the correct side. (Hint: the correct side to glue is the side that is the same color as the outside of the box.)
Go ahead and tuck that side tab in--remember, we saved space for by not glueing that one portion of the box bottom tab. Voila! It fits!
Now fold all of the roof pieces outward.
Thread a ribbon through all of the little slits on the roof tabs.
For the finishing touch, tie a cute bow in a complimentary colored ribbon, and you are done!
I also have these variations of the house box or tent-top box:
Happy Crafting!
Samantha


Love the house. And thanks for the great tutorial.
ReplyDeleteAmazing! Great tutorial, and beautiful project.
ReplyDeleteHugs, antonella :-)
Beautiful, boight them all.
ReplyDeleteHave a creative day.
Hugs Nana
♥ My Crafting Channel ♥
♥ 2 Creative Chicks ♥
♥ Silhouette Challenges ♥
Just found your blog. Like the things I see and your Silhouette designs. Thanks for the opportunity to win one.
ReplyDeleteThese House Boxes are really creative and amazing btw thanks for the tutorial. It's very decorative and attractive to pack small stuff like like small kids toys and other useful things. At Custom Box Makers we also designed these types of cardboard boxes to pack your useful stuff without any damage.
ReplyDeletegoogle 3767
ReplyDeletegoogle 3768
google 3769
google 3770
google 3771