
 Today I'm going to show you how to put together my new A2 Stationary box. This project will maximize the use of two 12 X 12 pieces of double-sided card stock. You can put it together with or without the lid, you can add all contrasting panels or use just some. The box will hold A2 sized stationary (8.5 x 11 quarterfolded cards.) Customize the box how you want with ribbon and embellishments!
First, you will want to open the design in your electronic cutting machine's software. I'm demonstrating the file on the Silhouette Cameo using the Silhouette Studio Designer edition.
First off...I recommend using a double-sided card stock with a detailed design on the front and a subtle design on the back. I used my Antique Damask cardstock from my Traditions collection for Carta Bella. This worked perfectly, as the yellow on the back was a subtle complimentary color to carry the detailed damask on the front.

When you open the design, half the cut lines will appear in the active area.
Go ahead and set up to cut this in this position.

Now you will want to select the design with your move tool, and shift the entire design over 12 inches so that the other half of the design appears in the active cutting area.

Now that the design is cut, find these two pieces as shown above. Be careful when finding the piece on the right side with the angled corner--there are two other similar pieces, you will want to choose the one that is the larges of the three. The smaller two will become the contrasting panels for the sides of the box.
Now glue the tab on the larger piece to the piece on the right.
Fold all the score lines, and glue the tabs to attach the angled sides to the bottom, as shown below:

Put glue on the front tabs and glue them to the angled sides.


Glue the tab on the lid. You can choose to glue the lid on the inside or the outside of the box. I chose to glue the tab to the outside of the box...I'll show you why in just a second...


Remember how I chose to glue the tab to the outside of the box...you can see my joint...
as I said...
I did this for a reason...

Here's the reason for glueing the tab to the back. I chose to use a contrasting panel on the back of the box. I placed the panel over the tab on my lid, as the tab would be strengthened by being between both the box and the panel--cool huh!

Fold the tabs on the optional interior divider.

Place the optional divider where it suits your needs. You can add more than one divider...
you'll just have to ungroup the design in your cutting software, and select more to cut.
you'll just have to ungroup the design in your cutting software, and select more to cut.

Here's your finished box with the lid closed.
It would be really cool to add thin magnets to latch it closed.
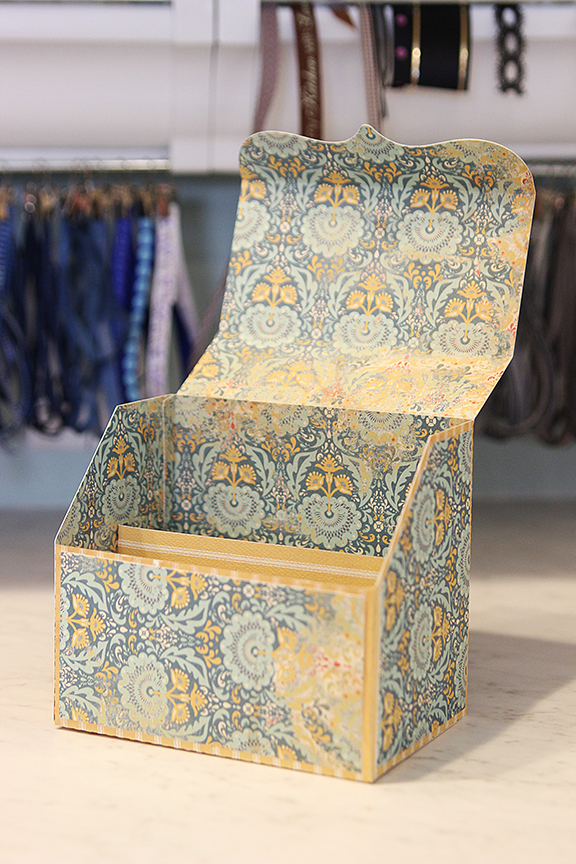
Here's the box in the open position.

Here's the box filled with a few cards...
Have fun customizing your box!
Happy Crafting!
Samantha Walker
Here are some of the supplies and other fun stuff!
Get Amazon Prime Membership! Enjoy Free 2-day Shipping on Prime products, plus access to Free digital content like videos, books, and more!


this is why I need a Silhouette-so I can make beautiful things like this.
ReplyDeleteI love this. I couldn't find it in the Silhouette online store. I hope I find it soon.
ReplyDeleteWhere can we find this file for download?
ReplyDeleteI searched for the cut file to no avail. Where can I go to find it? Thank you for posting this project... It is beautiful.
ReplyDeleteHi guys! This file will be available early next week! Thanks so much, Jamie
ReplyDeleteSocial Media Director | Creative Ream Lead
Great tutorial. thank you.
ReplyDeleteI love this and will enjoy making many of them. Thank you for a great tutorial!
ReplyDeletei love the box.. the whole thing. unfortunately i do not own a silhouette... any chance we can see something similar with using a score board and cutter... or a template that can be printed out maybe?
ReplyDeletehave a great week
I am still unable to find this on Silhouette. Please advise? I love it and cant wait!
ReplyDeleteHere it is in the Silhouette store - a2 3d stationary box samantha walker
ReplyDeleteby Samantha Walker
Design ID #46790
Published: 8/12/2013
Can this also be used as a recipe box. I like the design better than others I've seen in the Silhouette Store!
ReplyDelete