Ads 468x60px

Thursday, November 21, 2019

Circle Purse Instructions

This week in the silhouette store, I'm introducing a new purse design for Fall. You will be able to download this cutting file from my Silhouette shop.

Here's the direct link! Silhouette Design ID 308507

To make this purse you will need to download the cutting file available as either an .svg file or .studio file.

Arrange the different colored layers in the Silhouette studio software. This file already has maximized the space of a 12x12 cutting area, and is color coded to closely match my finished example above. You will only have to move a few pieces onto the live cutting area for each color paper change. If you aren't familiar with the Silhouette studio software, there are many tutorials online to achieve this step.

Assembly steps:
Attach the three contrasting backing pieces with a fine tipped paper adhesive such as Tombow mono adhesive. (these are the lighter yellow color)

Fold the leather strap pieces around the buckle hardware and fix with a brad or with glue. There are holes in this file that will match up to make attaching brads easy. The brads will hold the leather straps to the sides of the purse.

Fold the side pieces along the folding dotted line. There are two rows of dotted lines, one is to mimic stitching, the other is to actually fold. (see first picture in the second row.) Attach sides and front piece to the main piece with glue. Align the holes and fix brads at those points for the purse feet on the bottom. The brads aren't necessary, but add a nice detail.

Slide the front buckle onto the leather strap. You may fix it on with glue if  you wish. Attach this decorative strap with glue or brads.

Fold teeth on the side pieces inward then glue them to the front and back of the purse. (shown in first picture on the bottom row.)

Your purse is now complete. You can adhere a sticky velcro dot to the front flap purse strap, or use tape to shut the purse.


Tuesday, November 19, 2019

Circle Handle Purse design and Circle Pouches

This design can be found here. Silhouette Design ID 308288.
This design can be found here. Silhouette Design ID 308319.

This week in the Silhouette design store I'm releasing a few new versions of my circle handle purse. One mimics the look of tooled leather, another features a fall spray of foliage. You can follow along the directions of my original circle handle purse and here, and just add the "tooled-leather" look layer. I do recommend attaching this layer with a fine tipped paper glue such as Tombow Mono liquid adhesive. Another great way to attach this detailed layer would be to use adhesive backed paper.

Links to these designs will appear as soon as they are loaded into the Silhouette design store.
This design can be found here. Silhouette Design ID 308289.


These new circle pouch designs are simple to make and only require glue to attach the contrasting background that highlights the front design. You can easily assemble multiples of these and are recommended as party favors because of their simple assembly. Just simple fold and interlock tabs! Fill them with small gifts such a scented bars soap, hand sanitizers, little chocolate boxes, bags of candy or more.

This Design can be found here. Silhouette Design ID 308291.


Friday, December 02, 2016

Review of NEW Janome Skyline S9

Janome recently sent me their new Skyline S9 embroidery/sewing machine to play with and review...and play I did, and have enjoyed the machine very much!

This machine is a part of their affordable S series, and is the first in this series to combine sewing and embroidery on one machine.  The machine is feature rich, yet has the ease of use you expect from a Janome machine--with built-in tutorials to get you up and running. It also comes with a comprehensive manual that is indexed well, with pictures and diagrams, to let you know how to use all of the features. One of my favorite features...is it's wi-fi capability. This is a machine that speaks the language of the 21st century. You can send designs to the machine wirelessly via your i-pad. Because the machine is so feature rich, I wasn't able to test out every feature, but I wanted to make sure I at least tested out the basic sewing stitches, decorative stitches, and embroidery, and changing basic settings through the touch screen. I also purposely created a project that had many layers to see if this machine could be a reliable "work horse." My conclusion...you're going to love this machine.

To test some of the machine's basic features, I created designed and pieced quilt. (Heads up, this quilt design will be available as a FREE downloadable project on the Janome website later this month.)  For this project, I used basic straight stitches and listened to the machine's soft hum, as I pieced. The machine is smooth to operate, and has low vibration, which makes it nice to use. The LED lights were great for lighting up my project so I could be accurate with my piecing. The machine allows you the ability to operate it with a traditional foot pedal, or a touch stop/start button. A convenient knee lift is included with this machine for raising the presser foot.


You can also adjust the speed via the slide control, to prevent you from being to "heavy with your pedal" if you need to sew a little slower. I liked the convenient inclusions of the locking stitch, reverse, and cut-thread buttons. I also found the automatic presser foot lift feature quite useful in streamlining the process on my project. I would have loved to have had a completely automated needle threader like the Janome MC 15000, but the manual needle threader did the job well, and was quick. (This is where you save some money on the machine.) The workspace is larger than any of the other in the S class, at 8.25"x13" of bed space and 8.25" to the right of the needle. This was more than adequate space for the projects I chose. I went through lots of thread piecing this large quilt and so I got to know the bobbin winder. It's super simple, and if you forget how to use it, simply press on the question mark on the user interface and you will be directed to a tutorial.

For my second project, I tested out the embroidery side of the machine. You need to attach the embroidery arm unit, and switch out the needle plate before proceeding into embroidery mode. It doesn't take long to switch over, and I went back and forth between sewing mode and embroidery mode a few times with ease.

For this project, I created a matching pillow for the quilt. I selected one of Anna Maria Horner's on-board embroidery designs (yes, get excited, because 40 of her designs are included on this machine,) and selected some gorgeous thread from her embroidery kit specially designed for use with the S series. This thread is yummy scrumptious--yummy colors, and a scrumptious luxurious sheen in a strong polyester thread. This particular design was comprised mostly of satin stitches which really show off the sheen of the thread. I didn't have a single thread break while stitching this beautiful design.

The Skyline S9 includes the embroidery arm and three hoops--the largest being 170mm X 200mm. There are also hoop magnets included if you have a project where that kind of attachment works better over traditional hooping. I enjoyed watching the mesmerizing stitch sequences, and was pleased with the intricate detail that the design and the machine provided. This design takes 21 minutes and the screen shows you exactly which stitch you are on and how much more to go. You can resize your embroidery using the touch-screen interface, you can also reposition the design and change stitch density.

For fun I added some decorative stitching to my pillow project. After testing out several of the satin and decorative stitches, I chose to feature one of the appliqué stitches as I wanted the embroidery design to stand out and not get busied by a decorative stitch. The decorative stitches would be super fun for another project though. I played with the spacing and size on this appliqué stitch, via the touch screen, and found a setting perfect for my project.
When assembling the pillow, I decided to try out how the machine would do with a thicker project. So I purposely chose to quilt the design and add welting trim to see if the stitches were consistent even when things got a little tougher. I also designed the back of the pillow so it could easily accept a pillow form, by creating a split overlap with a rolled hem. This design meant that at one point, I would be sewing through 6 layers of fabric plus the welt edge, making that 8 layers, not to mention the quilt batting changing the thickness as well. The Skyline S9 had no issues with this extra workload. I used the included zipper foot to help aid in attaching the welt, which made the welt placement easy.
I was having so much fun sewing these projects, I decided I'd get another project done. I made a Christmas advent calendar to delight my three kiddos. This was a simple panel kit from Riley Blake, that I've had for a while, but just hadn't finished yet. I thought this would be the perfect time so the kids could have fun with it this December. I enjoyed adding some detail to this project with little accent stitches and a little bias tape. The pockets are filled with adorable "softies" that have ideas for different activities each day in December.

These were just some of the features that I tested. There is so much more to this machine than what I played with--including the ability to design your own custom decorative stitches! If you are looking for a great embroidery/sewing combo machine at a nice price point, this would be a good one to consider. You can read more about the features of this machine on the Janome website here.

By the way...the quilting on my quilt was done by Melissa Kelley of Sew Shabby Quilting. She does a beautiful job!

Monday, May 02, 2016

Powell Lake April 30th

Bonaparte's Gull Powell Lake Lehi, Utah
I don't usually do this...but I took the opportunity to chase a rare bird on Saturday. There was a report of two Horned Grebe out at Powell Lake in Lehi. (Not Lake Powell...different. places altogether.) Since the drive wasn't far...I set out to find it...and I did!

Since I haven't been a birder very long...I wasn't sure if I'd be able to distinguish the difference between a rare-for-our-area Horned Grebe and common-for-our-area Eared Grebe. After much studying...I think I could easily distinguish either one quite readily. Here's what I learned:
The picture above features our common Eared Grebe. There are three distinguishing features that you can notice right away... the feathers on the front of the head on the Eared Grebe will stand up, the yellow feathers by the red eye are wispy, the lower portion of the beak curves up slightly as it comes to the point.
This one is also an Eared Grebe. The feathers on the top of the head are not standing up right now, but you can still see the wispy eye feathers, and the turned up beak.

Now this picture above is of a Horned Grebe. Very similar in color, but notice the yellow eye feathers, they are more dense and create more of a stripe from the eye, rather than a wispy fan. Look at the beak, it has a white tip and a different shape. It's a little shorter, and does not have the upturn in the lower portion like the Eared Grebe. Now take a look at the eye, and follow it to the beak...notice the red line that connects the eye and the beak. Also, the feathers on top of the head do not stand up, but rather the feathers on the cheeks puff out.

You can see the "puffing out" of the cheek feathers better in this picture of a Horned Grebe above.

Here's a picture of a Horned Grebe and an Eared Grebe...with the clues mentioned, can you tell the difference?
I also saw four American White Pelicans on my outing...here's one flying over. Do you see the hump on his beak? That's only present during mating season. The American White Pelican is the only Pelican species that grows a hump. They shed it after laying their eggs. I suppose the growth on their beak helps them attract a mate...Nature is a funny thing.
 Here's three more American White Pelicans. Note that one is sans hump...
 There were a few Pie-Billed Grebe on the lake.
 I also spotted my first Spotted Sandpiper!
The Swainson's Hawks are coming back in full force now. Later in the day I saw one carrying a snake. Bless his heart! I love hawks...I hate snakes.
Of course you can't forget about the shy birds that hang around the lake too. There were several Yellow-Headed Blackbirds hanging out in the reeds. They were very good about staying in the thick of it all...made for some interesting pictures I must say.
It was a good birding day. I saw a total of 28 species. You can see the checklist here: http://ebird.org/ebird/view/checklist?subID=S29320879

I was ecstatic Monday morning to see that my report made it onto the rare bird alert from Cornell. That's a first!

If you haven't tried birding...grab your camera, and go out into your local area and see what hangs around in your neighborhood...you'll be surprised. There are more than just blackbirds and pigeons to be found.

Birding makes every day a treasure hunt!

Friday, March 11, 2016

Fish Springs National Wildlife Refuge (a side trip)

Yesterday, I posted about our geode-hunting-rock-hounding adventure...
While at the Dugway Geode beds, I mentioned that Jonathan and I took a little side trip to Fish Springs National Wildlife Refuge. That was my husband's great idea. He noticed that it was close to where we were already going. 

The refuge is literally in the middle of nowhere, so for it to suddenly be very convenient to a place we were already going, we couldn't pass up the opportunity to check it out. 

We've wanted to see it for some time now, but since it isn't near anything, we've never found ourselves in the neighborhood. You have to take long dirt roads to get there...about 3 1/2 hours away from our home in Lehi. It's not exactly convenient. The migratory birds think it's great though. ;)

Birding is a fun hobby...it gets you out to places you might not normally see. I've gotten hooked on  birding in the last year. It's a great pastime to get me away from the computer. My typing and mouse hands surely appreciate breaks like these. I highly recommend it. Birding is like making every day into a treasure hunt. Here's a great book to get you started.
Fortunately, the scenery along the drive is beautiful. 
The ride didn't seem as long because of that. 
From the Dugway Geode beds it is another half hour drive to get there. 
There is a small visitors center at the refuge. The ranger wasn't in, but it would have been interesting to talk to him about what recent bird activity they've been having.

As we started our visit, it became very clear that this refuge isn't visited often. That is one thing that makes it so unique! At the visitors center, instead of a ranger, we were greeted by his two happy Labradors who were excited that we accidentally let them out of the office. We had to round them up and get them back inside. That was fun! (seriously...it was fun.)

We signed in at the kiosk, and picked up a map and some brochures. Fish Springs is a natural spring that supports many migrating birds. It's literally an oasis in the middle of the Utah high mountain desert. It has an 11 mile auto-tour route that leads you along the ponds and streams within the refuge. There are also a few places that you can get to by hike only.

We weren't sure what to expect in the way of birds. I think we were a little bit early for the influx of Spring migrants, but it was still worth the trip.

We were greeted by this regal BALD EAGLE in the tree at the picnic area...which is just before the auto tour route. Incidentally, we saw him on our way out (in this very same spot) as well. I'm pretty sure he's put claim on this tree. He was very cooperative in front of the camera. He always had to have an eye on me...but he didn't fly off.

There was also another one soaring in the sky! I hadn't checked a Bald Eagle off my list this year, so I was pretty excited!
There were plenty of AMERICAN-COOTS in every pond and waterway. Here are just a few. I loved the way these photographed with the scenery. I adore this season for all the tall yellow grasses...make for such pretty pictures.
It wouldn't be a marsh without RED-WINGED BLACKBIRDS. This guy was hanging out on a fence post. Canadian Geese were in the grass beside him. (not in the picture.)
I saw a few fun ducks mixed in with the coots. This RING-NECKED DUCK was happily swimming along. I was grateful that he didn't see me behind the tall grass.

We also saw a pair of CINNAMON TEAL in this waterway, and a few more in another pond.

I was so excited to see a few BUFFLEHEADS. This was a life bird for me. (birder talk for the first time you've ever seen a certain bird.) I haven't been birding long...so there are lots of lifers yet for me to check off my list. They were so far away (hence the dreadful photo,) but still identifiable (they are the two birds up front, a drake and his lady friend to the right.)

There was a family of TUNDRA SWAN hanging out on a grass strip in this pond. Beautiful! There were two adults and two juveniles.

In this same pond, we saw a group of 3 Juvenile WHITE-FACED IBIS. I think they were hanging around the nest. Apparently, Mama hadn't kicked them out yet. ;)

I was a little overly excited about this find because I thought they might be glossy ibis who had lost their way and accidentally ended up in Utah...but then was able to figure out that the juvenile white-faced ibis looks an awful lot like the glossy ibis from the east coast.

We saw many more birds...Ravens, Harriers, Canadian Geese, Gulls, and more! For a complete bird list from this trip, you can view it on ebird.org
http://ebird.org/ebird/view/checklist?subID=S28051512

Unfortunately, our side-trip to the refuge had to be quick as we left friends digging at the Geode Beds (which by the way is an excellent adventure in itself!) We wanted to caravan with them back to Lehi. You never know what may happen in the middle of nowhere on a dirt road without cell reception. I would have loved to have stayed longer...but they were kind enough to dig a little longer to allow us the time to go to the refuge.

I'd definitely recommend this trip to any birder wanting to go on a day-trip adventure. You might want to mix it in with a trip to the Geode beds too. Just be prepared for the long beautiful drive.

Thursday, March 10, 2016

Dugway Geode Beds = BIG Adventure!


Monday, was a school holiday, and we had a spur-of-the-moment opportunity to go on a wild adventure.
As in...
we decided at 8:30am,
and were leaving with our group by 9:15am.

You see our son was invited to a birthday party to go geode hunting. (rock-hounding)
How cool an idea is that!

We thought we'd go along to help out this brave father who was willing to take 8 boys out to the west desert for this creative party. (not to mention... the adventure sounded pretty fun too...we'd never been...and to top that...it would be near a National Wildlife Refuge.) We have to commend this family for coming up with the most unique birthday party idea ever.

So instead of our regular Monday routine, suddenly we were packing up our truck for a LONG 3-hour drive to the middle of nowhere: Dugway Geode Beds, Utah
Seriously...
This was the kind of trip where dirt roads are the only way to get there. In fact, the only markers on this particular road were Pony Express markers. Each came with a sigh of relief that we were heading in the right direction.
This particular Pony Express marker was practically a metropolis, as it had a building next to it...
Not just any building...
but a re-built-on-the-original-site Pony Express mail station.

This is where the rider would trade horses and ride like the wind until the next station to trade horses again, they'd do this for about 3 stops, then they'd trade out riders.

There were about 100 stations in all, 80 riders, and 400-500 horses ready to deliver the mail. The service only lasted about 19 months. Pretty amazing history!
The scenery was stunning!
We're talking Hollywood western-movie-backdrop kind of stuff.
I'm proud to say I live in this beautiful state of Utah!
We saw wild horses. (which only exist in a few places these days.)
We had to remind the boys that they were WILD...
and it wasn't a good idea to approach one to "pet" it.
Wouldn't that have resulted in quite a surprise!
Antelope were abundant.
Civilization was scarce.
Eventually...
(three-hours-later...) 
We made it to the geode beds! 

Yes, those grey clay mounds are what we drove three hours into the west desert to see! 
The boys were delighted!
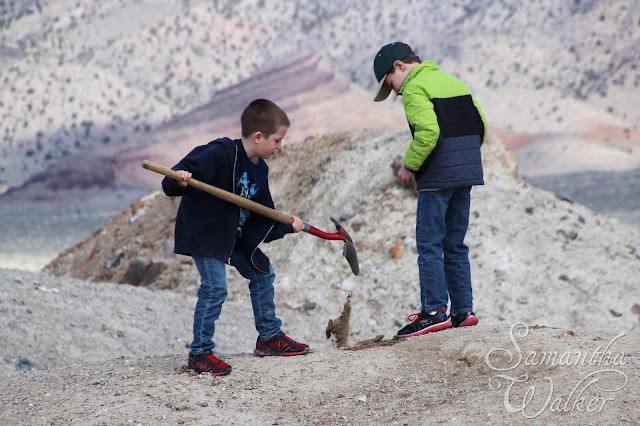

The boys seemed to know what to do.
Shovels, buckets, hammers, and gloves...
they were making a mad dash to the mounds to find the mother load!
The scenery wasn't too shabby there either.
It was a picture perfect sky.
While the shovels were fun, they weren't really necessary, as the geodes were abundant...
Really, they were just laying around.

The boys had fun cracking them open to see what treasure lay inside. It was pretty amazing how different the inside of each rock could be. Some were sparkly. Some lacked luster but were bumpy and interesting inside. The colors even changed from one geode to another.
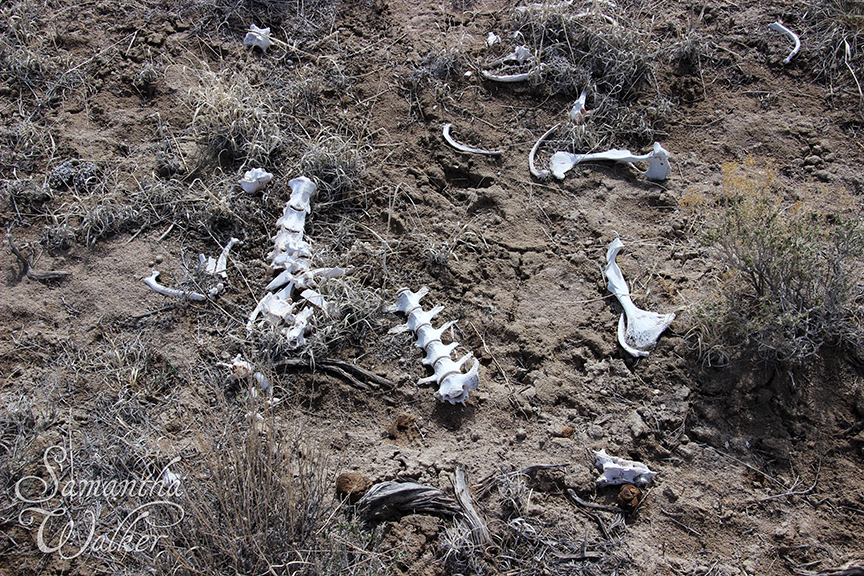
There were other things to see too...
Actually...
I kept this picture a secret until I got home.
I didn't want the boys picking these bones up and putting them into their bucket.
(Moms of these boys...you can thank me later.)
Each was able to fill a bucket with their finds.
Besides oodles of geodes...
The boys also found obsidian.
Makes sense since this was an area of volcanic activity many years ago.

Moms of these boys...if you don't want to keep their new rock collections inside...these geodes could make great outdoor landscaping accents. Encourage your boys to find some great places in the yard to display them.
Check out this Sparkly "Garden Rock."

The boys dug for three hours!
 With all the sparkly things they found...they felt like they were on top of the world.
Until...
Hundreds of sheep suddenly appeared at the dig-site.

While the sheep were cool...it wasn't the sheep that got the boys excited. It was the hyper shepherd dogs nipping at the sheep guiding them where to go. The boys say the dogs were ferocious. One even exclaimed, "One dog ate my bag of chips...bag and all."

I understand that the boys dove into the Suburban pretty quick to get out of the way. It was a sheep traffic jam...not something I think any of us have ever seen before.

Jonathan and I actually missed seeing this "sheep stampede" through the dig site, as we were just arriving back from a little side trip we took to see Fish Springs National Wildlife Refuge. (that's a whole other blog post.)

We got back from the bird refuge just in time to see the sheep ride over the next hill.
Once the sheep were over the hill...
We made the kids get out of the car for one last picture. 
The ride home was even more muddy than the ride there. Somehow the trip home was just over two hours, and not three...I don't know if the extra mud, and the speed at which we returned home, had any correlation...we were just glad to be home before sunset.
Did I mention the cars got really dirty?
Really really dirty...
Not just any dirt...
Clay mud is a whole different breed of dirt.

Jonathan spent 45 minute hosing down the truck, another half hour at the gas station self-serve car wash, the next day, we drove it through a fancy car wash...and then finally parked it by their vacuums and self serve cleaners where Jonathan and I detailed the inside and outside of the vehicle for another hour. After all of that...the wheel wells still have some dirt left in them.
So....
Was the trip worth it?
Yup...priceless!
So glad we were able to crash this neighbor's birthday party to have this once-in-a-life-time opportunity.

If you don't get a chance to make it out here to Utah to go geode hunting...you can still enjoy the experience of cracking open a geode to see what's inside. There are a few places you can buy geodes to crack at home. I'm sure they'd even make a great birthday present.

Trip info:
So what exactly are the Dugway Geode beds?
This site was once part of volcanic activity. Geodes were formed from out of molten rock that "bubbled" and trapped air. The air that was trapped inside also contained water and minerals. The minerals captured in the bubble-rocks are unique and can produce a variety of different crystals and formations in a rainbow of colors. The Geode beds are part of the Bureau of Land Management. There are some areas which are privately claimed. There is signage. The Crapo family claim can be explored if you contact them ahead of time and fill out a waver and pay a fee.

To get to there, follow these directions:
From Main street in Lehi
Go west and main street will turn into UT-73
Drive past Cedar Fort until you reach Fairfield
You will reach a Y in the road immediately after Fairfield (which is such a small town if you blink you may miss it.) Stay right at the Y to continue on UT-73
About 5 miles after Fairfield, UT-73 meets up with the Pony Express highway at another Y. This is not well marked. You will go left at this Y. (This is a dirt road and you won't see pavement again until your return trip.)
Stay on Pony Express Highway and you will come to the town of Faust. (it's very small)
Just after Faust you will reach a T in the road. Go left.
The Pony Express Highway continues this way until it turns into Simpson Springs Road, which is also the Pony Express Route.
Continue on until you get to GPS coordinates: 39.873001, -113.139176 At this point, turn right. Follow this dirt road staying left at the two Y's until you come to a T intersection. Go right, then stay right at the Y, and you will see the clay Geode beds. GPS coordinates: 39.894126, -113.136825

Additional tips:
Google Maps does pretty good at showing you the route on these dirt roads and GPS definitely helps. Our truck navigation system got frustrated though. It kept trying to guide us back to the nearest paved road. We ignored it and just observed the map on the screen. 

It's a good idea to take a jeep, truck, or SUV if you have access to one. It's also a good idea to caravan with another vehicle as cellphones do not work out here, nor along much of the road. It's also recommended that you start your trip early enough that you can return with daylight. 

On a sidenote...Topaz Mountain is near the Dugway Geode beds. This can be done in the same day with careful planning. I have not been there, but I understand that you can find topaz and other gems. 

I imagine Spring is one of the best times to go. It is the only time the west desert is green. Also, you can avoid the scorching heat, and the rattlesnakes are still hibernating. All good reasons. Just be careful to check the weather as Utah is known to have rogue snow storms even until early summer. 

Be prepared to enjoy the trip. The three hour drive goes quickly with such beautiful scenery all around. 

Disclaimer:
Use this information at your own risk. Please research this trip before attempting it. 
Related Posts Plugin for WordPress, Blogger...