Ads 468x60px

Showing posts with label heidi collection. Show all posts

Friday, May 11, 2012

A Crafty Gift by Angi Barrs

Hello everyone!  Angi here with a fun tutorial and gift idea using Samantha's adorable fabric and die-cut embellishments.

Baker's twine is a popular trend right now. Here's a way to give "The Gift of Twine" in a fun and unique way.

First you will need the following supplies:

1. A spool of baker's twine. I used the "Honeydew" twine from The Twinery.
2. Samantha Walker "Decadence" fabric - You can find it in the Riley Blake store.
3. Samantha Walker die cuts - You can find the "Heidi" collection die cuts.
4. A lollipop stick - (from Michael's Craft Store)
5. Pop dots

Step #1 - Cut a piece of Samantha's fabric - 9 inches long x 2-1/2 inches wide. Wrap it around the center of the spool of twine. Use three pop dots to adhere it.


Step #2 - Add pop dots to the back of your Samantha Walker die-cut embellishments.


Step #3 - Place the die-cuts on top of the fabric. Tie a small piece of baker's twine to the larger tag die-cut embellishment.


Step #4 - Add pop dots to the other die-cuts, then add them to the lollipop stick.


Step#5 - Place the decorated lollipop stick in the center of the spool of twine. Now you are ready to give a crafty gift that will make anyone smile!


I hope you enjoyed my tutorial.
Have a Happy Crafty Day!


*****

Friday, March 09, 2012

Silhouette Tutorial - Print and Cut by Jamie

Hi!  It's Jamie back with you today sharing a tutorial for creating a print and cut with your Silhouette dies!  I am using one of my favorite cuts, the Blooming Woodland Daisy from Samantha Walker.

Step #1:  Open the Silhouette die within your Silhouette Studio Software and resize the item.

Step #2:  Ungroup the items by going to 'Object' and selecting the 'Ungroup' option.

Step #3:  You will see separate boxes around each of the items.
Step #4:  Select the grass and stem area then click on the 'Open the Fill Color Window' shown in the red circle to open the fill colors.

Step #5:  Select a fill color of your choice.

Step #6:  Click on the petals section and select a fill color of your choice.

Step #7:  Click on the center section of the flower and select a fill color of your choice.

Step #8:  Click on 'Edit' and 'Select All'

Step #9:  Group the items back together by selecting 'Object' then 'Group'.
Step #10:  Click on the 'Open the Registration Mark Settings Window' and click the Show Reg Marks box.  This will show the registration marks on your page.

Step #11:  Click on the 'Open the Cut Style Window' and select 'Cut Edge'.  


Step #12:  Click on 'File' then 'Page Setup'.

Step #13:  Change your page to 8-1/2" x 11" (unless you have a large format printer that will handle 12x12).  Click 'OK'.

Step #14:  Click on the printer icon to send the print to the printer.

Step #15:  Select your printer and click 'Print'.

Step #16:  Once your page prints, click on the 'Send to Silhouette' icon.

Step #17:  Follow the instructions on the screen and then click on 'Continue'

Step #18: Place your print on your mat as shown on your screen.

Step #19: Load your paper then click on 'Detect Automatically' and your Silhouette machine will scan your page for your marks.

Step #20: Set you cutting setting to match your paper then click 'Cut'.

Step #21: Remove your pieces from your mat and create!

Samantha Walker Supplies:
Pattern Paper: Heidi Collection by Samantha Walker (Creative Imaginations) and
A to Z Collection by Samantha Walker (Creative Imaginations) 
Stamps: Sweet Life by Samantha Walker (Unity Stamp Co)
Metal Dies: Ornate Artisan Tags and Accents by Samantha Walker (Spellbinders)

Tuesday, July 19, 2011

So Happy to share my new dies with Spellbinders!

Yes, you heard right...Spellbinders!  This die cut and embossing system is so dear to my heart. I've been a lover of this system since it was first brought out into the market place.  I was first introduced to it by my dear friend Kim Hupke, many moons ago, where we both attended a scrapbook camp in Dearborne, Michigan.  She introduced me to Stacey, the inspiring owner of Spellbinders. With a constant twinkle in her eye, Stacey can't help but captivate you with her warmness and energy. That beautiful spirit does not stop there with just her, and if you've been to CHA before and stopped by the Spellbinders booth, you know what I'm talking about! This is where you get to experience ALL of the warm,  kind and amazingly creative the people that make up the Spellbinders Family!  I've made it a point to stop by their booth every CHA I attend, because they always WOW me with their innovations and creativity, and it's nice to catch up with old friends. And now, I'm so proud to say that I get to be a small part of the Spellbinders family!
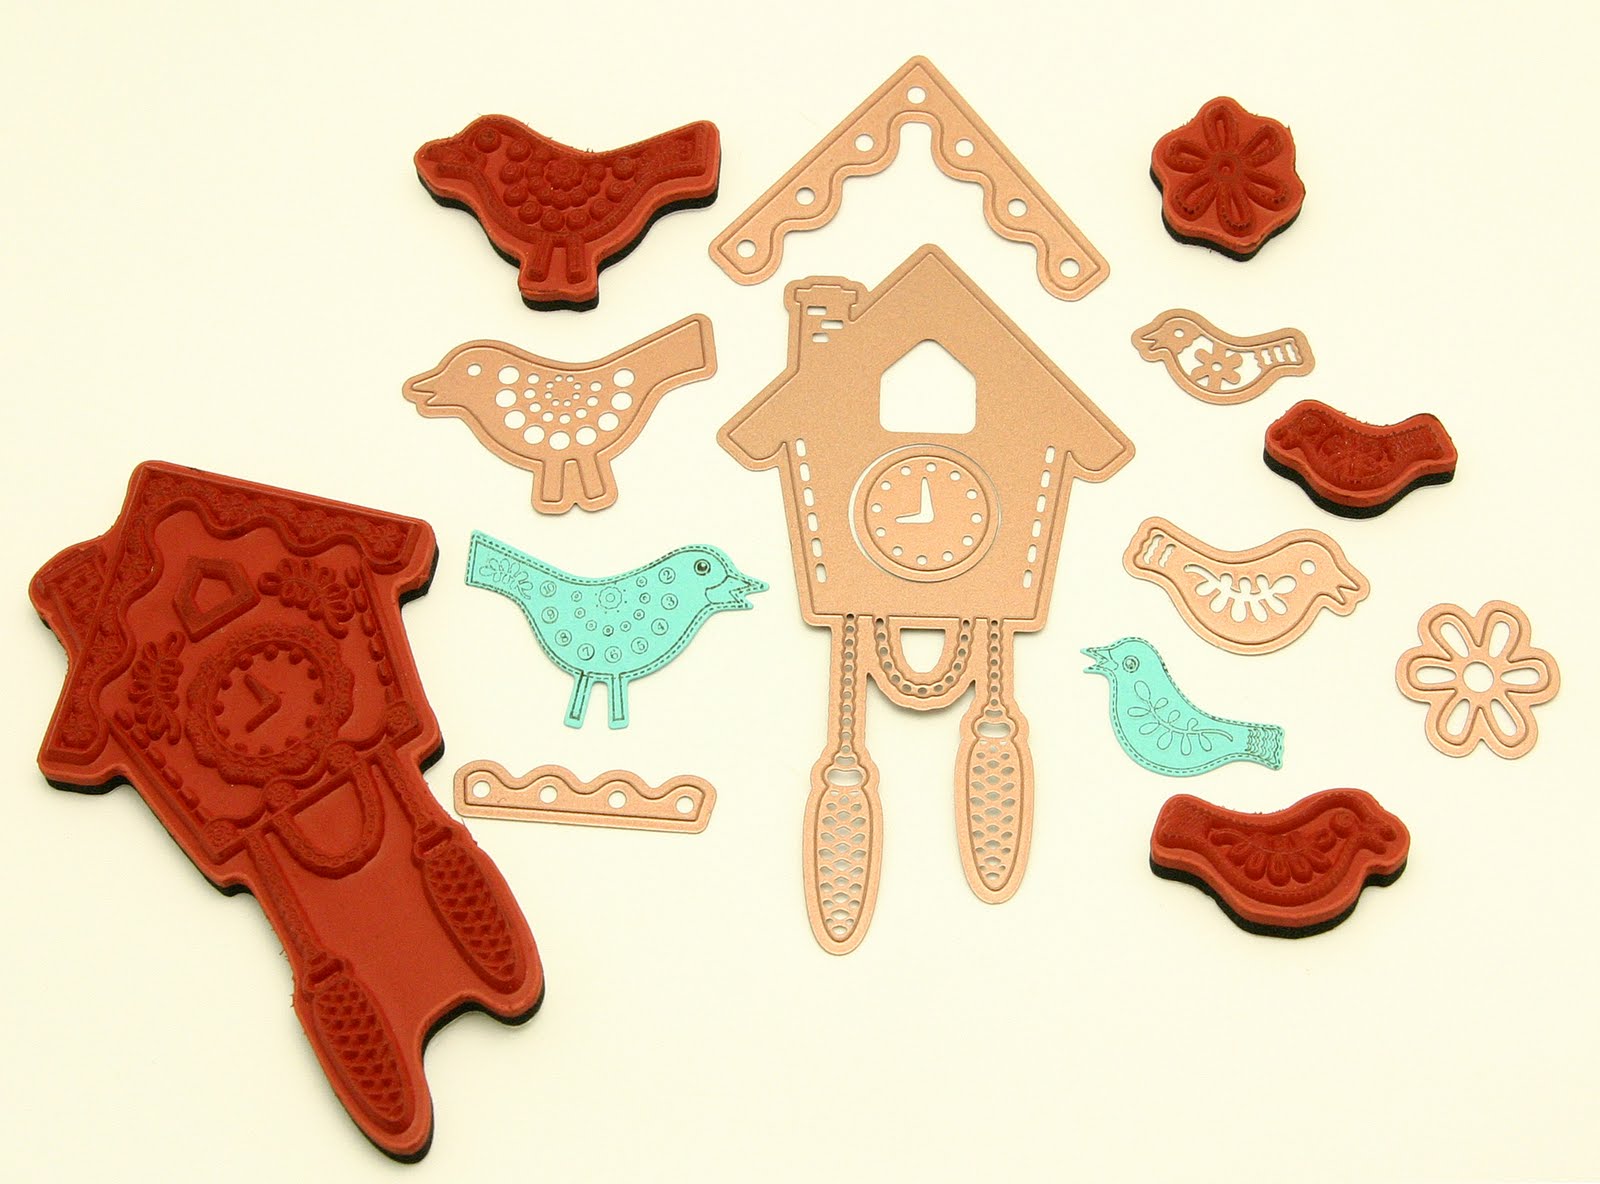
The set I'm sharing with you today is called, "Cuckoo Clock." The fun thing about this set is that it coordinates perfectly with my Unity Stamp set also called Cuckoo Clocks. Watch for SEVERAL coordinating stamp and die sets in my Spellbinders and Unity stamp collections. For this card I stamped the image of the clock on the paper two times.  Once on Green paper, once on Blue paper.  I laid my Spellbinders die over my stamped image being careful to line everything up.  I taped the die to the paper so that it would not shift during cutting. I did the same with the blue paper...lining everything up just so.  Then I put it all together with a little dimension by using Pop Dots.  I added a strip of paper from my Heidi collection at the top and the bottom of the card over a strip of my Holey Cardstock.  


Some of the above stamps are not at the correct scale relationship to each other.  The cuckoo clock on the right is rather large and not the same size as the bird on the left.
Related Posts Plugin for WordPress, Blogger...