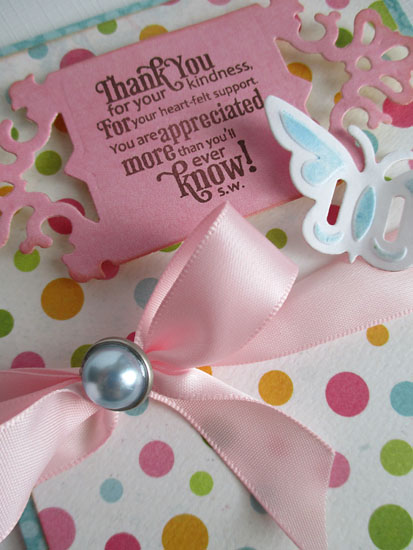
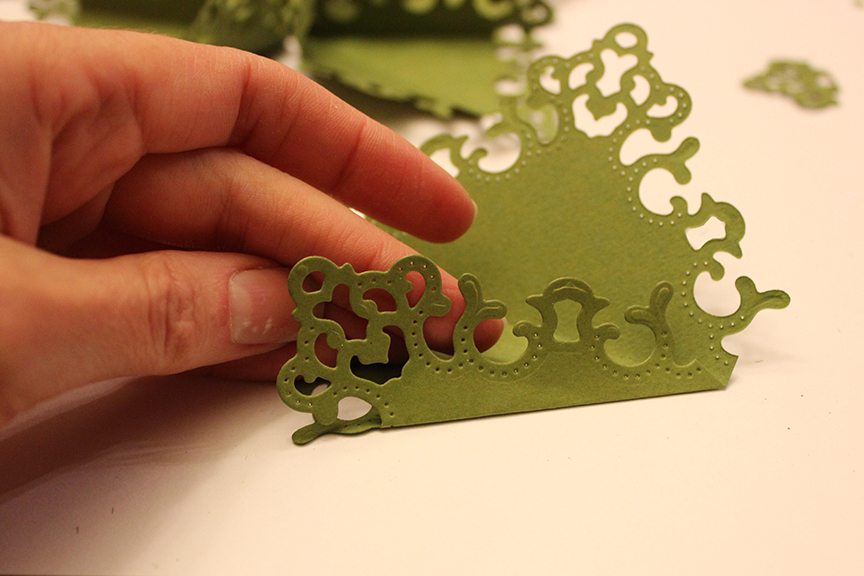
Today I am working with my new Butterfly Corner and Ornate Square dies!
But first...
Shhhhh....I'm going to let you in on a dirty little secret...I take shortcuts!
I do it all the time, because I am human...
and as such, I often get caught up in life. It creates the need to find ways to modify how I do things, so that I can fit in all the things that I want and need to do in a day.
So here's one of my favorite quick crafty-tips that can save you a bundle of time when you are in need of a quick card, or crafty gift.
On days when I do have a good slot of time to get my crafty on...I work double time with my Spellbinders Grand Calibur...
As I'm working on my project, I get out my paper scraps too--you know...the ones too small that you think you ought to throw them away...
but no...don't do that...
Instead, while you have all your crafty stuff out, run those scraps through your Grand Calibur with some of your favorite Spellbinders dies and then save them in a special place for a day when you don't have much time.
I like to file my "pre-cuts" in a file labeled with the die set they were created with. That way I can find them on the fly when I really need to craft fast. This works great for Birthday cards, tags for gifts, or even holiday crafts that need a special shape.
I have learned to craft this way, especially right now, as my craftroom is in serious limbo. We have been working to finish our basement for over a year. (My husband has been doing a fabulous job, but it is definitely a process.) I have a lot of my crafty stuff packed in boxes, or stashed here and there as it awaits a permanent home. So I find myself using my dining room table as my craft zone, which is not ideal, when you have to gather everything up, and then put it all away before dinner.
This week has been crazy. Parent teacher conferences, school projects, swim team stuff, gymnastics, music lessons, deadlines, and more deadlines...it's all good stuff...but my week went by so quickly, that it left little time for crafting.
This was the perfect week to get out my pre-cuts, and make some quick cards. It took me about 20 minutes to complete all three cards...and then I was off to my last parent teacher conference of the week.
I went through my files and quickly found some colors I wanted to work with that had been cut with my newest dies from Spellbinders.
Even though I did not have much time to craft this time...I wanted to make sure each project had something special, or a little twist in the design. I'll walk you through what I did in each project below:
For this first card, I took the tag die from my Ornate Square set and did what I call a "double take." That's where I use a die that is shaped one way, and make it appear another way by criss-cross stacking it with a duplicate cut. It's a great way to change up your die sets to get lots of looks from one set. So the original tag die is rectangular...by stacking it, I made it appear as a square. Then to add a little finishing touch to my card, I took some fabric and ran it through the center of the tag, like ribbon. I added a few knots for interest. In this case, I had also "pre-stamped" this with my coordinating stamps from JustRite, when I did my cutting session on a prior day. I just filed it away stamped and ready to go for a quick card.
-Spellbinders, Samantha Walker, Ornate Squares Die
-Just Rite Clear Stamps Samantha Walker Botanical Swirls
-Carta Bella cardstock Traditions by Samantha Walker
-Riley Blake Fabric Serenata by Samantha Walker
Here's another pair of cards that I created on the fly...
Once again these were created with pre-stamped pre-cuts, that I created one day, and filed away for a day when time was short.
I have two twists on this card...I first split my butterfly into two separate wings...to embellish the sides of my "happy" tag. Don't you feel like you have wings when you are happy? I thought it was a fun way to say "happy." The next twist on my dies, is that I took the smallest square from my Ornate Squares set, and just snipped off the ornate corners to use as a layered lace edge at the bottom of my tag. It was something simple, that really made for a nice way to "ground" my tag design...after all I had just given it wings...I didn't want it to fly away just yet. ;)
-Spellbinders, Samantha Walker, Ornate Squares Die
-Spellbinders, Samantha Walker Butterfly Corner Die
-Just Rite Clear Stamps Samantha Walker Botanical Swirls
-Carta Bella cardstock Paris Girl by Samantha Walker
I did another "double take" on this card. I used my largest ornate square die, and criss-cross stacked it to make it go from a square shape to a lacey snowflake shape. I also double stacked two of my butterflies from my butterfly corner set to give it a little lift.
-Spellbinders, Samantha Walker, Ornate Squares Die
-Spellbinders, Samantha Walker Butterfly Corner Die
-Just Rite Clear Stamps Samantha Walker Botanical Swirls
-Carta Bella cardstock Paris Girl by Samantha Walker
Since I made such quick projects for this blog frenzy, I wanted to make sure that I left you completely satisfied with some "knock your socks off" inspiration...so I asked my uber talented creative team to help show off my new dies with their interpretation.
You'll LOVE what they did!
Die Cuts: Butterfly Corner and Ornate Square by Samantha Walker (Spellbinders)
Patterned Papers: Traditions by Samantha Walker (Carta Bella)
Stamps: For All You Do Vintage Labels Three by Samantha Walker (JustRite Stamps)
Tools: Grand Calibur (Spellbinders)
Cardstock: Cream (Recollections and Bazzil)
Ribbon: Cream Crinkly (May Arts)
Twine: Buttercream (The Twinery)
Pearls: Cream (The Paper Studio)
Wood Chips: Hearts (Freckled Fawn)
Projects below all by Aimee Maddern:
Supplies:
-Spellbinders, Samantha Walker Butterfly Corner Die
-LCI White Wood Grain Cardstock, Bazzill,
Bo Bunny & American Crafts Cardstock
-Heidi Swapp Color Mist in Sweet Cherry & Primrose
-Dylusions ink spray in Cut Grass
-Mister Huey’s in Hot Dog, Lemonade & Bonny Blue
-3L adhesive squares, Glossy Accents
Supplies:
-Spellbinders, Samantha Walker, Ornate Squares Die and Butterfly Corner
-Just Rite Clear Samantha Walker For All You Do Vintage Labels Three Stamps
-LCI White Wood Grain Cardstock, Bazzill, Bo Bunny
& American Crafts Cardstock
-Heidi Swapp Color Mist in Sweet Cherry & Primrose
-Mister Huey’s in Hot Dog,
-Charcoal Twine from the Twinery
-Hat Pin From My Minds Eye
-3L adhesive squares, Glossy Accents
-Spellbinders, Samantha Walker, Ornate Squares Die
-Just Rite Clear Samantha Walker For All You Do Vintage Labels Three Stamps
-Stayton Ink in Timber Brown
-Cantaloupe Twine from the Twinery
-3L adhesive squares, Glossy Accents