
Susie here and I can hardly wait to share today's tutorial with you. I am using papers and elements from Samantha's new collection called Cool Summer. I am in L-O-V-E with the brads that come with this collection. And I knew immediately what I wanted to make with the larger ones. Take a look:
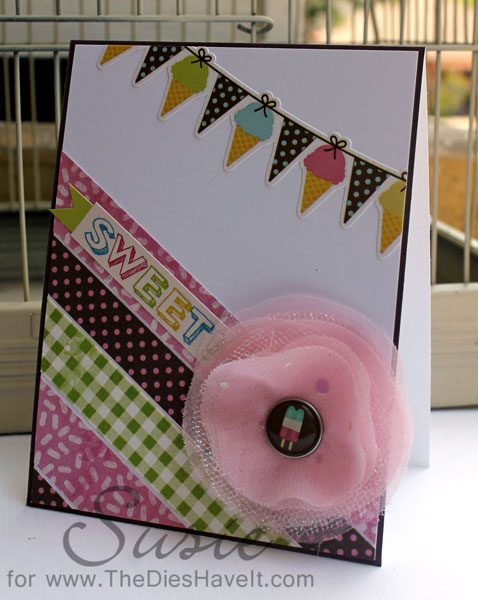
The larger size is just perfect for hiding the stitching that gathers up this sweet little gauzy flower. Here are the steps to making this flower and also a peek into how I made my card base.
I used three sizes of circle Spellbinders dies to make my flower. You could hand cut your circles because they do not have to be perfect. I grabbed a few layers of some satin fabrics and added in some sparkly tulle too.

When cutting fabric with dies, I find it best to place a piece of card
stock under the layers. It may or may not cut into the card stock, but it
does help cut the fabric. I ended up with lots of circles!

These are the pieces I used on my flowers. I had leftovers to use on another flower later. I stacked the layers and then offset them just a little because I was not going for perfection.

On the top of my layers, I ran a few basting stitches through all the flower layers. I used blue thread here so you could see. I made a circle of stitches and then poked the needle through the back and pulled the thread tightly to gather the layers. Then I just knotted the thread. I poked a hole through the center and inserted a large brad which covered my crazy stitching. It was perfect! Before I spread the prongs out, I added a circle of card stock to the back. This is not necessary, but I found it easier to glue paper to paper instead of paper to metal when finishing my card.
Now that the flower is done, let me show you what my card base looked like before trimming:

I cut strips of Cool Summer papers and adhered them diagonally across the bottom of the card. Then I took part of the ice cream border from the elements pack and placed it at the top. A few quick trims with my craft knife later, I had the card base that you see in my original photo.
I just added my flower and the "Sweet" sticker to complete my card.
I hope you enjoyed today's tutorial. And I hope you will make some flowers of your own soon.
And here is a little look at the Cool Summer Collection:

Links to products used in this post:


I would like to win this Fab price, as I live in South Africa and can not also enter for Overseas prices....
ReplyDeleteToo cute...love your card!
ReplyDeletevery PRETTY!
ReplyDeleteHave a wonderful day,
Migdalia
♥ Crafting With Creative M ♥
♥ 2 Creative Chicks ♥
♥ Silhouette Challenges ♥
Nice tip about the paper under the fabric to die cut better and paper on the bottom of the flower to glue paper to paper! Your card turned out beautiful.
ReplyDeletequilt 4 fun 2 at hot mail dot com