Ads 468x60px

Monday, February 24, 2020

Silhouette tutorial: Purse Cards

New in the Silhouette Design Store...

An updated version of my gift-card purse/money- pocket card. Yes, it's a mouthful...but it's a great practical and fun design, that has two special pockets that can hold a gift card (outside pocket) and/or money in the inside pocket.

It will appear in the Silhouette design store shortly. I'll post the link here.

This variation of the design has a St. Patrick's day theme. Watch for more themes on this new variation of the purse card in the coming weeks. You may be directed to this post for the tutorial on similar designs, that go together in the same way. 

Since the card has some new improvements, I thought I'd update the tutorial as well. 

First cut out all the pieces on the coordinating colors in the Silhouette studio software. You will have to ungroup all the pieces, and move one color group at a time, onto the cutting mat in the software.  You will work through each color group, moving it onto the live cutting area, and sending it to cut. 

Side note...If you are using the Cameo 4, and the autoblade resets to 0, when you start a new color, you may have to remove all excess design information that is not on your page/to be cut. (Meaning creating a separate file for each color.) Sorry for the extra step here, it's the only work around I can find right now. 


After you have cut each color group, lay out your pieces, so they are ready for the gluing steps.


Locate the main card piece and the contrasting bands at the bottom of the purse. Attach with a good paper glue like Tombow mono adhesive, to prevent your paper from warping. It also dries really fast.


Fold your pocket piece accordion style.


Glue the darker green contrasting piece under the decorative clover piece. Add a brad to the point, where the hole is already cut. The little green tab will help close this pocket in a tidy way.


Locate the interior "money"pocket, fold the tabs, and attach it to the inside of the card with glue. You do not have to attach it if you don't want to use it. Instead of money, you can use the dollar sized note card, provided with the cutting file, to insert a note here. 


The above shows the pocket being used with the provided dollar sized note card.


Now we will fold the "leather straps" around the card, be sure to thread your decorative buckle onto the strap, before attaching with brads. Do this for all 4 parts of the card. Brad holes are already cut...just line things up. 


This photo shows the buckle straps fully assembled. It also shows a previous prototype of the pocket before I added the tab and slot. It bugged me, that I couldn't keep it closed, and taping it, would have been clunky. I thought you'd think so too...so I redesigned it with a tab and slot, in order to keep things neat. ;)


Now we will center the pocket onto the face of the purse card. Use a touch of glue on the tabs and press it into place. Then add a dab of glue to the triangle flap, and slide it into the pocket and press. 


Time to add those adorable circle handles! Add a dab of glue to the bottom third of the gold side of the circle. Center the first one using the "dip" in the purse as your guide to line things up.


For the second circle, same thing...add a dab of glue to the bottom third of the circle. Now we will align it with the circle handle, that is already glued. Fold the card onto the circle handle, once you have it aligned. 


Now we will add the other additional feature, that I decided to redesign with this version. A closure strap, with a slot to slid it into! Attach it with a brad, then fold it, and slide it into the slot on the other side. It closes and stays closed so nicely now. 

Happy Crafting! 

Friday, February 14, 2020

Lucky Shamrock Horseshoe Purses


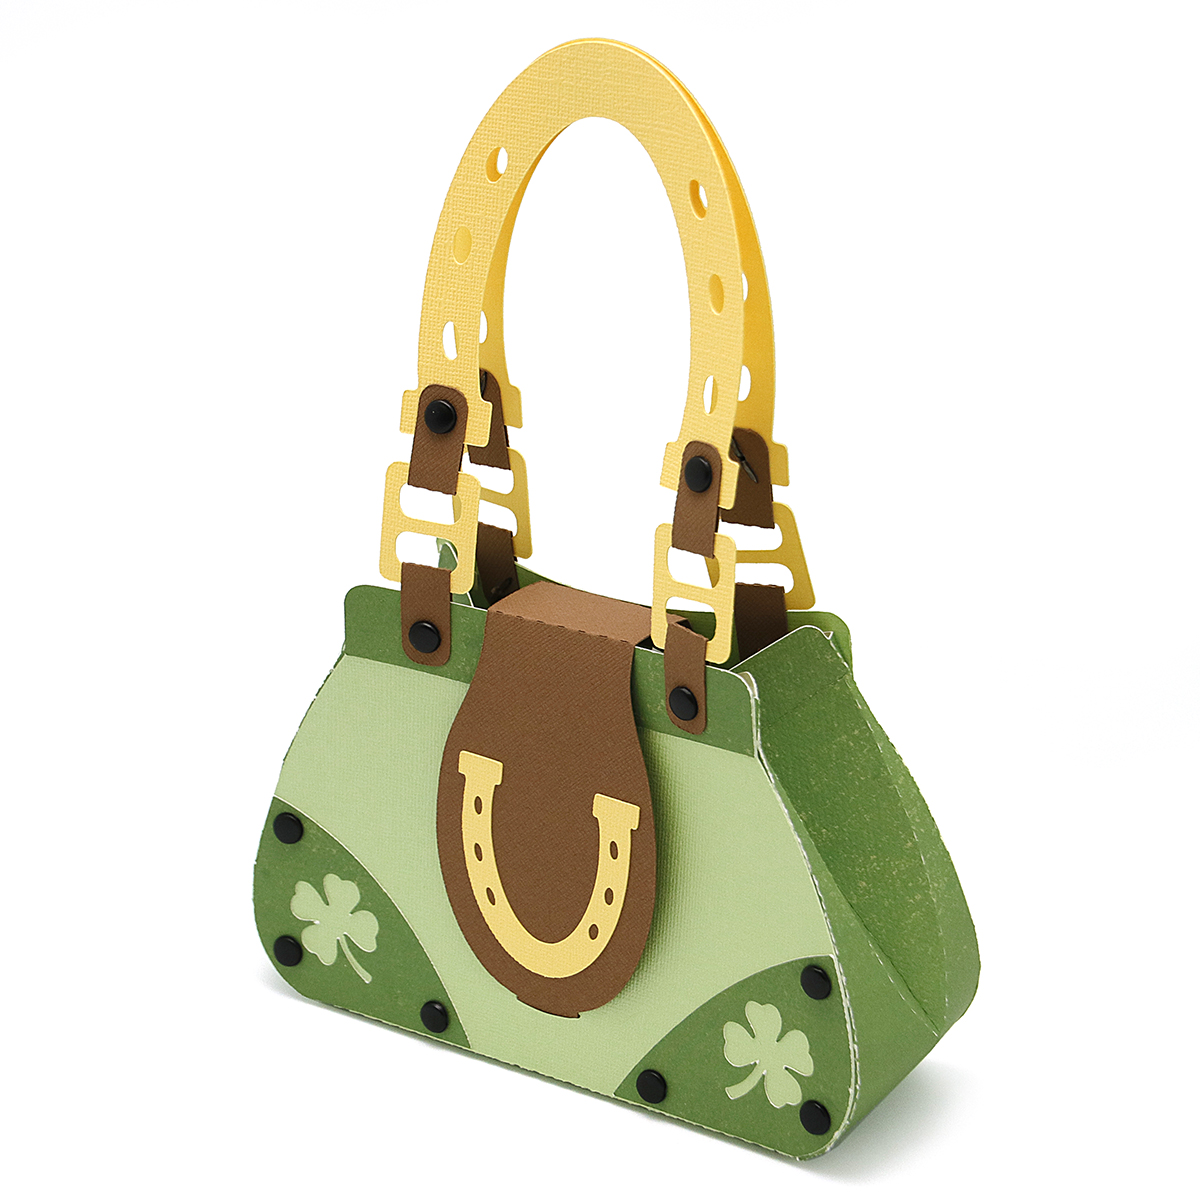
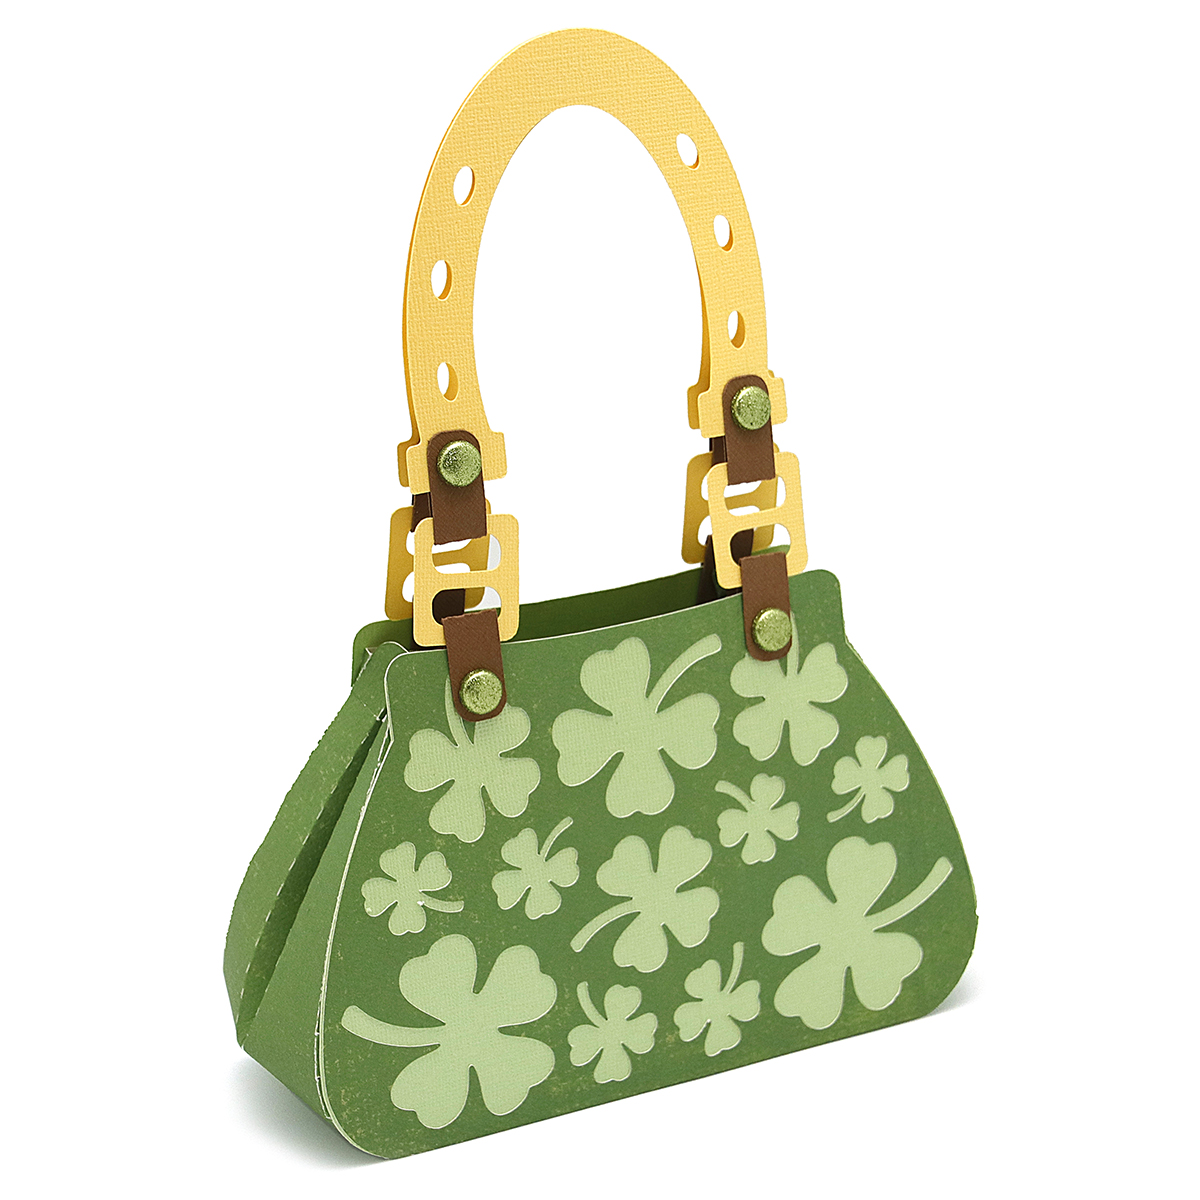
This week in the Silhouette Design Store, I have a few new purse designs just in time for St. Patrick's Day. They are adorned with shamrocks and horseshoes, and have lots of fun little details. They could be the perfect party favor for a St. Patrick's day event. Fill with treats, making them the perfect gift bag for your favorite leprechaun.

This is similar to another shamrock purse I did for Silhouette a few years back. However, the two purses are not quite the same. This one is new and improved. It has wider sides to fill it with more goodies, and a new and improved horseshoe themed handle, and updated buckles and purse flap.  You could call them your lucky purses!

I'll post a link to the files in the Silhouette store as soon as they are available. 

Both purses go together in a similar fashion. I will demonstrate just the one with the horseshoe flap, as that has an extra step. Here's how to assemble them:


First step, choose your papers and plan your cutting mats in the Silhouette Cameo software. When you open the file in the Studio software, it will be layered on a 12x12 mat. You can resize your file to use the maximum space on a 12x12 sheet of card stock. To see how it fits, you will need to ungroup your file, then arrange the color coded groups onto the live cutting area. The light green pieces are your two largest pieces. Determine how much you can enlarge your file by how you can arrange that on a 12x12. Make sure everything is selected when you enlarge. Once you have it the size you want, cut each color group separately, until you have cut all the parts. For more information on how to use your Silhouette Studio software, visit the Silhouette 101 blog. (Click on the Tutorials tab.) That is where you'll find a wealth of information about all the latest tricks and tips for the most recent software updates.

Once everything is cut, glue your decorative pieces to the front and back side of the purse. Make sure to use a good paper glue like Tombow Mono adhesive. A good paper glue won't warp your paper. I like to buy mine in bulk for obvious reasons.


Assemble the Horseshoe handles by folding the little brown tabs around the buckle pieces. Attach them with brads, as shown below.


We will attach these to the main purse later, as it's easier to do that step last. That way they aren't in the way when you get to the fancy glueing part.


Find the brown flap and attach the decorative horseshoe element. Then fold as shown, and attach the flap to the back side of the purse. You may want to align the flap with the little flap insert on the front of the purse to be sure that everything lines up.


Now you will glue the side pieces onto the front and back of the purse as shown above. Then you can attach the decorative brads through the little pre cut holes. I love precut brad holes! Makes assembling a project so much easier. I've shown you pictures of the front and back so you know what this will look like.


You will want to fold the gussets on the side before we get to the fancy gluing part of the project. Fold the center part inward, and the curved fold lines outward, so it's accordion style. You do not need to fold along the horizontal fold line at the top. Please note, your side gussets may have slightly different fold lines, as I adjusted it in the final design for ease of movement.


Now we will glue the tabs along the curve of the front of the purse. This can be tricky if you've never glued tabs along a curve before. Here are some hints to make this part go smoother. Only use a small amount of glue on each tab. Use your hands on both sides of the side piece. One to hold down the tabs as you glue, the other to guide the side piece along the curve of the purse. You may have to push and slide the tabs as you go, and they will start sticking as your glue dries. Good paper glue, really makes this part much easier. If you are frustrated with too much movement while you are gluing the tabs, you can use scotch tape to temporarily hold it down. (see below)

You will continue to glue the tabs until you have attached all four sides with the front and the back of the purse.


In the final step, attach the horseshoe handle to the purse using the brown tabs and brads to fasten. I love this new design, because the flap now has a tab to insert into a slot on the main purse. 


Thursday, November 21, 2019

Circle Purse Instructions

This week in the silhouette store, I'm introducing a new purse design for Fall. You will be able to download this cutting file from my Silhouette shop.

Here's the direct link! Silhouette Design ID 308507

To make this purse you will need to download the cutting file available as either an .svg file or .studio file.

Arrange the different colored layers in the Silhouette studio software. This file already has maximized the space of a 12x12 cutting area, and is color coded to closely match my finished example above. You will only have to move a few pieces onto the live cutting area for each color paper change. If you aren't familiar with the Silhouette studio software, there are many tutorials online to achieve this step.

Assembly steps:
Attach the three contrasting backing pieces with a fine tipped paper adhesive such as Tombow mono adhesive. (these are the lighter yellow color)

Fold the leather strap pieces around the buckle hardware and fix with a brad or with glue. There are holes in this file that will match up to make attaching brads easy. The brads will hold the leather straps to the sides of the purse.

Fold the side pieces along the folding dotted line. There are two rows of dotted lines, one is to mimic stitching, the other is to actually fold. (see first picture in the second row.) Attach sides and front piece to the main piece with glue. Align the holes and fix brads at those points for the purse feet on the bottom. The brads aren't necessary, but add a nice detail.

Slide the front buckle onto the leather strap. You may fix it on with glue if  you wish. Attach this decorative strap with glue or brads.

Fold teeth on the side pieces inward then glue them to the front and back of the purse. (shown in first picture on the bottom row.)

Your purse is now complete. You can adhere a sticky velcro dot to the front flap purse strap, or use tape to shut the purse.


Tuesday, November 19, 2019

Circle Handle Purse design and Circle Pouches

This design can be found here. Silhouette Design ID 308288.
This design can be found here. Silhouette Design ID 308319.

This week in the Silhouette design store I'm releasing a few new versions of my circle handle purse. One mimics the look of tooled leather, another features a fall spray of foliage. You can follow along the directions of my original circle handle purse and here, and just add the "tooled-leather" look layer. I do recommend attaching this layer with a fine tipped paper glue such as Tombow Mono liquid adhesive. Another great way to attach this detailed layer would be to use adhesive backed paper.

Links to these designs will appear as soon as they are loaded into the Silhouette design store.
This design can be found here. Silhouette Design ID 308289.


These new circle pouch designs are simple to make and only require glue to attach the contrasting background that highlights the front design. You can easily assemble multiples of these and are recommended as party favors because of their simple assembly. Just simple fold and interlock tabs! Fill them with small gifts such a scented bars soap, hand sanitizers, little chocolate boxes, bags of candy or more.

This Design can be found here. Silhouette Design ID 308291.


Friday, December 02, 2016

Review of NEW Janome Skyline S9

Janome recently sent me their new Skyline S9 embroidery/sewing machine to play with and review...and play I did, and have enjoyed the machine very much!

This machine is a part of their affordable S series, and is the first in this series to combine sewing and embroidery on one machine.  The machine is feature rich, yet has the ease of use you expect from a Janome machine--with built-in tutorials to get you up and running. It also comes with a comprehensive manual that is indexed well, with pictures and diagrams, to let you know how to use all of the features. One of my favorite features...is it's wi-fi capability. This is a machine that speaks the language of the 21st century. You can send designs to the machine wirelessly via your i-pad. Because the machine is so feature rich, I wasn't able to test out every feature, but I wanted to make sure I at least tested out the basic sewing stitches, decorative stitches, and embroidery, and changing basic settings through the touch screen. I also purposely created a project that had many layers to see if this machine could be a reliable "work horse." My conclusion...you're going to love this machine.

To test some of the machine's basic features, I created designed and pieced quilt. (Heads up, this quilt design will be available as a FREE downloadable project on the Janome website later this month.)  For this project, I used basic straight stitches and listened to the machine's soft hum, as I pieced. The machine is smooth to operate, and has low vibration, which makes it nice to use. The LED lights were great for lighting up my project so I could be accurate with my piecing. The machine allows you the ability to operate it with a traditional foot pedal, or a touch stop/start button. A convenient knee lift is included with this machine for raising the presser foot.


You can also adjust the speed via the slide control, to prevent you from being to "heavy with your pedal" if you need to sew a little slower. I liked the convenient inclusions of the locking stitch, reverse, and cut-thread buttons. I also found the automatic presser foot lift feature quite useful in streamlining the process on my project. I would have loved to have had a completely automated needle threader like the Janome MC 15000, but the manual needle threader did the job well, and was quick. (This is where you save some money on the machine.) The workspace is larger than any of the other in the S class, at 8.25"x13" of bed space and 8.25" to the right of the needle. This was more than adequate space for the projects I chose. I went through lots of thread piecing this large quilt and so I got to know the bobbin winder. It's super simple, and if you forget how to use it, simply press on the question mark on the user interface and you will be directed to a tutorial.

For my second project, I tested out the embroidery side of the machine. You need to attach the embroidery arm unit, and switch out the needle plate before proceeding into embroidery mode. It doesn't take long to switch over, and I went back and forth between sewing mode and embroidery mode a few times with ease.

For this project, I created a matching pillow for the quilt. I selected one of Anna Maria Horner's on-board embroidery designs (yes, get excited, because 40 of her designs are included on this machine,) and selected some gorgeous thread from her embroidery kit specially designed for use with the S series. This thread is yummy scrumptious--yummy colors, and a scrumptious luxurious sheen in a strong polyester thread. This particular design was comprised mostly of satin stitches which really show off the sheen of the thread. I didn't have a single thread break while stitching this beautiful design.

The Skyline S9 includes the embroidery arm and three hoops--the largest being 170mm X 200mm. There are also hoop magnets included if you have a project where that kind of attachment works better over traditional hooping. I enjoyed watching the mesmerizing stitch sequences, and was pleased with the intricate detail that the design and the machine provided. This design takes 21 minutes and the screen shows you exactly which stitch you are on and how much more to go. You can resize your embroidery using the touch-screen interface, you can also reposition the design and change stitch density.

For fun I added some decorative stitching to my pillow project. After testing out several of the satin and decorative stitches, I chose to feature one of the appliqué stitches as I wanted the embroidery design to stand out and not get busied by a decorative stitch. The decorative stitches would be super fun for another project though. I played with the spacing and size on this appliqué stitch, via the touch screen, and found a setting perfect for my project.
When assembling the pillow, I decided to try out how the machine would do with a thicker project. So I purposely chose to quilt the design and add welting trim to see if the stitches were consistent even when things got a little tougher. I also designed the back of the pillow so it could easily accept a pillow form, by creating a split overlap with a rolled hem. This design meant that at one point, I would be sewing through 6 layers of fabric plus the welt edge, making that 8 layers, not to mention the quilt batting changing the thickness as well. The Skyline S9 had no issues with this extra workload. I used the included zipper foot to help aid in attaching the welt, which made the welt placement easy.
I was having so much fun sewing these projects, I decided I'd get another project done. I made a Christmas advent calendar to delight my three kiddos. This was a simple panel kit from Riley Blake, that I've had for a while, but just hadn't finished yet. I thought this would be the perfect time so the kids could have fun with it this December. I enjoyed adding some detail to this project with little accent stitches and a little bias tape. The pockets are filled with adorable "softies" that have ideas for different activities each day in December.

These were just some of the features that I tested. There is so much more to this machine than what I played with--including the ability to design your own custom decorative stitches! If you are looking for a great embroidery/sewing combo machine at a nice price point, this would be a good one to consider. You can read more about the features of this machine on the Janome website here.

By the way...the quilting on my quilt was done by Melissa Kelley of Sew Shabby Quilting. She does a beautiful job!

Monday, May 02, 2016

Powell Lake April 30th

Bonaparte's Gull Powell Lake Lehi, Utah
I don't usually do this...but I took the opportunity to chase a rare bird on Saturday. There was a report of two Horned Grebe out at Powell Lake in Lehi. (Not Lake Powell...different. places altogether.) Since the drive wasn't far...I set out to find it...and I did!

Since I haven't been a birder very long...I wasn't sure if I'd be able to distinguish the difference between a rare-for-our-area Horned Grebe and common-for-our-area Eared Grebe. After much studying...I think I could easily distinguish either one quite readily. Here's what I learned:
The picture above features our common Eared Grebe. There are three distinguishing features that you can notice right away... the feathers on the front of the head on the Eared Grebe will stand up, the yellow feathers by the red eye are wispy, the lower portion of the beak curves up slightly as it comes to the point.
This one is also an Eared Grebe. The feathers on the top of the head are not standing up right now, but you can still see the wispy eye feathers, and the turned up beak.

Now this picture above is of a Horned Grebe. Very similar in color, but notice the yellow eye feathers, they are more dense and create more of a stripe from the eye, rather than a wispy fan. Look at the beak, it has a white tip and a different shape. It's a little shorter, and does not have the upturn in the lower portion like the Eared Grebe. Now take a look at the eye, and follow it to the beak...notice the red line that connects the eye and the beak. Also, the feathers on top of the head do not stand up, but rather the feathers on the cheeks puff out.

You can see the "puffing out" of the cheek feathers better in this picture of a Horned Grebe above.

Here's a picture of a Horned Grebe and an Eared Grebe...with the clues mentioned, can you tell the difference?
I also saw four American White Pelicans on my outing...here's one flying over. Do you see the hump on his beak? That's only present during mating season. The American White Pelican is the only Pelican species that grows a hump. They shed it after laying their eggs. I suppose the growth on their beak helps them attract a mate...Nature is a funny thing.
 Here's three more American White Pelicans. Note that one is sans hump...
 There were a few Pie-Billed Grebe on the lake.
 I also spotted my first Spotted Sandpiper!
The Swainson's Hawks are coming back in full force now. Later in the day I saw one carrying a snake. Bless his heart! I love hawks...I hate snakes.
Of course you can't forget about the shy birds that hang around the lake too. There were several Yellow-Headed Blackbirds hanging out in the reeds. They were very good about staying in the thick of it all...made for some interesting pictures I must say.
It was a good birding day. I saw a total of 28 species. You can see the checklist here: http://ebird.org/ebird/view/checklist?subID=S29320879

I was ecstatic Monday morning to see that my report made it onto the rare bird alert from Cornell. That's a first!

If you haven't tried birding...grab your camera, and go out into your local area and see what hangs around in your neighborhood...you'll be surprised. There are more than just blackbirds and pigeons to be found.

Birding makes every day a treasure hunt!
Related Posts Plugin for WordPress, Blogger...