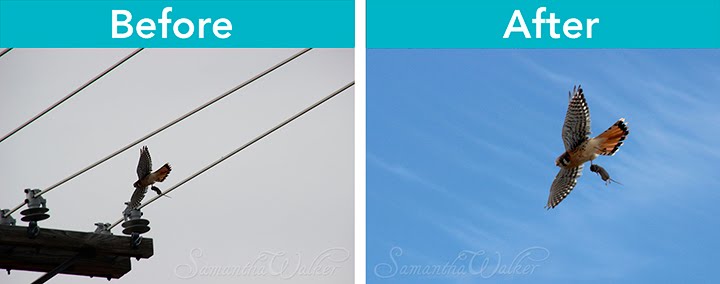
 Last week I shared this terrible photo with you of a Kestrel that came into my yard when I wasn't ready with my camera. (in this post here.) I basically missed the shot because I didn't have the right settings or time to set up the shot before the Kestrel flew away.
Today, I want to show you how I fixed it. I apologize to those who have been waiting to see the second half of the tutorial....last week had a few surprises that prevented me from getting to this post...thanks for your patience.
I'm using Photoshop CC to adjust my image. This tutorial assumes that you have some basic knowledge of photoshop like familiarity with tools and use of layers. If you have Photoshop Elements, you may not have all the features mentioned. And one more thing before I begin...If you know a little about Photoshop, you are probably aware that there are often several different ways to achieve the same thing. Every designer works a little differently. It's a personal choice, and you have to do what works for you. This is my method...and it works for me.
Exposure:
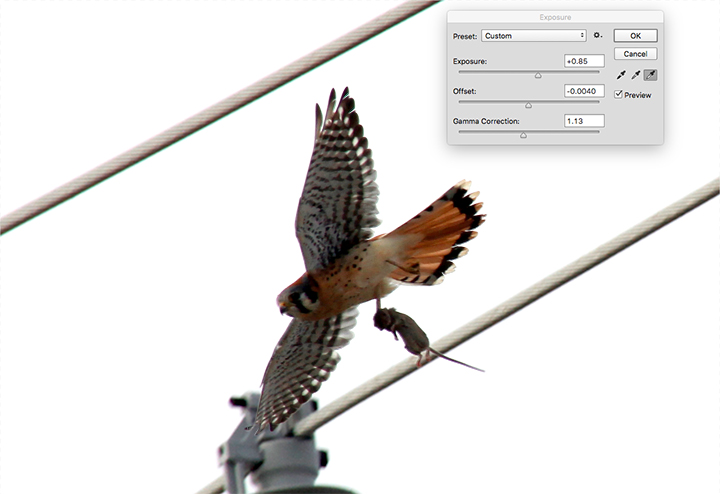
The first thing I did was fixed the exposure. Go to Image/Adjustments/exposure, and the exposure interface window will pop up. There are three settings that you can control with in exposure. Exposure, Offset, and Gamma Correction.
Here they are explained in layman terms:
Exposure adds or subtracts overall light from your image. Move the slider to the left will make it darker, slide it to the right and the image becomes lighter.
Offset will effect the darks in your image. Move the slider to the left and your darks will get darker, more it right and your darks will grey out. This is a slider where a little goes a long way--so don't get carried away with this slider.
Gamma correction effects the tonal range. Moving the slider to the left removes detail from the tonal range, moving it right adds detail. This will effect how much detail shows in your image.
Unfortunately, the exposure on my original image was so wonky, that it was beyond correcting perfectly...but the idea was to get it to as good as it could get. The Kestrel in my photo was too dark, so I bumped the exposure to the right to put some light back into it. This brought out some of the feather details in the falcon's wings. Be careful not to go too far with this setting, because it is easy to wash out your image. To help the image with contrast, I barely bumped my Offset to the left to give more contrast. Bumping it too far to the left will put too much black into your image. Go easy. Then I worked with the gamma correction until the detail was showing up. In this case, I had to move the slider to the left which enhanced the bird without muddling the detail together.
Isolation:
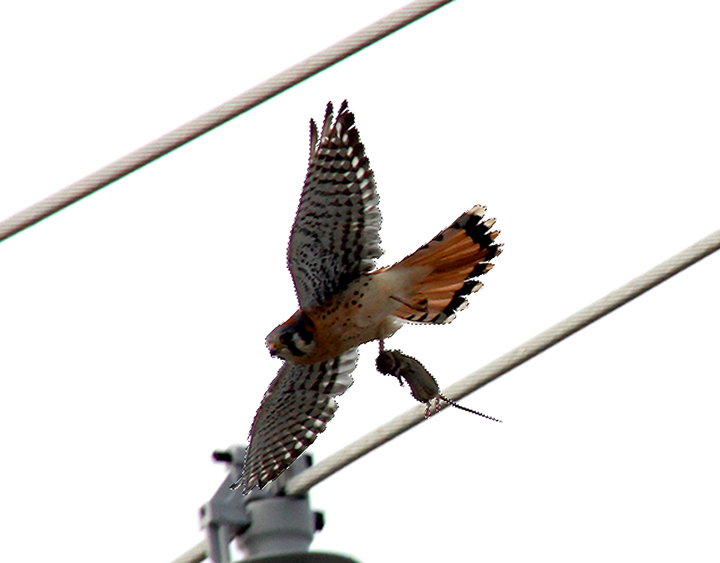
Next, I needed to isolate the bird so I could get rid of the distracting background. To do this, I used a combination of tools.
First I used my magic wand to select the white areas by clicking on them.
Then while holding the shift key, I added to my selection big areas like the power lines by using the rectangular selection tool.
Finally, while holding the shift key I added to my selection with the lasso selection tool (feathered 2 pix--setting is in top bar) any areas around the bird that weren't selected by the previous selection steps. (like the grey area from the power line that butted up with the lower wing and the power line behind the mouse.) Make your selections the best you can, but do not worry about making your selection absolutely perfect. Just make sure that your selection doesn't eat into the area of the bird. If it does, you can fix it with the lasso tool by clicking on option (alt PC) while selecting and your lasso will subtract that area. We will clean anything up with the eraser tool in an upcoming step.
Once all of those areas were selected, I inverted the selection by clicking ⌘-shift-I (command-shift-I on Mac Control-shift-I for PC, or find inverse in top dropdown menu Select/inverse) Now my Kestrel was isolated.
Refine Edge:
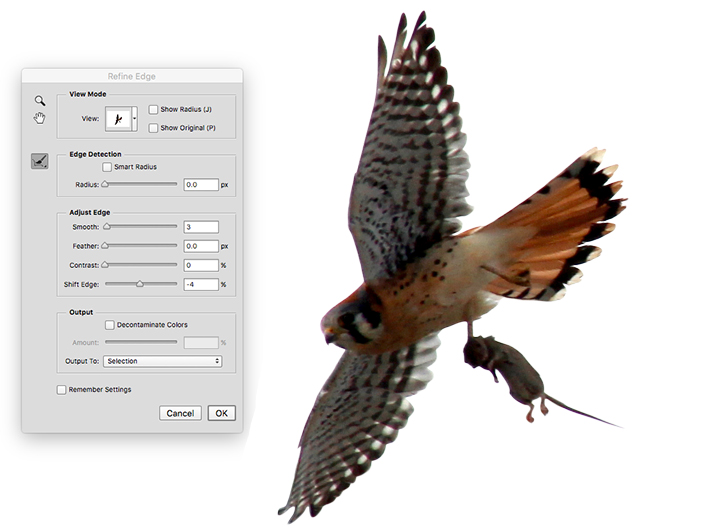
If you were to lift the bird from the background at this point, you would be sorely disappointed because you'd be left with a rough edge. To remedy that, go to the top bar and click on Select/Refine edge. It will bring up the dialog box shown below.
We will make a small adjustment here that will smooth the edges of our selection. Go to "adjust edge" and move the slider that is next to the word "smooth." Move it over to a small number like 2 or 3. You can also shift your edge to bring it in closer to your subject if you were unable to get your selection as close as you wanted it. Do this by moving the "shift edge" slider. It usually doesn't take much. Play with this to see what it does. It will show you where it is shifting the edge.
Once you've made these adjustments, copy your selection by clicking ⌘C. Paste your selection in a new layer.
Zoom in on your subject, and if there is any background still remaining, you can erase it with a small feathered edge eraser tool. Get close to the edge without erasing your subject.
New Background:
Now the original background of my photo was awful. Nothing exciting about a white sky and a distracting utility wire.
I knew I had a good sky background in another photo, so I found one that would be perfect for this project...only one small problem...there was another bird in that photo. I opened up this photo separately so I could apply my easy fix.
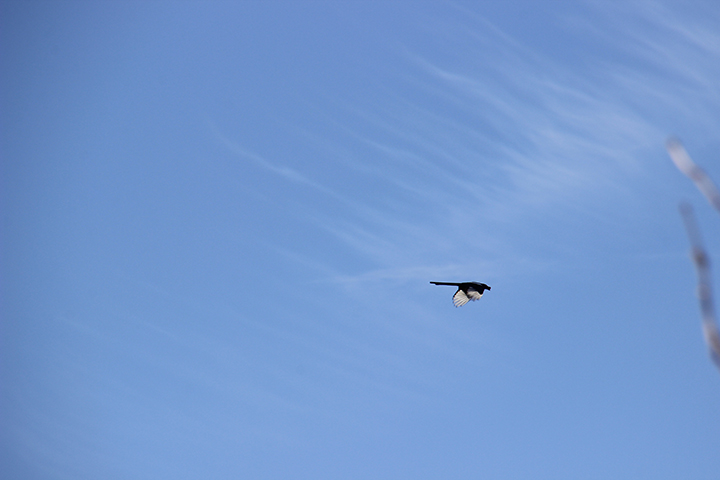
I used the clone tool...
When you use the clone tool, you need to select a brush. I almost always select a feathered edge brush of appropriate size for the area I'm trying to clone. That way, the area that you clone will blend better. You will also need to tell the tool where you want to start cloning from. You do this by clicking on the chosen area of your photo while holding the option key (alt PC.) Now your cloning tool will use that as your origin of where it will copy from. Now move the clone tool over the area you want to cover, and use it like a paint brush. I cloned right over the magpie in the sky so the sky giving the result below.
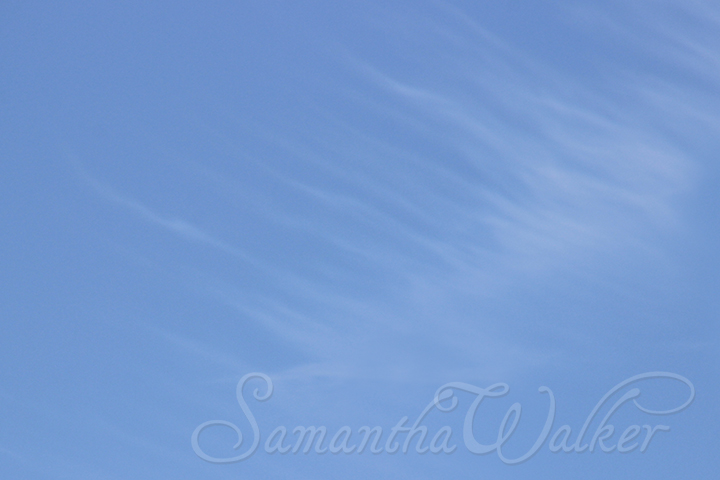
I then selected the sky by clicking ⌘A. Then clicked ⌘C to copy the sky. I went back to my Kestrel photo and pasted the sky right over the background layer by clicking ⌘V.
See layers below:

I used my eraser tool and selected a soft feathered brush. You don't want a large brush, you'll want a smaller one...the one I used was about 50 pix. I set the opacity of the brush (control found in top bar) to about 15%. Then I lightly smoothed over the back edge of the wings. It made the wings pick up a touch of the blue sky color, making the bird fit better with the new environment. I also hit the back of the mouse to blend it with the sky. You want to go easy with this--it's easy to over do it. You don't want your subject to go transparent...you just want to blend it to make it fit.
I then adjusted my brush to an even smaller diameter. That way I could blend areas of the bird that I wanted to keep sharp yet still fit with the new background. I smoothed around the birds head and any other areas that didn't seem to fit quite right. Notice the harsh white edge around the mouse tail in the photo above, smoothing around the edges eliminated the white without loosing the detail of the tail (see below.)
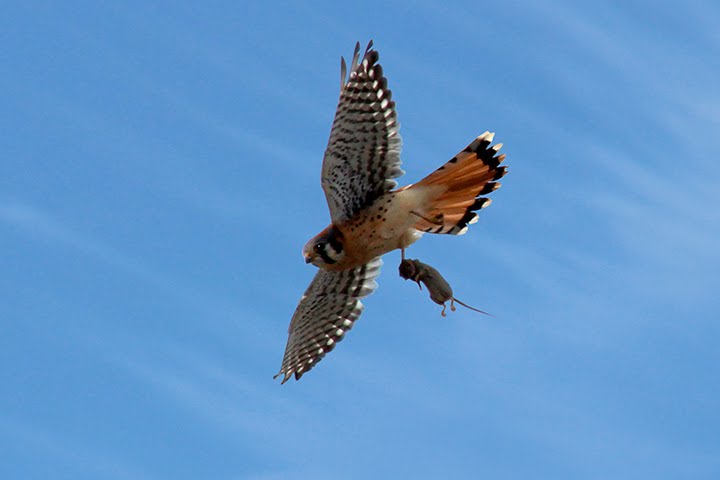
Finishing touches:
Finally, the bird lacked sparkle. Nothing makes a living creature look more dead than dull black eyes.
I fixed this by creating a highlight with a small soft brush in a separate layer. It's too risky to do right on top of your subject, so always create a new layer before applying brushwork. That way, you can easily delete it if you don't like it, or adjust that layer's transparency should you need to. With one little click with my soft brush, I added a simple sparkle. Make sure that your brush is small enough that it looks proportionate to the eye. Think of where the sun is shining, and place the sparkle relative to where it might hit the eye. In this instance, the sun is above and to the right side of the bird...so I placed my eye shine in the upper right portion of the eye center. It's much easier to fake eye sparkle when there isn't much detail showing in the eye. The process to enhance eyes is much different if you already have eye detail in the photo.
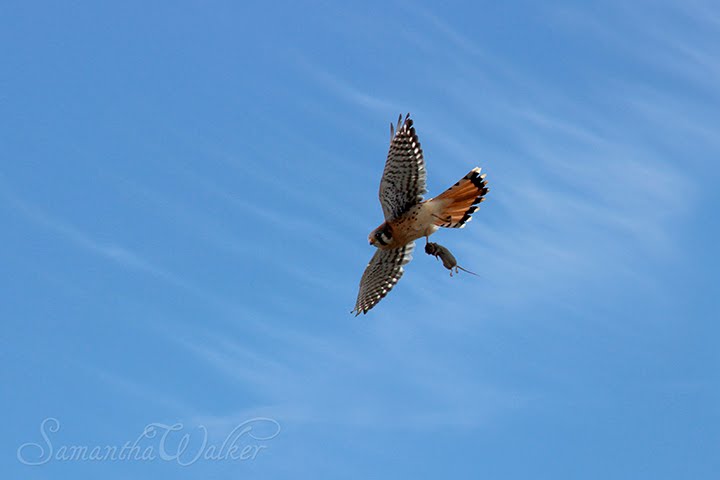
Now if you are happy with your final image...save a photoshop version with the layers in tact, and save a flattened JPEG copy to send to your photo developer.


I already found the real file, Download Below
ReplyDelete===================
Free Downl0ad N0 Survey Click Here Download N0W
Free Downl0ad N0 Survey Click Here Download N0W
Free Downl0ad N0 Survey Click Here Download N0W
Free Downl0ad N0 Survey Click Here Download N0W
Free Downl0ad N0 Survey Click Here Download N0W
Free Downl0ad N0 Survey Click Here Download N0W
Free Downl0ad N0 Survey Click Here Download N0W
Free Downl0ad N0 Survey Click Here Download N0W
===========================================================
===========================================================
===========================================================
===========================================================
===========================================================
.
.
.
.
.
.
.
.
.
.
.
.
.
.
.
.
.
.
.
.
.
.
.
.
.
.
.
..
.
.
.
.
.
.
.
.
.
.
.
.
..
.
.
.
.
.
.
.
.
.
.
.
.
..
.
.
.
.
.
.
.
.
.
.
.
.
..
.
.
.
.
.
.
.
.
.
.
.
.
.00dsfsdfsssssssssddddd
google 4111
ReplyDeletegoogle 4112
google 4113
google 4114
google 4115
google 4116
GBWhatsApp allows you share about 10 images at once, and there are even restrictions as to the file size of videos and documents that can be shared with the service. Using GBWhatsApp, users get to share up to 100 images at the same time and can send video files as large as 50MB in one go.
ReplyDeleteCool tutorial
ReplyDelete