

Good morning!

Hello and a happy Thursday to you! My name is Arin from A Piece of Life's Pie and I am thrilled and honored that I have been invited to be a guest designer for Samantha Walker! Ever since I have been working with my Silhouette Cameo, I unknowingly gravitate towards Samantha Walker cuts and paper, so having the honor to actually be here today makes me want to break out in my happy dance!
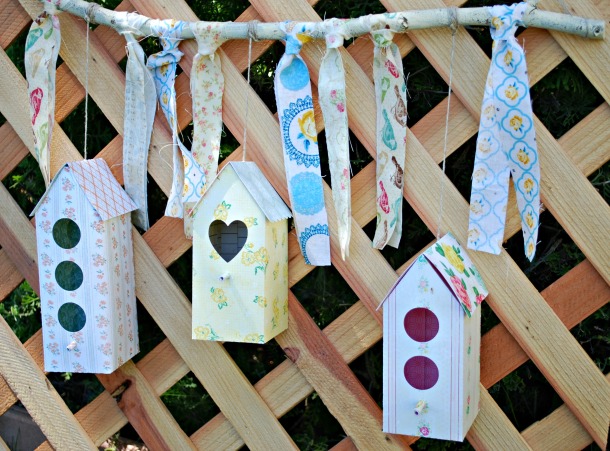
What I am going to share with you is two 3D projects that I just had to sink my creative teeth in when I saw them. The first project is a fun and whimsy vintage inspired bird house home decor. This project was so fun and easy to make and it sure adds a touch of spring to any room or outside patio it is displayed in
 Supplies:
Supplies:
- Samantha Walker Silhouette File: 3 Story Bird House
- Samantha Walker Silhouette File: 2 Story Bird House
- Samantha Walker Silhouette File: Box Love Bird Mailbox
- Crate Paper - Little Bo Peep
- Hemptique - Hemp Cord
- Small wooden Branch (18-24 inches)
- Craft paint - Buttermilk
- Drill
- Paper punch
- Glue
- Bone Folder
- Tapastry Needle
- Fabric
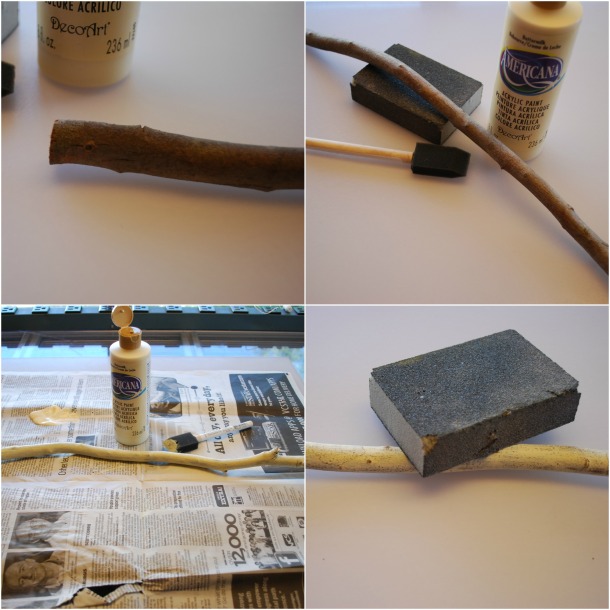
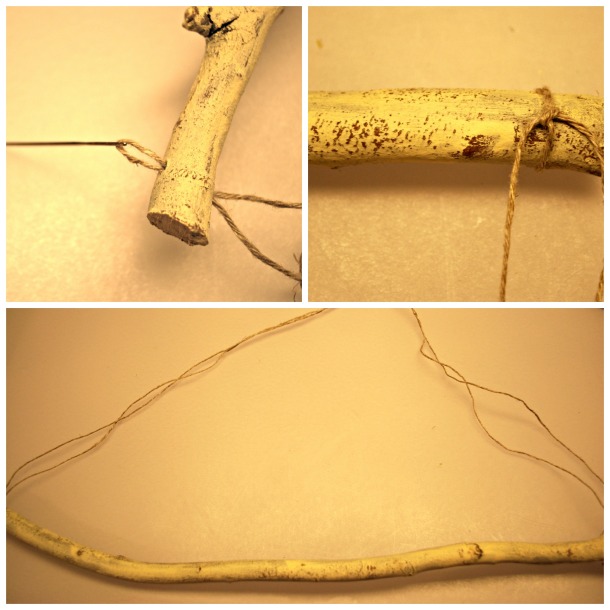
Step 1: Prep Branch Drill holes at each end of branch and paint. Once dried, sand to distress.
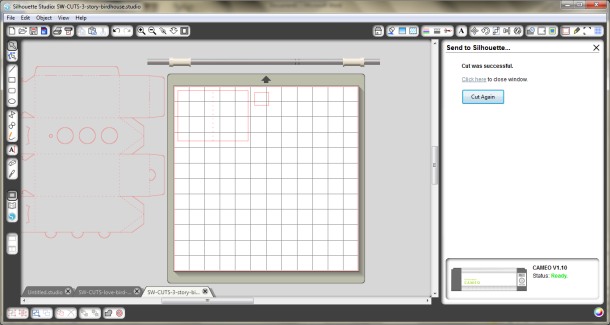
 Step 2: Cut and assemble bird houses - There are three different bird houses used in this project. Keep all bird houses at "stock size". The steps below apply to all three bird houses, therefore only the three story bird house will be shown.
Step 2: Cut and assemble bird houses - There are three different bird houses used in this project. Keep all bird houses at "stock size". The steps below apply to all three bird houses, therefore only the three story bird house will be shown.
Leave size as is and "ungroup". Move perch and roof off page. Group house and cut house on a 12x12 sheet of designer paper.
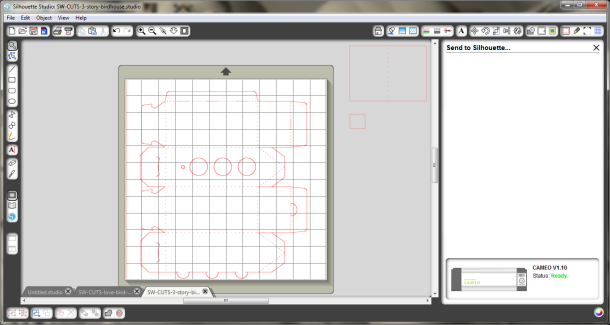
Move house off page and move roof and perch back on mat and cut.
( Please note, when cutting the Love Bird Mailbox, be sure to delete mail slot before regrouping image)
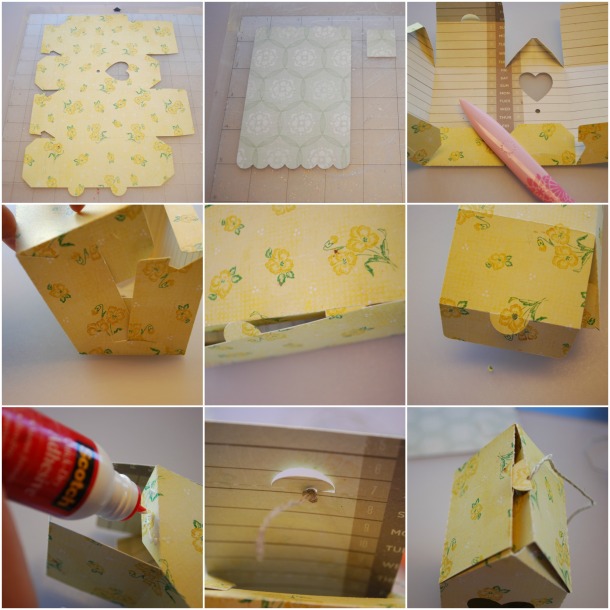
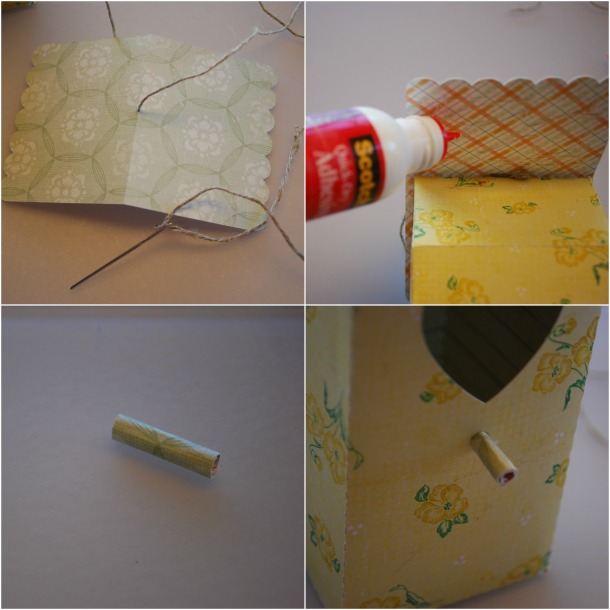
When making the perch, be sure you first add a little glue to the paper before you roll it. Also be sure to be aware of the hole size it needs to fit in.
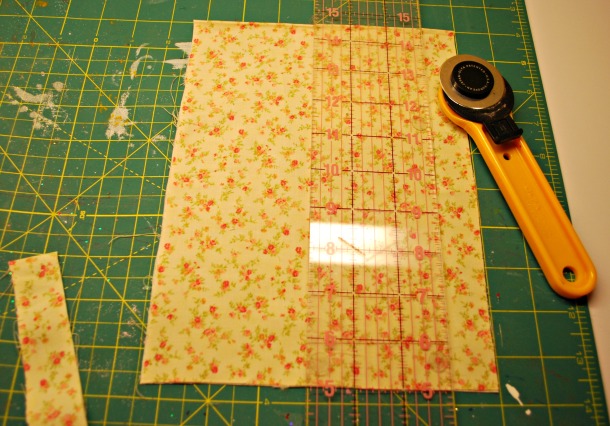
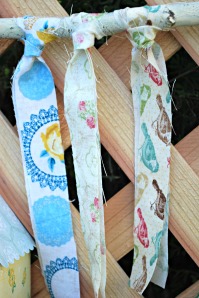
Step 3: Prep Fabric: Using a variety of fabric, cut 8 strips at 1 inch wide and 10 inches long.
 Step 4: Assemble bird houses to branch: First attach 24 inches of hemp cord to the branch by threading the needle through the hole and then warping the cord around one end of the branch. Do this on both ends. Bring together at the top, make sure level and tie off. Trim any excess.
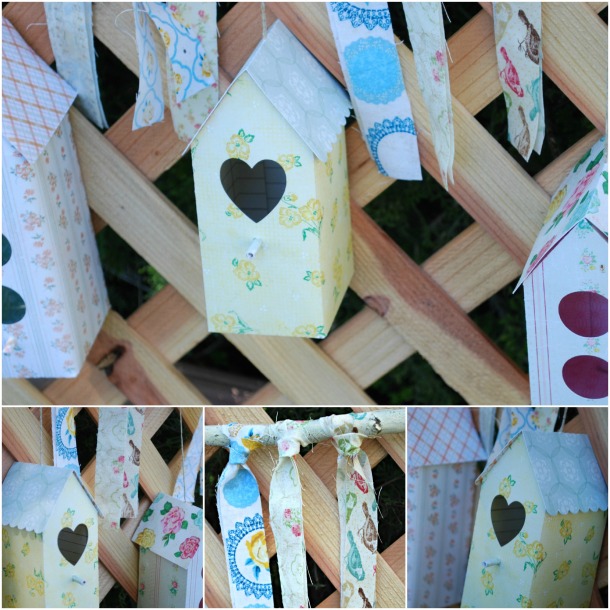
Attach the bird houses to the branch evenly spaced by wrapping and securing them to the branch.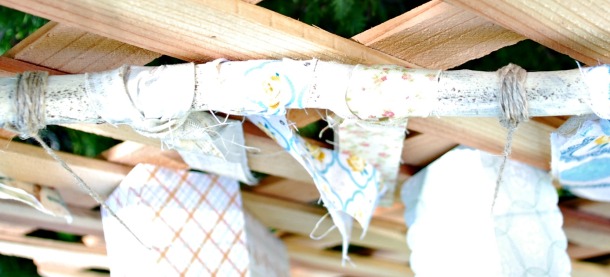
Attach the fabric to the branch using a slip knot, looping around the branch.


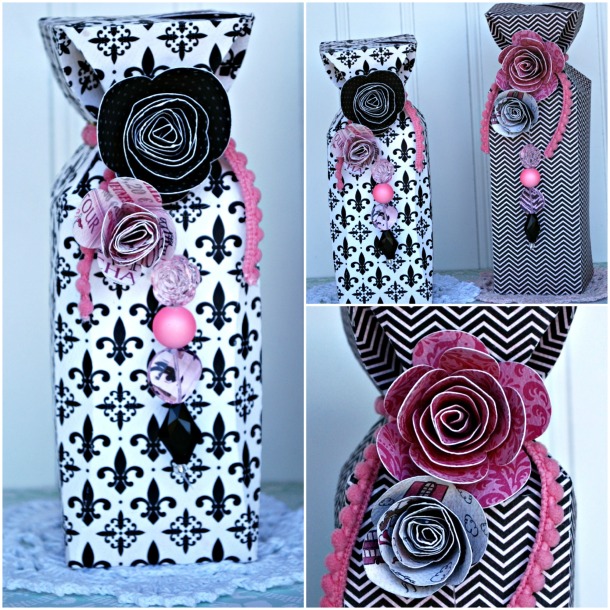
For the next project, I had so much fun making these 3D bottles that I had to make a video to show you all how to construct the them! The Samantha Walker flower cuts really finish the project! These bottles are such a great idea for adding some "Ooh lala" effect to a little gift or treat.
 Supplies List:
Supplies List:
- Samantha Walker Silhouette File: 3D Curved Bottle Box
- Samantha Walker Silhouette File 3D Bottle Box
- Samantha Walker Silhouette File: (Video cut) 3D Short Bottle Box
- Samantha Walker Silhouette File: Flower (Cut twice, once at stock image and once at 2.5 inches)
- Samantha Walker Silhouette File: Flower Spiral Peony Bud (Cut twice, once at stock image and once at 2.5 inches)
- Samantha Walker "Paris Girl" - Carta Bella Designer Paper
- Bone Folder
- Quick Dry Adhesive
- Hot Glue
- Beads
- Fishing Line
- Twine
- Close To My Heart Ribbon
A quick run down of final assembly of bottles: The flower cuts are rolled and set with hot glue. Once the bottles are assembled, tie decorative ribbon around the neck to cover the twine that is securing the bottle neck. Sting decorative beads of choice onto fishing line or like material and attach to the decorative ribbon and attach the flowers using hot glue.
It has been a pleasure to be able to share these two projects and you can find another fun Samantha Walker project over at my blog today! I hope that they inspire you and snag yourself some Samantha Walker 3D cuts and see what you can come up with!
A big "Thank You" to Arin for sharing her projects with us today!
Be sure to stop by Arin's blog to see more of her fabulous creations!


This comment has been removed by the author.
ReplyDeletethank you so much for this wonderful honor! I just adore Samantha Walker cuts and it is so fun to be a guest designer! :-)
ReplyDeleteWow! Fantastic!!! Thank ypu for sharing.
ReplyDeleteWow... Amazing Arin! Great tutorials. Love the colors too. Holly :-)
ReplyDeleteI just love these adorable projects! Arin is soooo talented!
ReplyDeleteFabulous projects Arin! Thank you so much for sharing them with us!
ReplyDeleteFabulous creations - love the bottles! And the birdhouses are wonderful. TFS
ReplyDelete