Friday, June 22, 2012
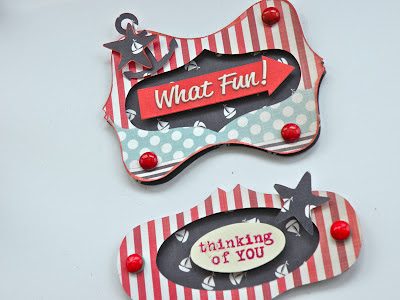
Tag Tutorial by Pinky


11 comments:
Thanks for taking the time to leave a comment! Without your readership, I wouldn't be doing a blog.
My blog is supported by sponsors and affiliates. If you decide to make a purchase through my affiliate links, I am paid a small commission for it. This doesn’t cost you anything additional. These commissions help to keep the rest of my content free, and allow me to blog more often.
From time to time I make recommendations of products that I love to use, or products that I have designed. Occasionally, manufacturers send me products to play with. They have not obligated me to show them on my blog or review them. I only make positive remarks about those things that I truly love and enjoy to use. Everyone's personal experience with various products may be different, as we all use things in different ways. I am not compensated for these remarks, and merely pass on my opinion to you as a reader. I hope you find my opinions valuable.
Thank you for supporting my blog!


I love this line! Pinky's work is always AMAZING!!!
ReplyDeleteThese are so much fun! Love your tutorial too!
ReplyDeleteWOW these are my fav! what paper did you use I love this!! Like the retro/nautical feel of it.
ReplyDeleteok ps what if you don't have a silhouette do you have a file that works with a cricut?
ReplyDeleteThat paper is gorgeous! What line is it and where did you get it?!?! Great tags, too! I want to try and make some.
ReplyDeleteHi guys! Pinky used the Nautical Collection by Samantha for Creative Imaginations. You can see the full line through this link: http://www.creativeimaginations.us/store/CI_SamanthaWalker_Collection_Nautical_3x.php
ReplyDeleteSamantha also sells SVG files over at JessicaSprague.com, you can find those here: http://www.jessicasprague.com/index.php?option=com_virtuemart&page=shop.browse&category_id=137&Itemid=49
Thanks guys!
Jamie
Social Media Director and Creative Team Lead for Samantha Walker
Ok, SUPER newbie question......what do you mean by "I cut my paper in half and turned one sheet over, then use my
ReplyDeleteSilhouette to cut the digital cut files." Was your paper a double thickness? The 2 halves stcked on top of each other? Sorry, just got my Cameo this week and I know NOTHING!!! LOL
lrlincks, The Nautical Collection is a double-sided paper, so Pinky used one 12x12 paper and cut it in half, creating two 6x12 pieces. She placed the front side up on 1/2 of the Silhouette mat and the backside up on the remaining portion of the mat. You can see it in the 3rd photo. Hope that helps!
ReplyDeleteJamie
Social Media Director and Creative Team Lead for Samantha Walker
I love love love these dies!!! I want them lol!!! Awesome
ReplyDeleteAnything nautical calls my name
ReplyDeleteLove these!!! Super cute and the dies are just the perfect touch!!! Great tutorial Pinky!
ReplyDelete