Ads 468x60px

Showing posts with label interactive card. Show all posts

Saturday, April 26, 2014

Kite Interactive Card and Sentiment Tutorial by Nicole

The school year is ending in a little less than a month for us.  With it comes lots of changes for our family.  One big change for my Wesley is it's his last year in elementary school.  His teacher has helped him learn to be more independent and really get ready for junior high (too bad she couldn't help me get ready to have a junior high student!).  When I saw Samantha's new interactive card this idea immediately came to mind and knew it would be a great thank you card to give to his teacher.  


I used the bicycle card as my base, but modified it slightly putting the cut out section on a slight angle and shortening it length wise.  


I decided to print the sentiment right on the card base and did this with the print and cut feature in the Silhouette program.  It's not hard once you get the hang of the registration marks and it makes putting the card together a breeze.  

First you'll need to select the text tool.  
Select the (2) font, (3)size, and then click on your project and type.  Once you have your text exactly like you wanted it printed you'll need to do a few things to make it ready to print.  

Click and highlight the text.  Go up to Fill Color and select the color you want your text to be printed.  Then click on Line Color and select the same color as the fill color you just selected.  

Now go up the the Cut Style Window and select your text.  In the Cut Style menu click the "no cut" feature. 

No go to (1) page and select (2)letter in the menu to change the background size.  
-I probably should have done this at the very beginning to set it up to print size, but didn't think about it-

You'll now need to select both the card base and the text by clicking and dragging to highlight both and rotate them to fit on the new 8.5x11 size.  

Select the (1)Registration Marks Menu and click the box next to the (2)"Show Reg Marks".  
The marks will now appear on your background.  (3)You just need to now make sure your card base is inside the red lines and not in the grayed out areas.

Go up to File and select Print.  Follow the onscreen directions.  
Here is what it looks like after printed.  

Place the paper onto your cutting mat.  Make sure you place your paper on your mat according to how the mat looks on your computer (the first time I did it wrong and my machine couldn't read the registration marks).  Load into machine and cut. . 
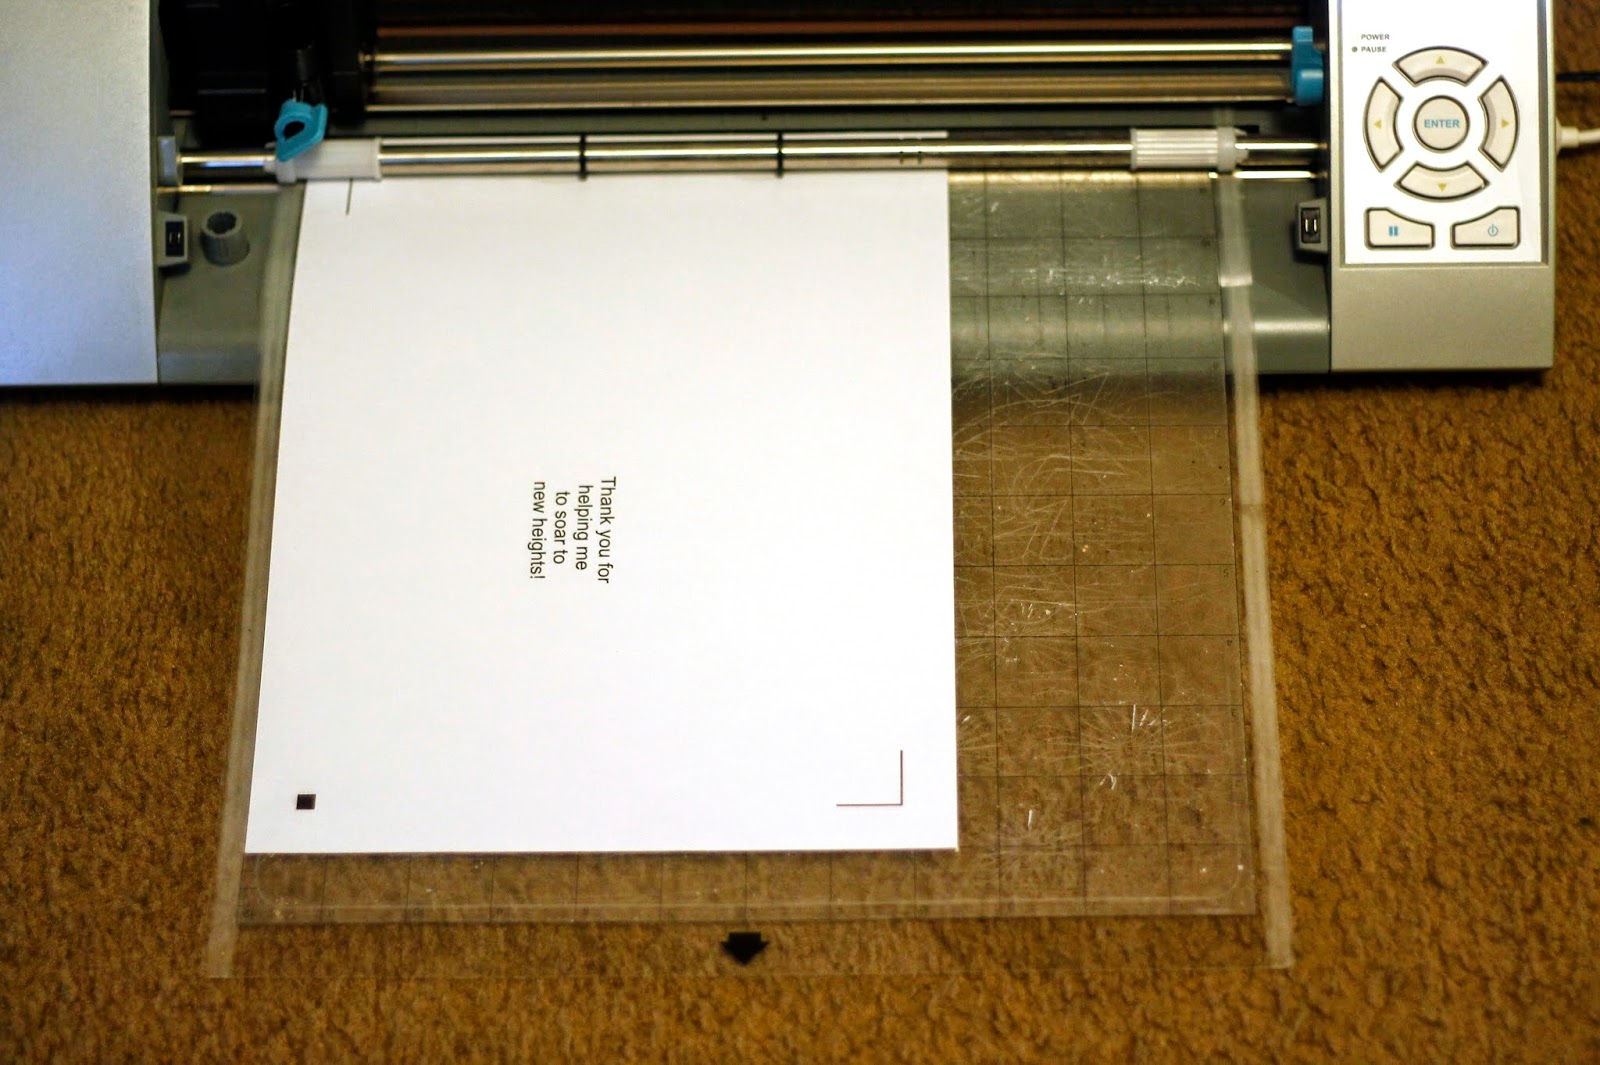

Once my card base was cut I then cut the decorative elements from Samantha's Cool Summer line for Carta Bella.   The kite is an older file that I'll link to in the bottom.  

I added the slide to the front and back of the slot with brads and then attached the kite to the top with Helmar Zapdots to add some dimension.  I also glued a little twine to the kit tail to add color.  
  
Here is another look at my finished card:
and with the kite slid to the top.

Thanks so much for stopping by the blog today and I hope you give the cut and print feature a try as well as these fun new interactive cards. 


Supplies
Pattern paper: Cool Summer by Samantha for Carta Bella
Cardstock: Georgia Pacific
Twine: Doodlebug
Chalk ink: Martha Stewart Crafts
Adhesive: Helmar 450 Quick Dry Adhesive, Helmar Quick-fix Adhesive, 
and Helmar Zapdots 


Thursday, April 24, 2014

Silhouette Tutorial Creating a Circle Interactive Card

This tutorial is a follow up on the interactive card tutorial I offered last week. This one is a tiny bit more complicated, but still pretty simple. I will likely have other circle interactive cards to share with you, and this tutorial will work for all cards of that style. The graphic that goes around may be different, but the assembly is virtually the same. 

For this project you will need this Equipment:
A Silhouette Electronic Cutting machine. This file works great with both the Silhouette Cameo and the Silhouette Portrait cutting machines.
For those of you who are new to my blog, and may not have heard about the Silhouette electronic cutting machine(the machine I used to cut this file out,) I put together a product review at this link. You can read other's reviews of the machine here. This machine will change the way you craft! 

You will also need this Silhouette File:
a2 interactive hot air balloon card

Related files:
a2 interactive bike race card
a2 card set interactive moving bicycle
a2 interactive carousel card
tutorial for these files can be found here.

Okay...now for the project instructions...

First, cut all the parts with your silhouette machine. You will need to ungroup the file and arrange different cutting passes in your selected card stock, or do one cutting pass by arranging several colors of card stock on your cutting mat according to how it is laid out on the screen. See how to do that in this tutorial here.

Fold the card in half.

Take the liner piece (the one that is 4.25X5.5 and not folded) and insert it into the card. Do not glue it at this point.

Take your circle piece, then put glue only in the center, making sure to leave all the edges free of glue.

Center the circle in the larger circle of the folded card, and glue onto the liner piece.

Assemble your balloon as shown.

Insert a brad through the balloon where the tiny hole has been cut. Then find the little circle disk with the hole in it. Insert your brad through the disk and butterfly the clasp. Some people are bending this too tight making it harder to move your interactive card. You can avoid trouble if you fold this a little looser leaving a card stock thin gap before folding the clasps out.

Take your balloon and brad assembly, and slide it onto the circle of the card front, then slide the other side of the disk under the circle of the insert piece.

After the balloon has been set in place, then glue the insert to the front of the card. You need not glue all 4 sides of the insert piece to the front of the card, just 3. The top, the bottom, and the leading edge of the card.  Trying to glue the 4th side (where the fold line is) may be difficult anyway, once your balloon is placed.

Now add your cloud pieces. You will notice that each cloud has been split so that one part of the cloud will go on the inside of the circle and the other part will go on the outside. Try to line them up the best that you can.

I'd love to see your versions of this card! So please feel free to share on my Facebook page at: www.facebook.com/samanthawalkerdesigns


Tuesday, April 22, 2014

Cards in motion by Diana


Hello! Diana Fisher here with you today to share a card tutorial. Samantha recently debuted a fun bike card that is interactive — I immediately loved it! Oh the whimsy! The card is originally built to be a shorter card that is wider than it is tall. Since the cards I make are almost always tall, I set out to edit the studio file to accommodate my card making style. Here is my tutorial for that process.

When you open the studio file in the Silhouette software, you'll see this on your screen (if you have the mat set for 8.5 x 11). 


After ungrouping the pieces, take the card base, the clouds and the circles that hold the wheels and put them on one sheet. 

You'll notice that the base of the card in the above screen shot is much shorter. I was able to ungroup the slit from the base and the perforation. I pulled the bottom until the height of the card was 11 inches. I pushed in the sides until it was 4 inches wide. The perforation stayed in proportion and it was easy to move the slit and adjust accordingly.


Take the grass, sun and bike and put them on another sheet. You will cut the above out of white card stock and the below screen will have green paper in the top left corner, pink in the top right and yellow in the bottom left. 


After you've cut your pieces, adhere one blade of grass above the slit. Then take the bike and the circles. Using small brads (most of us have them in our stash somewhere!) run the brad through the front of the bike, through the slit, through the circles and then close down the tabs. It will look like this when completed.


Flip the card over and it should look like this. You'll be able to push the bike along the slit easily. If it resists, loosen the brads.


I added a strip of grass in the front of the bike. It means that the bike won't move as far along the card because of the foam dots in the way, but it does move a little — enough to still make it fun.


Place the foam dots where you would like them and then put the grass on top, pushing firmly to get it to stick.


Now that the bottom of the card is done, you can work on the top. Remember that we cut the clouds out of the white card stock? Give them just a little bit of color with a ink dauber foam sponge. It's an easy way to give clouds a touch of texture.


You can see here in the final card that I also added some white ink faux stitch marks on the clouds and a stamped sentiment from the All Boy Clear Stamps.


 Thanks for stopping to see my tutorial for adjusting the height on the interactive bike card.


Thursday, April 17, 2014

Silhouette Tutorial: Creating interactive cards

It's easy to create interactive cards with your Silhouette cameo or Portrait machine. This week, I will be introducing several kits with interactive properties. You can add your own personality to your cards with your paper choices. The card featured here has a bicycle that can slide across the card.

Here are some of the other similar cards you will find in the Silhouette store:


For this project you will need this Equipment:
A Silhouette Electronic Cutting machine. This file works great with both the Silhouette Cameo and the Silhouette Portrait cutting machines.
For those of you who are new to my blog, and may not have heard about the Silhouette electronic cutting machine (the machine I used to cut this file out,) I put together a product review at this link. You can read other's reviews of the machine here. This machine will change the way you craft! 

You will also need this Silhouette File:
Bike Interactive Card set

Related files:
a2 interactive bike race card
a2 interactive car race card
a2 interactive hot air balloon card detailed tutorial for that project can be found here.

Papers used:
Cool Summer Garden Green by Samantha Walker for Carta Bella 
Cool Summer Cool Off (yellow side) by Samantha Walker for Carta Bella 
Cool Summer Midsummer sky by Samantha Walker for Carta Bella 

Okay...now for the project instructions...

First cut out the card background, and the 5.5x4.25 backing piece. Next cut out your clouds, grass, bike and other elements in the papers of your choice.
Then glue the grass to the front of the card, along with the clouds and the sun. I put my sun partially behind one of the clouds. I also inked the edges of my clouds with a darker blue ink to add contrast. 
Then add the flowers and stems. To attach the bicycle, put two brads through the holes in the wheels, then through the cut-out "slide strip" in the card. 

 On the reverse side of the card, attach the two white circles with those brads so that it is secured through the "slide strip" as shown in the photo above. If you wish to add a backing paper to cover it up, a 4.5x5.5 rectangle has been included in the file. If you use that, make sure that you do not attach it where the circles will slide on the strip.

The envelope goes together easily. Just fold all sides in. Then glue the front bottom flap up over the sides. Attach the sun seal, then close it with your method of choice (glue, ribbon, tape, etc.)

I'll add pictures of my other interactive card cutting files, that go together similarly, to this blog as they are loaded into the Silhouette store.
Related Posts Plugin for WordPress, Blogger...