Ads 468x60px

Showing posts with label 3D Flower. Show all posts

Saturday, March 09, 2013

Basket of Flowers by Jamie Cripps

Craftsy
Good Morning!  Jamie with you today to sharing a fun
tutorial for creating a basket full of flowers!


Silhouette Cut Files Needed:


Tutorial: 

Cut out several of the 3D Layering flower shapes in three different sizes so that you will have three flower sizes once assembled.


Once your flower pieces are cut, place a foam adhesive 
square in the center of the largest shape.


Adhere the middle shape to the center, off setting the petal forms as shown.  Place a second foam square in the center.


Adhere the smallest shape to the center, off setting the petal forms again.  Complete the flower by adding in a small pearl or gem.

Bend the flower petals to shape as desired.


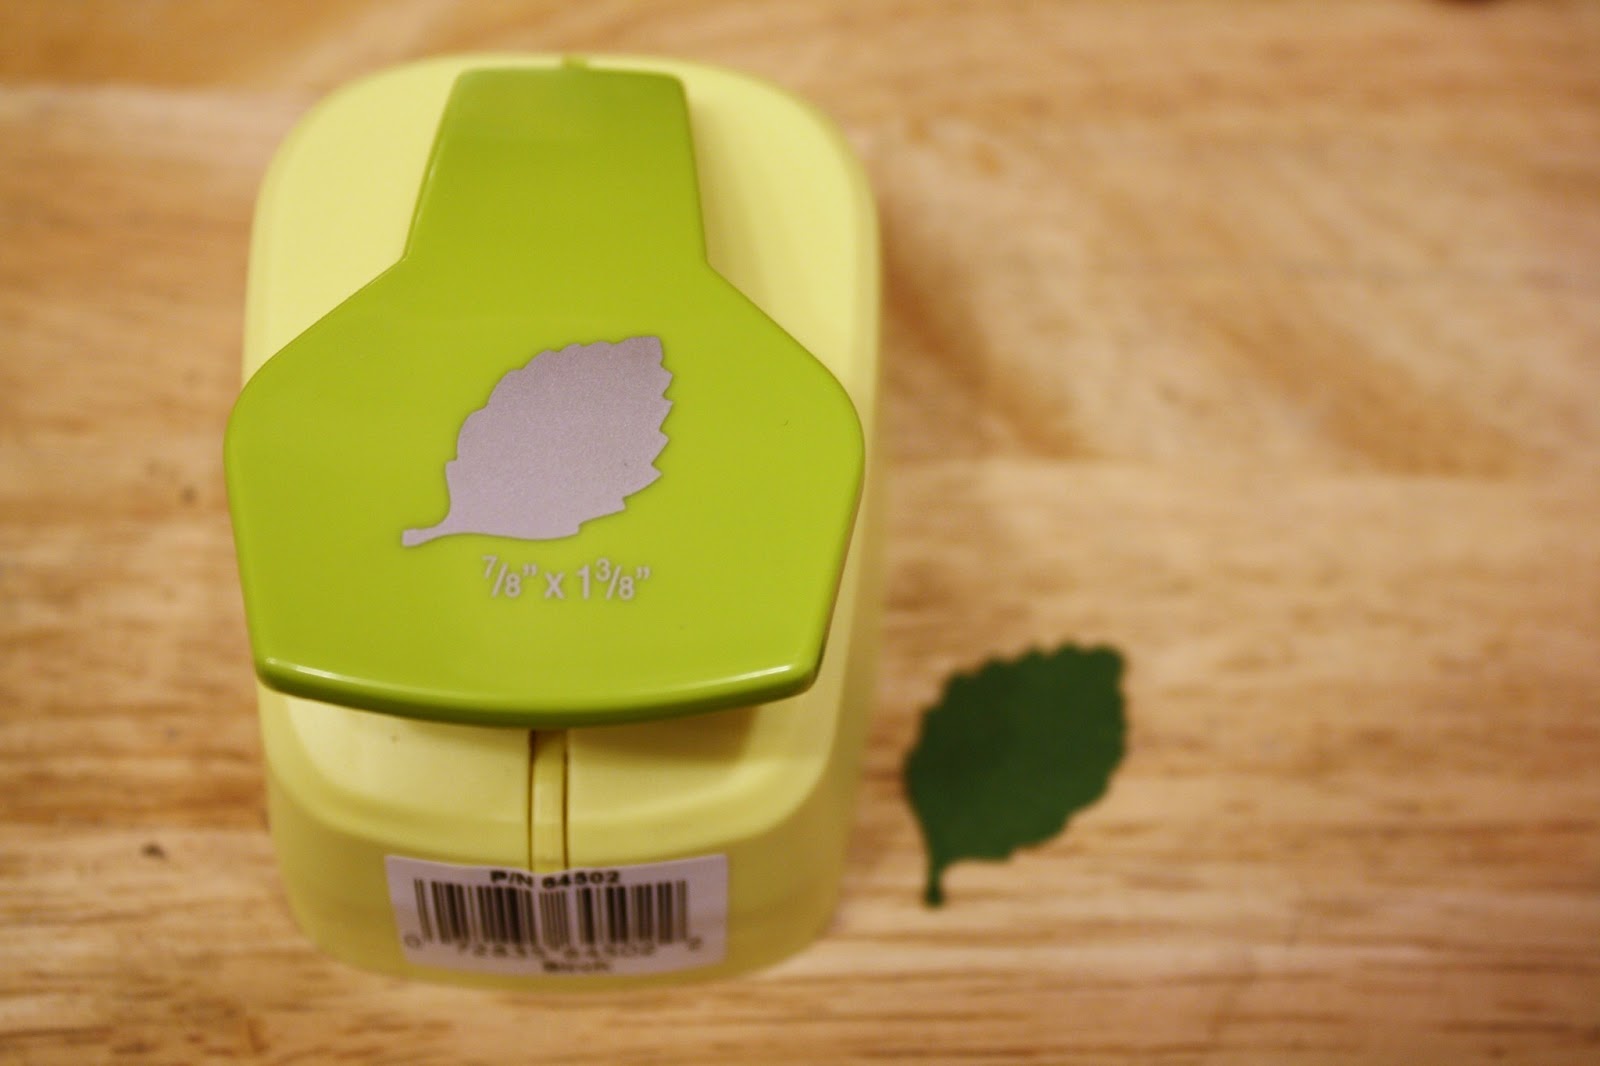
Punch or cut several leaf shapes.


Place each leaf on a score board and create a score 
through the center of the leaf shape as shown.


Place a foam adhesive toward the stem of each leaf.


Then adhere the leaf shapes for the bottom of the flower.


Your flowers should look similar to the image above.


Cut out and assembled Samantha Walker's Woven Basket.  
Tie a piece of pink satin ribbon around the handle then
tie a piece of Blossom twine in the center.


Use fringing scissors to cut blades of grass.
If you do not have fringing scissors you could also use 
Samantha's Scallop Dot Fringe cut and remove the blades.


Place the blades of grass in the bottom of the basket.


Then start placing in your flowers!  You can use adhesive to hold them in place or just sit them within the basket. 


Thanks so much for stopping by today!  

Tuesday, December 18, 2012

Ornament Box Tutorial

Good afternoon!  Jamie with you today to share a quick tutorial for the Samantha's Ornament Box!

 Tutorial:
 1.  Cut out the Scalloped Ornament Box and fold on all the score marks.
 2.  Place a strong adhesive tape along the left edge.  
      Optional: Cut a large scallop to fit outside the window and adhere.  This piece is not 
       included in the file.
 3.  Fold the box over and adhere the left edge, pressing firmly.
 4.  Form the bottom of the box, fold the large piece in as shown.
 5.  Fold in one of the side pieces and tuck under the large piece.
 6.  Fold the second side piece in and tuck under as you did above.
 7.  Tuck the final flap down into the larger piece.
 8.  This step is optional.  I placed adhesive on the sides of the ornament 
      base to hold it in place.    
 9.  Place the ornament base in the bottom of the box as shown.
10. Gather your ornament.
11. Place the ornament inside the box.
12. Insert the second holder inside the box, placing the ornament tip in the 
     cut out to hold securely.
13. Fold the two side flaps in and tuck the top flap into the box as shown.
14. Cut the 3D Flower in a coordinating cardstock.
15. Place a foam adhesive in the center of the largest flower.
16. Adhere the next largest flower in the center and then place foam adhesive 
     in the center of that flower.  
17-19. Repeat step #16 until all flower pieces are adhered.
20. Tie a bow on the box and adhere flower as shown.


You can find this Ornament Box and others by clicking on the images below:

Silhouette Store:


Thanks so much for stopping by today!
Related Posts Plugin for WordPress, Blogger...